

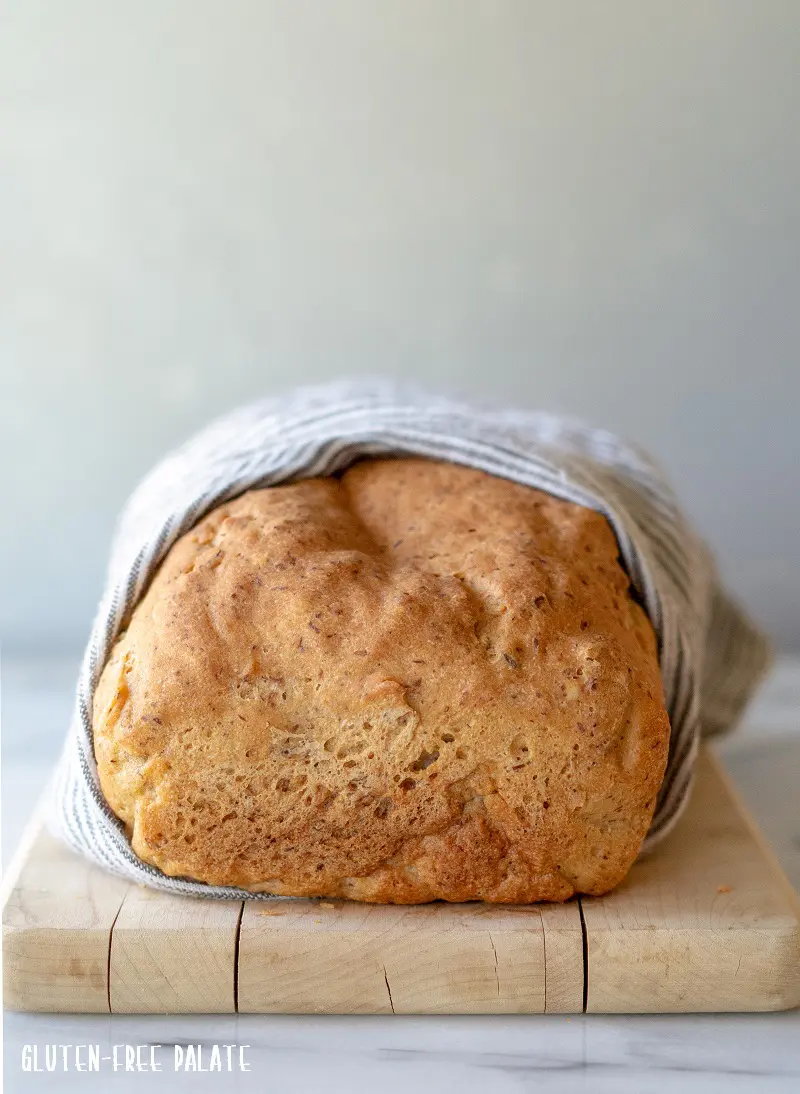
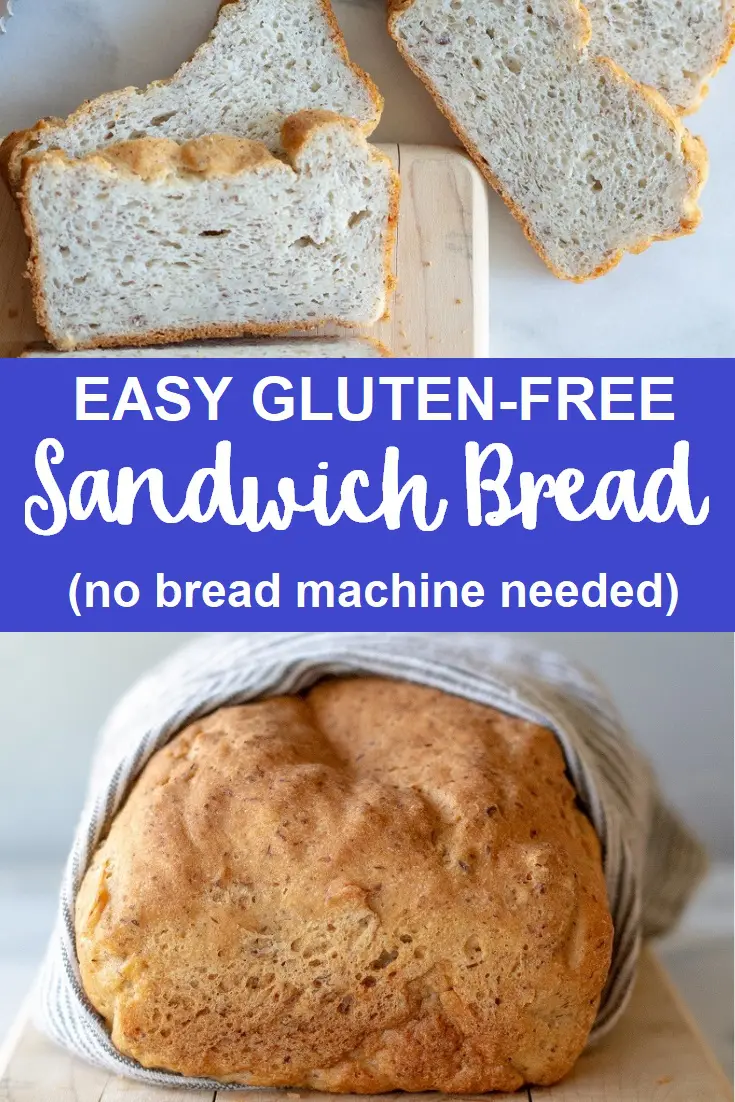
Whip up this simple and easy-to-make homemade gluten-free bread. It is a straightforward, no-fuss recipe with tips and information for success. This easy-to-make bread is the ideal base for any sandwich, perfect for your next lunch.
I've also included instructions for making this gluten-free bread in a bread machine for those who prefer to use a bread machine when making gluten-free bread. If you are vegan, I've included instructions, too!
Start your gluten-free baking with this Gluten-Free Yeast-Free Bread, this tangy, easy Gluten-Free Sourdough, and the sweet Gluten-Free Cinnamon Raisin Bread; each recipe has a different taste.
The Gluten-Free Hawaiian Rolls are one you need to add to your list, while the Gluten-Free Rye Bread is so good, too. Which one will you choose next?
Gluten-Free Sandwich Bread Recipe
I posted a gluten-free bread recipe back in early 2015. It was okay, but it wasn't the best gluten-free bread. It had a little bit of a quick bread texture. I also have a gluten-free bread recipe for the bread machine (see further down if you use a gluten-free bread machine).
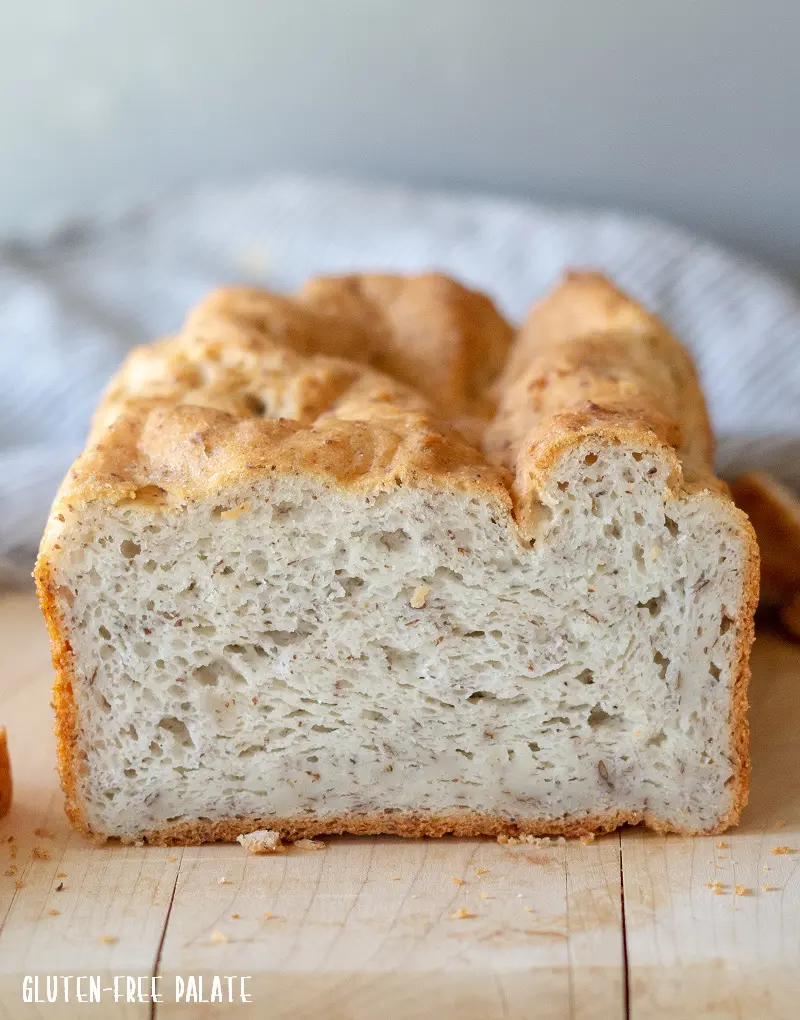
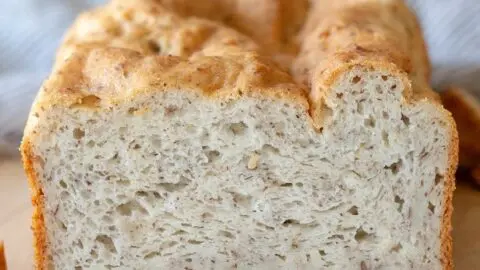
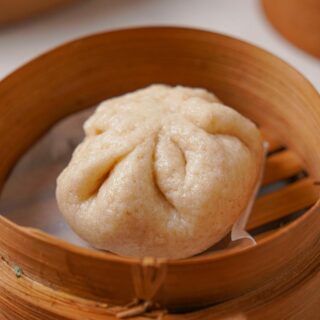
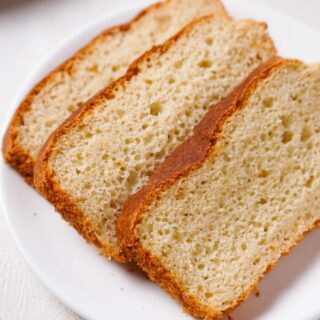
Just look at the texture of this easy gluten-free bread. It's amazing. The gluten-free loaf featured in this picture could've used a few more minutes in the oven, but I'll discuss that below.
You are going to love this gluten-free, dairy-free bread. I promise.
Please, please read through this post. I share my experience and what worked and didn't when I was reworking this gluten-free bread recipe.
Why You’re Going to Love This Gluten-Free Bread
Tastes so good - Leave the store-bought bread and enjoy real, fresh, homemade bread that tastes delicious.
Great for various diets - You can make this bread dairy-free, and I've also included a vegan option.
Simple And wholesome ingredients - This recipe blends gluten-free flours and natural ingredients. So, no nasties.
Ingredients in Gluten-Free Bread
For The Yeast Proof
Water (95°F-110°F) - The warm water activates the yeast, which is important for the bread to rise.
Sugar or Honey - This acts as food for the yeast, which helps activate it and produces carbon dioxide, which causes the dough to rise.
Active Dry Yeast - The key leavening agent, it ferments the sugars and creates air bubbles that make the GF bread light and fluffy.
For The Bread
White Rice Flour - This ingredient contributes to its structure.
Tapioca Starch - Adds chewiness and helps bind the ingredients, improving the bread's texture.
Potato Starch or Arrowroot Starch - This helps with the bread's moisture and is for that tender crumb.
Millet Flour or Almond Flour - Adds a nutty flavor.
Ground Flaxseed (Flaxseed Meal) - This increases the fiber content and can help bind the dough, similar to gluten.
Xanthan Gum - Replaces gluten's role by providing elasticity and stickiness. This is for the bread's structure.
Baking Powder - An additional leavening agent that helps the bread rise and achieve a light texture.
Salt - This is added for the overall flavor of the bread and regulates yeast activity.
Oil - Adds moisture and richness, contributing to a soft texture and extending the bread's shelf life.
Egg Whites - Provide structure and stability to the bread, helping it to rise and maintain its shape.
Apple Cider Vinegar - Improves the bread's texture and interacts with leavening agents for a better rise.
Equipment Needed for This Gluten-Free Bread
Loaf Pan - A standard-sized loaf pan of 9x5 inches works well.
Stand Mixer with Paddle Attachment - This is for mixing the dough so that the bread has the right texture. You don't need a dough hook for this recipe.
Mixing Bowls - Used for preparing the yeast-proofing mixture and combining the dry ingredients before mixing with wet ingredients.
Thermometer - To measure water temperature for yeast activation, ensuring it's within the optimal range (95°F-110°F).
Rubber Spatula - Useful for scraping down the sides of the bowl during mixing and transferring the dough to the loaf pan.
Plastic Wrap or Damp Cloth - To cover the dough during the rising process to create a warm environment to aid the yeast.
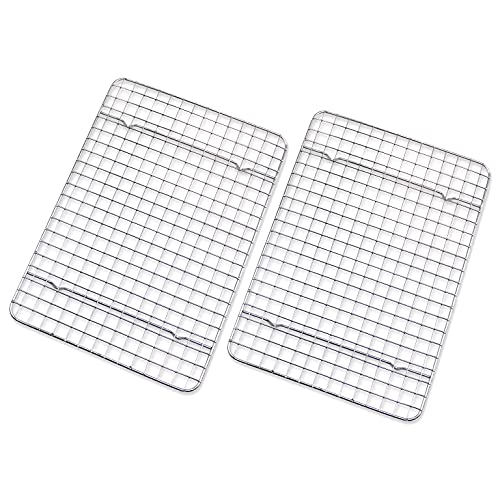
Wire Rack - For cooling the bread after baking, which helps to prevent sogginess and keep the bread's structure.
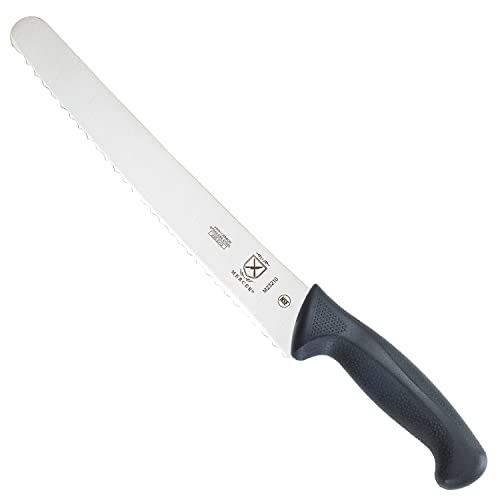
Serrated Knife - A serrated knife is for slicing the finished bread. It has a saw-like blade that helps to cut through the crust easily without squashing the center of the bread.
If you have any questions about making Gluten-Free Bread, please leave a comment, and we will get back to you as soon as possible.
Additional Gluten-Free Flours to use when making this gluten-free bread
I used my gluten-free flour blend when I first made this gluten-free bread recipe. It works great, but I realized it needed something more.
I tested several different flour blend options before settling on the winner, the one that I think makes the best gluten-free bread. See the recipe card for the gluten-free bread recipe that readers love.
Here are some additional options for making this gluten-free bread recipe. Note that these substitutions will yield slightly different results. If you decide to go with one of these substitutions, you will need to replace all the flours and starches in the recipe with the following (everything else stays the same):
- 2 ½ cups of my gluten-free flour blend + ½ cup of almond flour + ¼ cup flaxseed meal (ground flaxseed).
- 2 ½ cups of my flour blend + ½ cup of millet flour + ¼ cup of flaxseed meal. It's an amazing nut-free gluten-free bread.
- 2 ½ cups of Bob's Red Mill 1-to-1 gluten-free flour blend + ½ cup of almond flour + ¼ cup flaxseed meal.
- 2 ½ cups of Bob's Red Mill 1-to-1 gluten-free flour blend + ½ cup millet flour + ¼ cup flaxseed meal.
This gluten-free dairy-free bread recipe was originally developed for the oven, but I have a gluten-free bread machine recipe version below for those who like to use a bread machine.
How To Make Gluten-Free Bread
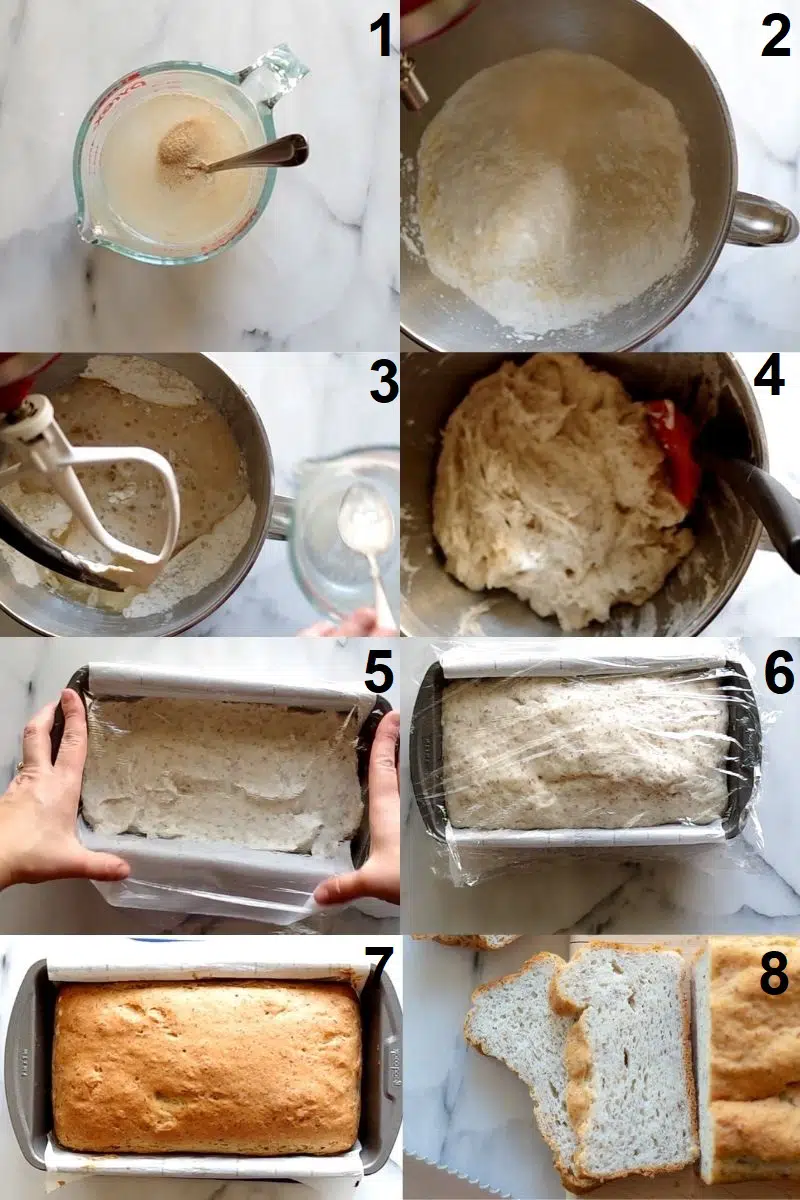
- Add the sugar and yeast to your warm water (95-110 degrees F) and stir; set it aside for 5-10 minutes but no longer.
- While your yeast is proofing, in the bowl of a stand mixer fitted with the paddle attachment, add the flours, flax seed meal, xanthan gum, baking powder, and salt. Turn your mixer to low and mix just until combined.
- Add oil, egg whites, vinegar, and proofed yeast mixture.
- Turn the mixer to a medium speed and mix for 2 minutes. The dough will be thick and sticky. Turn off the mixer and scrape down the sides.
- Using a rubber spatula, add the dough to your prepared loaf pan, filling in the corners of the pan and leveling the top. Wet your fingers and smooth the top.
- Cover the dough with a lightly oiled piece of plastic wrap and allow it to rise in a warm place for 45 to 60 minutes or until it has risen slightly above the loaf pan.
- When the dough is near the top of the pan, preheat your oven to 350°F. Remove the plastic wrap and bake for 60 – 65 minutes. Halfway through baking, cover the bread loaf with a piece of foil to keep it from over-browning.
- Remove the loaf from the oven and let cool completely before slicing. Slice the entire loaf and store in a container at room temperature for up to 4 days or in the freezer for up to a month.
Please see the recipe below for the complete ingredient list and instructions.
Gluten-Free Bread in a Bread Machine
If you prefer to make this gluten-free bread recipe in a bread machine, make sure you have one with a gluten-free setting. I have a Zojirushi bread machine and it makes a beautiful loaf and is my preferred gluten-free bread machine. There are other bread machines, just follow their instructions if they are different.
Check out our list of the Best Gluten-Free Bread Makers on the market today if you're looking to purchase one yourself. (I highly recommend it!)
- Add the warm water, oil, egg whites, and vinegar to the pan in your gluten-free bread machine. Do not add the yeast here. We are not proofing the yeast, we will add it in later.
- In a large mixing bowl, whisk together all dry ingredients except for the yeast (sugar, flours, flaxseed, xanthan gum, baking powder, and salt) and add to the bread machine pan on top of the wet ingredients, in a mound.
- Make a hole in the center of the top of the dry ingredients that are in the bread machine and add the yeast. Don't let the yeast touch the wet ingredients.
- If your machine has a "rest" setting, cancel it. You don't need it. With the Zojirushi you have to do this before you select any other settings.
- Select the gluten-free bread setting on your machine.
- Close the lid and press "start".
Please let me know if you have any questions about making this gluten-free bread recipe.
Egg-Free Substitution in Gluten-Free Bread
For a gluten-free vegan bread version of this gluten-free bread recipe, you can use chia eggs or Bob's Red Mill Egg Replacer (2 eggs worth).
I've only tested this gluten-free egg-free bread recipe in the oven. I haven't tested the egg-free version in a bread machine.
Swap out the 3 egg whites with 2 tablespoons of chia seed + 7 tablespoons of water (let sit for 5 minutes and stir before you add it to the mixture). Or use Bob's Red Mill Egg Replacer and mix up 2 eggs worth.
Bake for 70 minutes (putting a piece of foil over the loaf to help prevent over-browning, halfway through).
Dairy-free gluten-free bread recipe
I still can't get over how amazing this gluten-free sandwich bread is. It's better than any gluten-free bread I've had, and my family, including my gluten-eating husband, agrees.
This gluten-free bread is also dairy-free. I've tested it with dairy (milk for activating the yeast and butter instead of oil) and I found it to add to the quick bread texture.
If you want this gluten-free bread to have the same texture as deli-style sandwich bread, then you need to use water when activating the yeast, and oil instead of butter.
Trust me. Plus, it's less expensive to use water and oil in gluten-free bread recipes than it is to use milk and butter.
To make this a gluten-free vegan bread, see the instructions above for subbing out the eggs for chia eggs.
Related: Easy Gluten-Free Artisan Bread Recipe
Gum-free gluten-free bread
I use xanthan gum in this gluten-free dairy-free bread recipe. I feel it yields the best results.
Not everyone can have gums. You can use psyllium husk powder (not full husks) in this recipe. I only tested it once, but I used 3 tablespoons of psyllium husk powder in place of the xanthan gum - yes, that reads 3 TABLESPOONS.
Psyllium husk powder is not a 1-to-1 for xanthan gum. Again, I only tested this one time, so I cannot claim that this is the best sub for xanthan gum.
Sure, it worked for me, but I haven't checked to see if it's repeatable with that amount of psyllium husk powder.

Tips for making gluten-free bread
Here are my tips that work with this gluten-free bread recipe. See below for my gluten-free bread machine recipe.
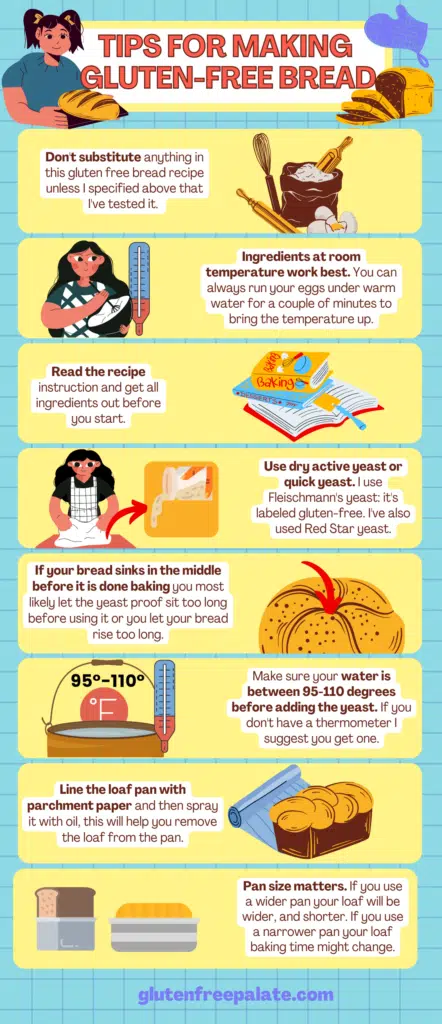
Don't substitute anything in this gluten-free bread recipe unless I specified above that I've tested it. This is important. If you substitute something, I can't guarantee anything, and I can't help you troubleshoot if something doesn't work in your gluten-free bread.
Ingredients at room temperature work best. You can always run your eggs under warm water for a few minutes to keep the temperature up.
Read the recipe instructions and get all the ingredients out before you start.
Use dry active yeast or quick yeast. I use Fleischmann's yeast: it's labeled gluten-free. I've also used Red Star yeast.
If your bread sinks in the middle before it is done baking, you most likely let the yeast proof sit too long before using it, or you let your bread rise too long. You want to put your gluten-free bread in the oven when it rises just above the top of the loaf pan, no longer.
Ensure your water is between 95-110 degrees before adding the yeast. If you don't have a thermometer, I suggest you get one.
Line the loaf pan with parchment paper and then spray it with oil. This will help you remove the loaf from the pan.
Pan size matters. If you use a wider pan, your loaf will be broader and shorter. If you use a narrower pan, your loaf baking time might change.
Again, if you have any questions on how to make gluten-free bread, please leave me a comment below. I've included a video that shows step-by-step how to make gluten-free bread.
Frequently Asked Questions
How long to bake gluten-free bread?
This gluten-free bread recipe works best when baked for 60-65 minutes in the oven or on the gluten-free setting in a bread machine.
See my notes on the gluten-free bread recipe for the bread machine below.
Remember to cover your gluten-free bread with foil halfway through baking so it doesn't over-brown.
You might read that a loaf is done baking once it hits around 200 degrees F. Please bake this loaf 60-65 minutes, even if your thermometer says otherwise.
What size of a pan do I use to make Gluten-Free Bread?
This gluten-free bread recipe was developed using a 9 x 4 inch metal loaf pan. You can use a different size loaf pan, but you'll want to watch the cook time. Also, it won't have the same rise, depending on the size.
You can also make this bread recipe in a glass loaf pan lined with parchment paper. Metal and glass pans transfer heat differently, and gluten-free bread loaves typically have a thicker crust when baked in a glass pan.
How to store freshly baked bread
This fresh-baked bread stays soft for 2-3 days after it's been baked. You'll want to let it cool to room temperature before you slice it. We like to store it whole, in a sealed container, or wrap it tightly with cling wrap, and slice it as we need it.
After a day or two, we will freeze any bread that's left.

Can I freeze gluten-free bread?
Yes, you can freeze this gluten-free bread loaf. After it has completely cooled, slice the loaf into equal slices. We like to place a piece of parchment paper in between each slice, so it's easy to pull out of the freezer.
You can either defrost the bread in the microwave or you can let it sit at room temperature until it has thawed.
Why is my gluten-free bread dense?
If you are using a bread machine, does it have a gluten-free setting? This setting is essential because it only does one mix cycle, not two mix cycles, as you get with other settings.
If you don't have the gluten-free setting option, use a quick program with one mixing cycle rather than two when making gluten-free bread. Mixing it twice will always cause the bread to be denser.
Are you scooping your measuring cup into the flour? Or spooning the flour into the cups and then leveling? It would be best if you always spoon and then level. Otherwise, you'll end up with more flour than you want, which will cause the bread to be dense.
Are you storing your flours in the freezer or refrigerator? If flours are stored that way, they lose moisture, and when they are mixed with other ingredients, they tend to absorb more of the moisture, and the bread is denser.
Can I Double This Bread Recipe?
Yes, you can double this gluten-free bread recipe. When doing so, use two loaf pans to ensure even baking and consider slightly adjusting the yeast quantity to avoid over-proofing.
Be mindful of the mixer capacity for the increased volume of ingredients, and check for any necessary adjustments in baking time.
However, I recommend you try the recipe first. I usually make two doughs for two loaves as it is easier to handle and yields consistent results.
View our step-by-step instructional video for this recipe on YouTube.
Simple and Easy Gluten-Free Bread Recipe
Whip up this simple and easy-to-make homemade gluten-free bread. It is a straightforward, no-fuss recipe with tips and information for success.
Ingredients
For the yeast proof:
- 1 ¼ cup (10 oz.) water between 95°F-110°F
- 2 tablespoons (25g.) sugar (or honey)
- 2 ¼ teaspoons dry active yeast (a 7g. packets worth)
For the bread:
- 1 cup (145g.) white rice flour
- ¾ cup (85g.) tapioca starch
- ¾ cup (92g.) potato starch (or arrowroot starch)
- ½ cup (60g.) millet flour (or almond flour)
- ¼ cup (25g.) ground flaxseed (flaxseed meal)
- 2 ½ teaspoons (9g.) xanthan gum
- 1 teaspoon (5g.) baking powder
- 1 teaspoon (6g.) salt
- ¼ cup (2 oz.) oil of choice (I used avocado oil)
- 3 egg whites (75g.)
- 1 teaspoon (6g.) apple cider vinegar
Instructions
- Line a 8-inch x 5-inch metal loaf pan with parchment paper and spray it with cooking spray; set it aside.
- Add the sugar and yeast to your warm water (95-110 degrees F) and stir; set it aside for 5-10 minutes but no longer.
- While your yeast is proofing, in the bowl of a stand mixer fitted with the paddle attachment, add the flours, flax seed meal, xanthan gum, baking powder, and salt. Turn your mixer to low and mix just until combined.
- With the mixer still going, add the oil, egg whites, vinegar, and proofed yeast mixture.
- Turn the mixer to a medium speed and mix for an additional 2 minutes. The dough will be thick and sticky.
- Using a rubber spatula, add the dough to your prepared loaf pan making sure to fill in the corners of the pan and level the top. Wet your fingers and smooth the top.
- Cover the dough with a lightly oiled piece of plastic wrap and allow it to rise in a warm place for 45 to 60 minutes, or until it has risen slightly above the loaf pan.
- When the dough is near the top of the pan, preheat your oven to 350°F.
- Remove the plastic wrap and bake for 60 – 65 minutes. Half way through baking, cover the bread loaf with a piece of foil to keep it from over-browning.
- Remove the loaf from the oven and let cool completely before slicing.
- Slice the entire loaf and store in a container at room temperature for up to 4 days or in the freezer for up to a month.
Notes
- Please read all the tips and tricks in the post before you get started. If you prefer to use a bread machine, check further up in the post for instructions.
- Use dry active yeast or quick yeast. Instant yeast is okay and you don't need to proof it, just make sure you get it in the oven as soon as it rises to the top of the loaf pan.
- For the gluten-free bread machine recipe, add wet ingredients to the pan, and then dry ingredients except the yeast, make a hole in the center of the dry ingredients and then sprinkle the yeast into the hole. See complete instructions just above the recipe.
- Make sure your water is between 95-110 degrees before adding the yeast. This is warm to the touch, but not hot.
- Line the loaf pan with parchment paper and then spray it with oil, this will help you remove the loaf from the pan. Pan size matters. If you use a wider pan your loaf will be wider, and shorter. If you use a narrower pan your loaf baking time might change.
- Flour blend option: 2 ½ cups of Bob's Red Mill 1-to-1 gluten-free flour blend + ½ cup millet flour + ¼ cup flaxseed meal. The 2 ½ cups of Bob's Red Mill 1-to-1 is in place of the rice flour, tapioca, and potatoe. You are swapping the three with Bob's.
- Egg free option: Swap out the 3 egg whites with 2 tablespoons of chia seed + 7 tablespoons of water (let sit for 5 minutes and stir before you add it to the mixture). Bake for 70 minutes (putting a piece of foil over the loaf to help prevent over-browning, half way through).
- Not everyone can have gums. You can use psyllium husk powder (not full husks) in this recipe. I only tested is once, but I used 3 tablespoons of psyllium husk powder in place of the xanthan gum.
Recommended Products
As an Amazon Associate and member of other affiliate programs, I earn from qualifying purchases. They never cost you extra.
-
 Pyrex Smart Essentials 3-Piece Prepware Mixing Bowl Set, 1-Qt, 1.5-Qt ,and 2.5-Qt Glass Mixing Bowls, Dishwasher, Microwave and Freezer Safe
 -
ThermoPro TP510 Waterproof Digital Candy Thermometer with Pot Clip, 8" Long Probe Instant Read Food Cooking Meat Thermometer for Grilling Smoker BBQ Deep Fry Oil Thermometer
-
Reynolds Kitchens Quick Cut Plastic Wrap, 225 Square Feet
-
Checkered Chef Cooling Rack - Set of 2 Stainless Steel, Oven Safe Grid Wire Cookie Cooling Racks for Baking & Cooking - 8” x 11 ¾"
-
Mercer Culinary M23210 Millennia Black Handle, 10-Inch Wide Wavy Edge, Bread Knife
-
Good Cook 7428419185195 8 Inch x 4 Inch Loaf Pan (8 x 4 Inch (2 Pack), Stainless
-
KitchenAid KSM150PSAQ Artisan Series 5-Qt. Stand Mixer with Pouring Shield - Aqua Sky
-
Zojirushi BB-CEC20 Home Bakery Supreme Breadmaker & Gluten-Free Accessory Bundle
-
Anthony's Xanthan Gum, 1 lb, Batch Tested Gluten Free, Keto Friendly, Product of USA
-
Bob's Red Mill Gluten Free 1-to-1 Baking Flour, 22-ounce
-
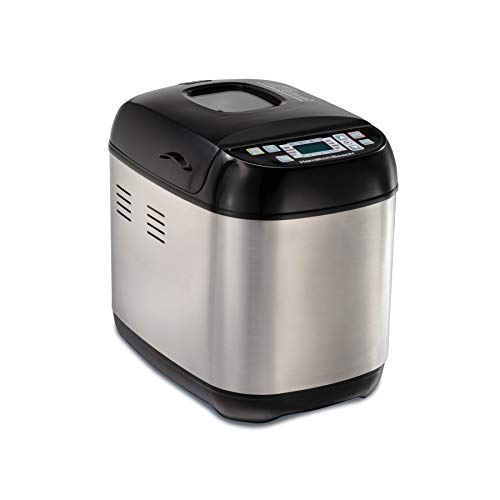
Hamilton Beach Digital Electric Bread Maker Machine Artisan and Gluten-Free, 2 lbs Capacity, 14 Settings, Black and Stainless Steel
-
NileHome Silicone Spatula Set, Rubber Spatula High Heat-Resistant Premium BPA-Free One Piece Seamless Design Cooking Spatulas Utensils Set For Kitchen 4pack(Black)


Nutrition Information:
Yield:
12Serving Size:
1 sliceAmount Per Serving: Calories: 26Total Fat: 0gSaturated Fat: 0gTrans Fat: 0gUnsaturated Fat: 0gCholesterol: 0mgSodium: 14mgCarbohydrates: 5gFiber: 0gSugar: 0gProtein: 2g
This nutrition info is based on the exact ingredients and brands used at the time. It may not be 100% accurate. Please check your ingredients nutrition labels.


)
Lisa
Would you use this recipe to make gluten free bread for bierocks or do you have another suggestion?
chrystal
I haven't tried it for bierocks. Maybe try my rolls recipe?
Best,
Chrystal
Silvia
Hello
Can i use guar gum jjnstead of xantam gum?
chrystal
Yes, you can use guar gum.
Best,
Chrystal
Susan
My dough did not turn out thick....it was thin, like pancake batter. I spooned the flours into the measuring cups, followed the recipe exactly. Any idea why that might have happened?
chrystal
Hi Susan,
Can you tell me which flour blend option you used, and how you measured your wet ingredients? Also, is there a chance you might have left a flour out?
Best,
Chrystal
Susan
Hi! I used the flour blend listed in the recipe (millet, arrowroot, tapioca, rice flour). I measured the wet ingredients in a glass measuring cup. I am new to making GF bread so it is HIGHLY possible I messed this up. For the record, mine didn’t rise (even though the yeast mixture foamed up before mixing it in) BUT I baked it anyway. It turned out good! Chewy texture and crispy crust. I’ll take any suggestions for improvement.
chrystal
Hi Susan,
It sounds like maybe an ingredient was incorrect, or missed. Did you also add the flaxseed meal? The only reason I can think of it not rising if the yeast foamed was that it wasn't left long enough to rise, or it wasn't at the right temperature.
If you decide to try it again, maybe print off the recipe and check off each ingredient as you add it. For the yeast, after it foams add it in right away, and make sure to cover the bread and let it rise in a room that is at least 80 degrees. You can also warm up your oven and turn it off, and let it rise in the oven for an hour. It should rise to the top of the pan.
I hope that helps.
Best,
Chrystal
Susan
Thank you so much! Yes, I did add the flax meal. I will definitely try this one again. It is so tasty and I know once I do this a few more times it will be perfect.
Rosalie More
I find that using a kitchen scale to weigh the flour instead of filling a measuring cup is more accurate. Flour that is spooned into a measuring cup is sometimes fluffy, sometimes a bit more packed. It might not be the exact right amount every time.
Ben
Do I still have to add the xanthan gum if I use the "2 1/2 cups of Bob's Red Mill 1-to-1 gluten-free flour blend + 1/2 cup millet flour + 1/4 cup flaxseed meal" option?
chrystal
Hi Ben,
You can add it, but it's not necessary.
Best,
Chrystal
Jeorgia Ludlow
Hi Crystal,
I have been reading this article and can’t find any comments if you don’t have a bread mixer. I have a stand alone one with a cake accessory/whiskers.
Can I use it or can I mix by hand?
Many thanks,
Jeorgia
chrystal
Hi Jeorgia,
You can mix it by hand. Just make sure that all the ingredients are incorporated with no pockets of flour.
Best,
Chrystal
Kay
Hi,
I follow everything as closely as I can, but the inside still feels a little stickyish after ive let it set for 2 hours. Is that normal? The rest of it looks beautiful, just not sure if thats normal. I'm very new to baking.
chrystal
Hi Kay,
It sounds like it either didn't bake long enough or it didn't cool completely before you sliced into it.
Best,
Chrystal
Kay
How do I test if it's cooked long enough?
Kay
I cooked it for 65 minutes before taking it out and letting it cool for 2 and half hours before cutting into it.
chrystal
You can insert a thermometer in the center to check the internal temp (should be at least 200F), and pull it out and see if there is still dough on it.
Best,
Chrystal
Kay
I'm going to start from the beginning because I am just having a rough time making this work. I want it to so badly because it smells great, but it is still coming out feeling sticky. It looks good in pictures and everything, but if we leave it set overnight it gets a sour smell which tells me that it never finished cooking.
So to start: I proofed a packet of active dry yeast in 2 tablespoons of honey and 1 1/4 cup of 105°F water for 7 minutes.
For the bread I used
1 cup white rice flour
3/4 cup tapioca starch
3/4 cup arrowroot starch
1/2 cup almond flour
1/4 cup ground flaxseed
2 1/2 teaspoons xanthan gum
1 teaspoon baking powder
1 teaspoon salt
1/4 cup grapeseed oil
3 Large egg whites
1 teaspoon apple cider vinegar
I followed everything to a T with this. I scooped everything out of the bags and measured carefully. I don't have a working scale at the moment.
I used a Ninja bread mixer to mix everything together on the dough setting for 2 minutes until it is mixed and sticky. Unfortunately with this method, I can't add things in slowly since the mixer wont start until I have the lid on it so I have to add everything in together to work it together.
After it's combined I pull it out and put it in a 9x5 bread pan that I set up earlier with olive oil and parchment paper so it wouldn't stick to the pan. After I've transferred the dough, I use olive oil on a piece of plastic wrap, brushing it around so there isn't so much in one area and then put it directly onto the dough carefully touching it and making sure no air gets into it so it doesn't dry out while proofing.
It proofs for an hour, I check it at 40 minutes and then every 10 minutes after to see how the proof is going. The middle of the dough gets just to the top of the pan, maybe a little higher before I pop it into the 350°F oven for 30 minutes before I tent it with foil and then leave it for the next 30 minutes to finish baking. I tested it today, at an hour, with my thermometer which read 210°F inside, but when I pulled the thermometer out it was sticky with dough. I then checked it every 10-15 minutes to see if the thermometer would pull out clean, but it never did even after another hour in the oven. We called it after having baked the bread for 2 hours. I pulled it out and set the bread on a drying rack and waited 2 hours before cutting into it at which point we realized that the bread was still sticky to the touch. I'm really not sure what I'm doing wrong. The only way we have found to rectify the issue is by toasting the bread in the oven for another like 30 minutes flipping in between just so it is no longer sticky, but this makes toast instead of sandwich bread.
chrystal
Hi Kay,
I'll do my best to help you troubleshoot. Thank you for the details, as it helps me try to figure this out. A couple of things: first, I have never used a ninja bread maker so I can't speak to that.
The sticky texture could be one of a few things:
- Foil tent - When I use a foil tent, if it's too tight around the pan it tends to trap the moisture. The steam produced while baking needs to rise up through the loaf, and out the top. If the foil tent is too tightly wrapped around the bread, the steam can't escape. Try using a loose foil tent or leaving it off. You can lower your oven rack when baking, to try and combat the top darkening. Of all these things listed, I'd try this first.
- Overmixing, this could be your bread maker, but I'm not sure.
- Letting it rise too much, or not enough. Maybe try letting it rise for 45 minutes and just under the top of the pan.
- A rancid ingredient.
- I haven't tried the combo of arrowroot and almond flour together, I don't think that's it, but just be aware. When I tested I tried arrowroot in place of tapioca, but with millet, and almond flour but with tapioca.
I hope that helps,
Chrystal
Rosalie More
I use a food thermometer to test my bread when it has baked long enough. If it's around 206 degrees, I take out the loaf and cool it. If the temperature is below 197, I bake it 10 or 15 minutes more.
Laura L. Galland
Can salt be omitted? I have a request for gluten, sugar, and sodium free bread.
chrystal
Hi Laura,
I haven't tried it without salt, but I imagine it should be fine.
Best,
Chrystal
Penny
Hi Chrystal,
If I use instant dry organic yeast, what changes do I need to make?
chrystal
Hi Penny,
Your bread should rise much quicker. You'll want to get it on the oven as soon as it rises to the top of the pan.
Best,
Chrystal
Jenni
We made this recipe last night!
We substituted the almond flour with buckwheat flour and also substituted the xanthan gum with ground chia seed.
I was informed I was celiac about a week ago and this was my first time baking gluten free. Before baking anything my husband (who has been a bread Baker for sthe better part of his adult life) and I did a boat load of reading and your recipe seemed to be the best bread we could find, so I'm gonna talk about the substitutes and stuff.
Buckwheat flour. We read you can substitute buckwheat with almond flour 1:1 but the flavor will be a richer deeper flavor, since I normally love a good rye or pumpernickel the idea of a more robust flavor didnt bother me, so I went for it...idk what the bread would of normally tasted like, but it was great none the less.
Chia seeds. We also read that you can substitute ground chia seeds and xanthan gum 1:1 except the chia will make food a bit more elastic, which considering a gluten naturally makes breads elastic in texture (chewy) I didn't mind the idea of that substitute either.
Everything else we followed to a T. Like timed everysingle thing obsessively. We found the dough does come out thick and sticky, but more like a rounded up pancake batter than a bread dough, which made us realize the idea of a deeper load pan could be used to make larger sandwich bread, since the rise in your dough recipe when it's proofing is absolutely magnificent. Our dough we didnt even have to proof it to the whole 40 mins, even though we forgot it and let it proof to the 40 mins. It rose about a half a cake pan more and over the sides!!!! Absolutely impressive rise!
We baked the bread and anxiously waited for it to be finished. We had to put a drip tray in because we let the dough proof too long and it caused a huge goopy mess before we even put it in, but this allowed for like a test piece (that we gobbled up at the halfway mark where we covered the bread with tinfoil) to be eaten, for science.
Anyway. After the full loaf was cooled down we tested the heel and were surprised, it was like the perfect white bread with a slightly savory flavor. It pulled and snapped exactly like bread. This morning we toasted up a few slices in a csstiron like we used to do with our old sourdough before my diagnosis and it was great. It took me back to childhood and what it was like to have a perfectly toasted piece of wonder bread. This bread is like the perfect sandwich bread!!!
Thanks for the recipe! Next time I'm going to try a pan with higher walls!
Jenni
Also, I would like to add gluten free baking isn't like baking at all, it's way more like alchemy. I felt like a damn wizard.
chrystal
Lol. I can understand 🙂
chrystal
Awe, I am very glad that you and your husband loved my bread recipe. Especially with you both having experience in making bread.
Thank you for sharing what you substituted in.
Best,
Chrystal
Patrice Mason
can you double the recipe ?
chrystal
I don't recommend doubling it just in case an ingredient is missed or the wrong amount is added. Also, it's harder to mix.
Best,
Chrystal
NANCY GOLDBERG
I made this bread the morning using a Zojirushi bread machine. The loaf is very yummy, however the finished loaf is approx 2 1/2" high. Is this the same rise you got when you made it? Thanks!
chrystal
Hi Nancy,
It should be more like 4-inches high. I'm glad you liked it.
Best,
Chrystal
Tracey
I have finally found a gluten free bread loaf that works for me and rose beautifully!! I cannot tell you how excited I am about my loaf. Mixed the flours as per your recipe. Add the instant yeast into the flour mix and added the water and honey with the wet ingredients. Coated the top with egg rather than cover it and it was crispy brown. Thank you so much for sharing, I am truly grateful!!
chrystal
I'm so glad you like it.
Best,
Chrystal
NANCY
Any suggestions to make a higher rise? I used your flour mix, using almond flour and psyllium husk powder. With the exception of no rest, did you use the pre-set gl bread settings? Thanks!
chrystal
Hi Nancy,
My bread machine has a gf setting.
Best,
Chrystal
Ash
You recommend any substitute for yeast .
chrystal
I'm sorry, I don't have a yeast free option yet.
Lauren
Have you or anybody else on this thread tried using brown rice flour instead of white rice flour? I'd like to do that if possible, since my nutritionist recommend I only eat brown rice. Thanks!
Lauren
Still waiting for a reply on this?
chrystal
I haven't tried this recipe with brown rice flour, but as long as it's fine ground, it should work.
Best,
Chrystal
ina
I did last week with my mom and it turned out great 🙂
chrystal
I am so glad!
Best,
Chrystal
Bailey Nimmrichter
Hi Chrystal, I made this loaf and the flavour is great, however the finished product is smaller than when we put it in the oven (not even 2 inches high). We used a 5.5x10 inch lid pan and followed your recipe exactly and did not miss a single ingredient. Any reason why our bread came out so small and dense?
chrystal
Hi Bailey,
It should have risen and been at least 4-5 inches. Can you tell me what flour blend you used? The pan size could have played part in the size, but not why it would have been dense.
Best,
Chrystal
Dean F
Hello Chrystal,
I used your recipe today, and with traditional-leaning modifications, I was absolutely delighted with the results. Profressionally done gluten free bread, in my experience, is like cake - just so lacking in structure and qualities expected in bread. Today's loaves made me want another taste, another bite, just as if this were wonderful artisan bread made from wheat flour. (Which my household eats, by the way. We have relatives and friends who are celiac, but we are not.)
Which brings me to a question - why do you yell at bakers "NOT INSTANT YEAST"? With all the dry ingredients that need to be combined, it seems like the perfect time to just add some instant yeast. Tell me why you don't recommend it.
My two Pyrex glass loaf dishes need more dough, so I'll be using Excel to recalculate a slightly larger batch. I prefer to weigh most ingredients. The next batch of bread with your recipe will happen soon. Thank you for sharing.
chrystal
Hello Dean,
Thank you for the lovely comment. I am so glad you are enjoying this recipe. Many of my readers were using instant yeast and letting the loaf rise too long before placing it in the oven, creating a mess in the oven. With the shortage of yeast, and so many people asking about instant yeast, I think it's time to update the post to include instant yeast.
Thank you again,
Chrystal
Laurie
I made this bread yesterday. As I was mixing all my dry ingredients I realized I did not have any arrowroot starch left. So after looking up substitutes I just used the tapioca starch in its place. The bread baked perfectly. It had a slightly sticky feel but the crust was great. I did slice it after cooling and laid slices out on paper towels for about an hour. I think that helped with the stickiness. Sounds a bit odd and certainly not necessary but thought it worked well. Very nice bread.
chrystal
I'm so glad you liked it Laurie.
Thank you for sharing,
Chrystal
Laurie
Also did not have parchment paper, but the bread just feel out of the pan anyway.
Renee
If I'm using instant yeast and making the gf loaf in a bread machine do I not proof the yeast? Just sprinkle it in at the end? If so, do I still add water? And when?
chrystal
No, you don't proof the yeast. I have instructions on the page for bread machines. You mix the flours, add them to the pan, and make a well in the center for the yeast.
Best,
Chrystal
Penny
Is the mix of 2 1/2 cups of Bob’s Red Mill 1-to-1 gluten-free flour blend + 1/2 cup millet flour + 1/4 cup flaxseed meal also suitable for making buns? I'm thinking of using this mix for garlic buns.
chrystal
Hi Penny,
For garlic buns, I suggest you use my rolls recipe.
Best,
Chrystal
Beth
I’m a little confused about adding the yeast for the breadmaker option. Do I add the water from the “yeast proof” to the wet ingredients, and the sugar with the dry ingredients, and pour the dry yeast in the hole in the center? (Basically confirming I don’t “proof” the yeast before it goes in the breadmaker?)
chrystal
Hi Beth,
You make a hole in the center of the flour ingredients, and put the yeast in the hole. Yes, you add the water from what would have been the yeast proof in when you add the other wet ingredients. You don't proof the yeast, the bread maker should do the work for you.
Best,
Chrystal
Glenys elliott
I made this bread today with the third flour combination listen in a bread maker. I have two gluten free types at home and they told me it was the absolute best gluten free bread they had ever eaten. That’s a real compliment to the recipe from two fussy eaters. Very grateful for this recipe.
chrystal
I am so glad you like it. Thank you for taking the time to stop back by and let me know.
Best,
Chrystal
Christina
I've made this recipe several times now. I've started adding a few alternations to work for my family, and have had a good deal of success.
A few points:
1) Pay close attention to the "if your bread sinks in the middle, you let it rise too long" rule. I've had this problem more than once. About 45 minutes should be all you need if you let it rise the way I do, which is:
2) Rising the dough- I turn the oven on to 350 degrees when I start mixing the dough. When it is just under 350, I turn it off and let it sit. By the time I'm ready to put the dough into the oven to rise, it's a nice warm environment that lets my yeast rise properly. I tried numerous other ways, including raising the temperature of my apartment to 80 degrees, with little success. The oven has been the most reliable method for getting the dough to rise.
3) I found out through this recipe that I am allergic to flaxseed! So I have substituted an extra 1/4 cup of almond flour. This was worked marvelously and I actually enjoy the flavor a little better.
4) I accidentally bought sweet white rice flour- if you remove 1/4 a cup of the regular white rice flour and add this instead, you'll get a much springier bread with an even more bread-like texture.
5) When you add the yeast and water, the mixture will be very runny. Stir. Stir and stir and stir. Keep stirring. Eventually you get a very springy dough-like texture. Give the flours a chance to absorb all the water you just added.
6) This loaf lasts about a day stored in the open, a day and a half in a closed container, before the texture becomes very crumbly. So plan to consume the whole loaf the day you make it. It's delicious, so that's never a problem for my family.
That's all I've discovered so far! Thank you so much for this excellent recipe. I thought I wasn't going to be able to eat bread anymore when I met my fiancé, who has Celiac's. But now he just thinks I am the baking goddess 😀
chrystal
Thank you for sharing! I'm so glad you like it.
Best,
Chrystal
Anna
I agree with people here... it is so wonderful to have a GF bread which tastes like bread!!! Thank you for sharing. My question: have you tried making this recipe with the total egg vs just the egg white?
chrystal
I have. The texture is more like a quick bread, but it still works.
Best,
Chrystal
Anna
I tried it, Chrystal, but I decreased the oil to only 3Tbsp (vs 4Tbsp) to account for the fat in the egg yolk... the result was the same taste and texture, without 'wasting' the egg yolk!
chrystal
Thanks for sharing Anna!
Best,
Chrystal
Jan
Had never baked any bread in my life but have made this 4 times and turned out perfectly every time! Added some pumpkin seeds - my husband who is GF loved it. The family is liking "Quarantine Mom". Thank you Chrystal for all your time perfecting this - much appreciated.
chrystal
Awe, I'm so glad. I love the addition of pumpkin seeds. Thank you for sharing.
Best,
Chrystal
Shed35
Thank you for the recipe. It made an amazing bread which is so moorish! I shocked it went so well This will be my go to recipe!
chrystal
I'm so glad you love it.
Best,
Chrystal
Alyce
Could this be made in a airfryer instead of an oven?
chrystal
I don't think it would work in an air fryer, but I haven't tried it.
Best,
Chrystal
Athena
I would like to use sourdough starter instead of the dry yeast... how much should I use? H ave you tried this option?
chrystal
I haven't personally tried a sourdough starter with this recipe yet.
Best,
Chrystal
Nicky
Hi there, am going to try this today just wondering if the sliced bread freezes well? Many thanks Nicky from NZ
chrystal
Hi Nicky,
I think it freezes fairly well. I tend to heat up the slices after they have been frozen, to soften them a bit.
Best,
Chrystal
Adam
I do not have millet flour, but I have an all purpose GF flour, brown rice flour, Cassava, and buckwheat. Will any of those work as a replacement?
Thank you!
chrystal
Hi Adam,
You can probably use your brown rice flour or buckwheat flour in place of the millet. I haven't personally done this, but their structure is similar.
Best,
Chrystal