

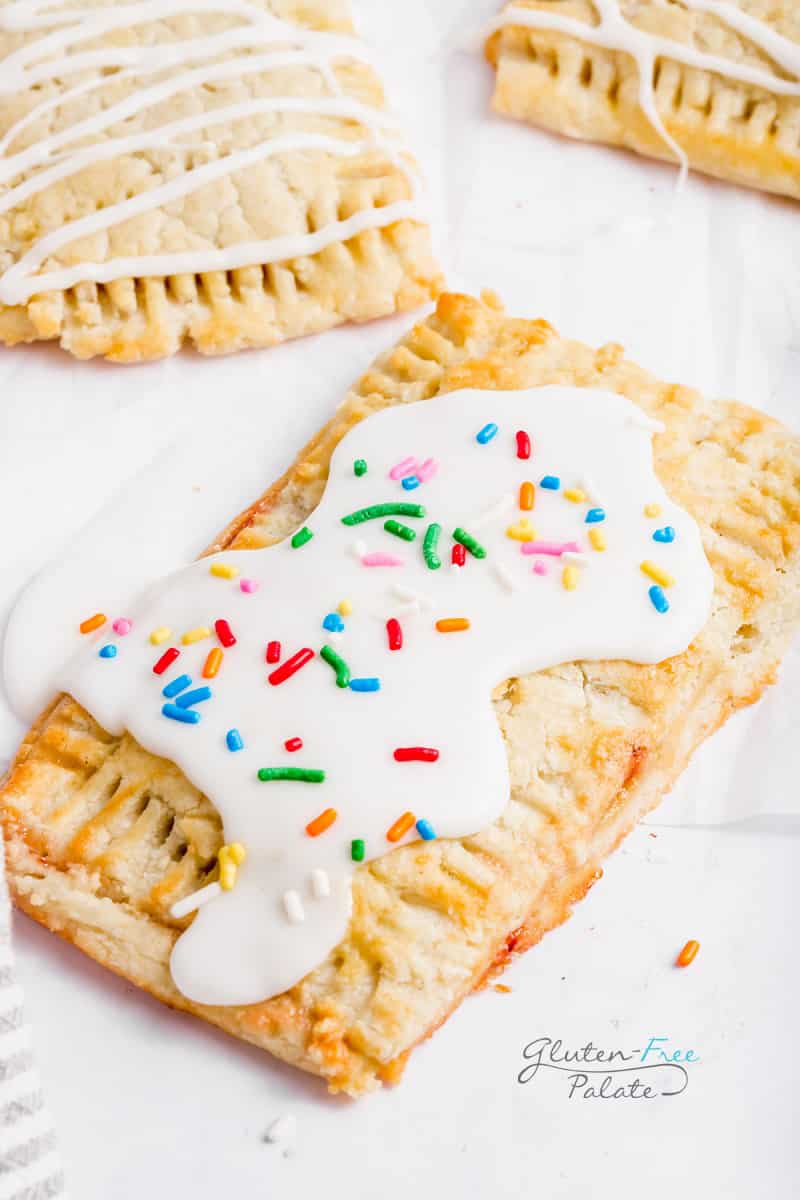
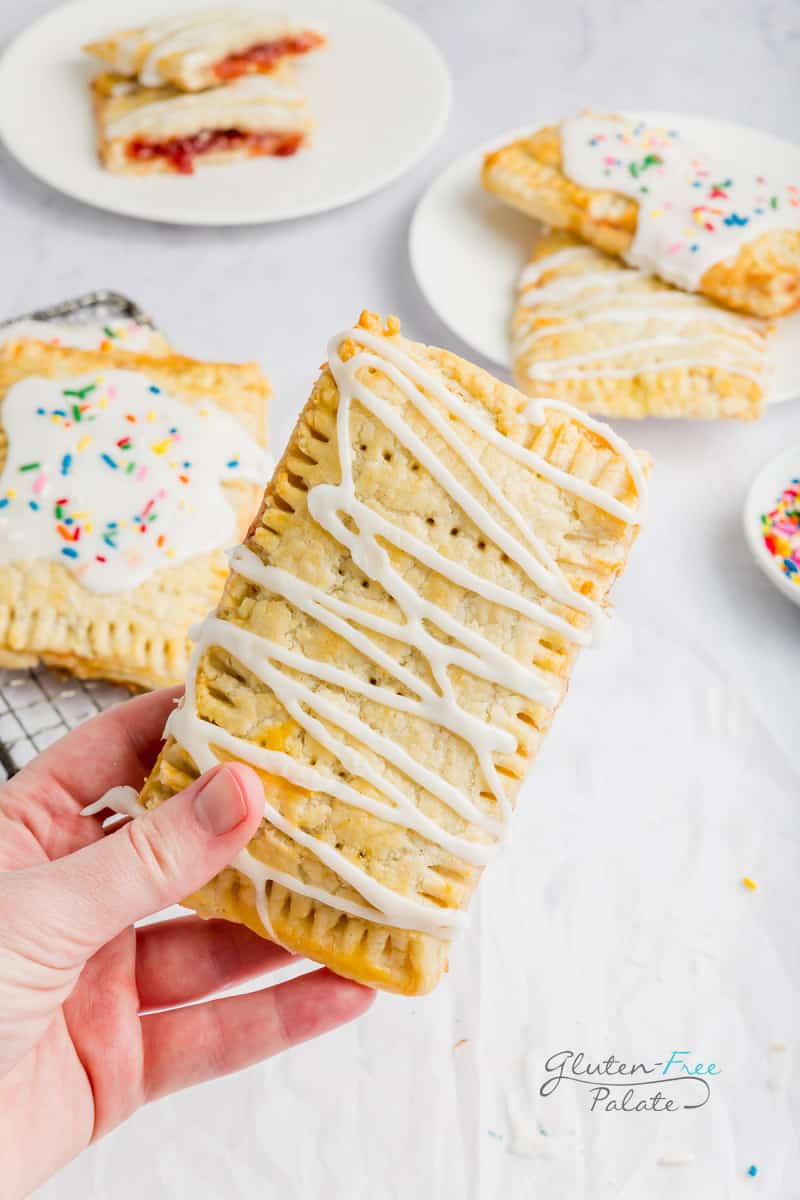
If you love the flaky, buttery crust and sweet filling that makes a pop tart, you're going to devour these gluten-free pop tarts for breakfast!
Gluten-Free Pop tarts taste just like your childhood favorite pop tart, and they are pretty simple to make.
If you feel like some more childhood favorites try these easy gluten-free apple turnovers, from-scratch gluten-free cinnamon rolls or we’ve rounded up some of the best gluten-free desserts!
GLUTEN-FREE POP TARTS RECIPE
Who grew up eating pop tarts? I did and they were a childhood favorite. My two favorites were strawberry filling and the cinnamon-filled pop tarts.
If you are short on time, get a store-bought pie crust and you will be devouring these in no time! My pie crust includes vegan and dairy-free options as well as the recipe below.
WHY YOU’RE GOING TO LOVE THESE GLUTEN-FREE POP TARTS
Simple to make - This gluten-free pop tarts recipe is simple to make, and it includes a few variations for filling including fruit filling and a cinnamon filling.
Time saving pie crust - You can use my gluten-free pie crust or if you're in a rush you can use your favorite store-bought pie crust.
Handful of ingredients - With just 6 ingredients and either sprinkles or colored sugar, these delights are done in no time.
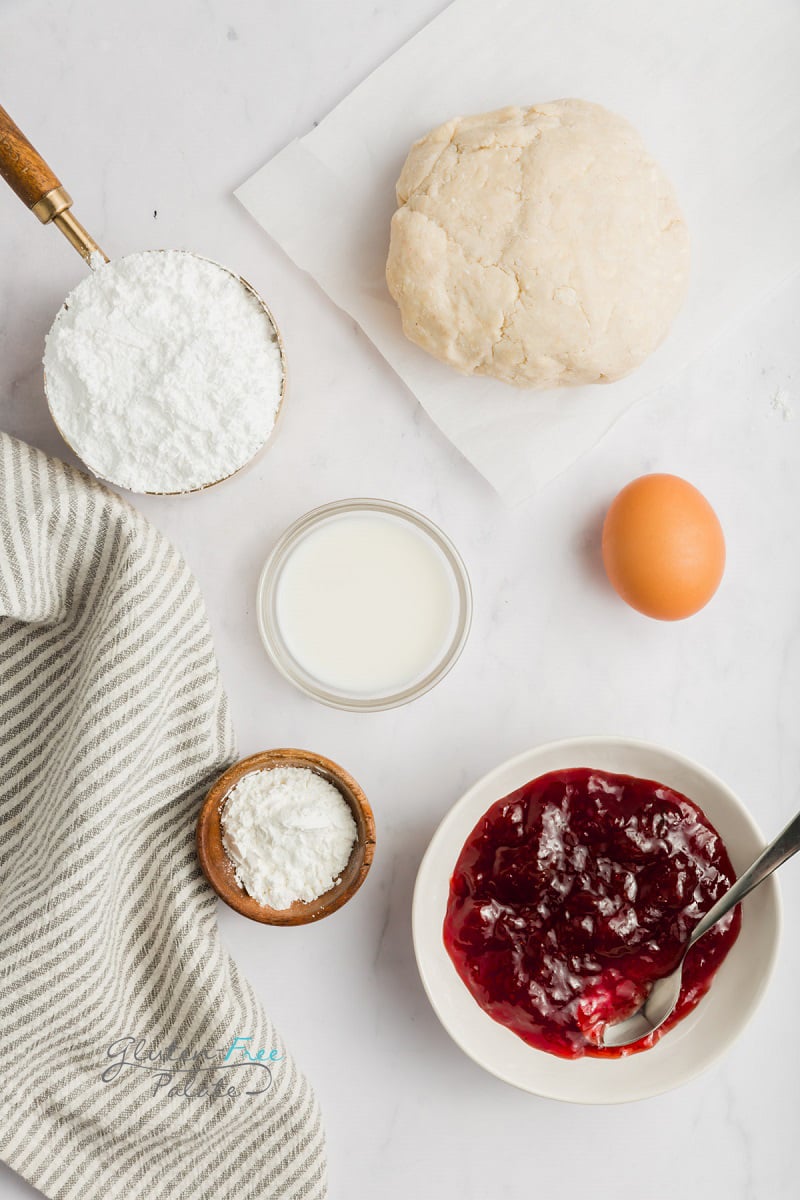
INGREDIENTS IN GLUTEN-FREE POP TARTS
Gluten-free pie crusts - you can use my gluten-free pie crust recipe or your favorite store-bought gluten-free pie crust.
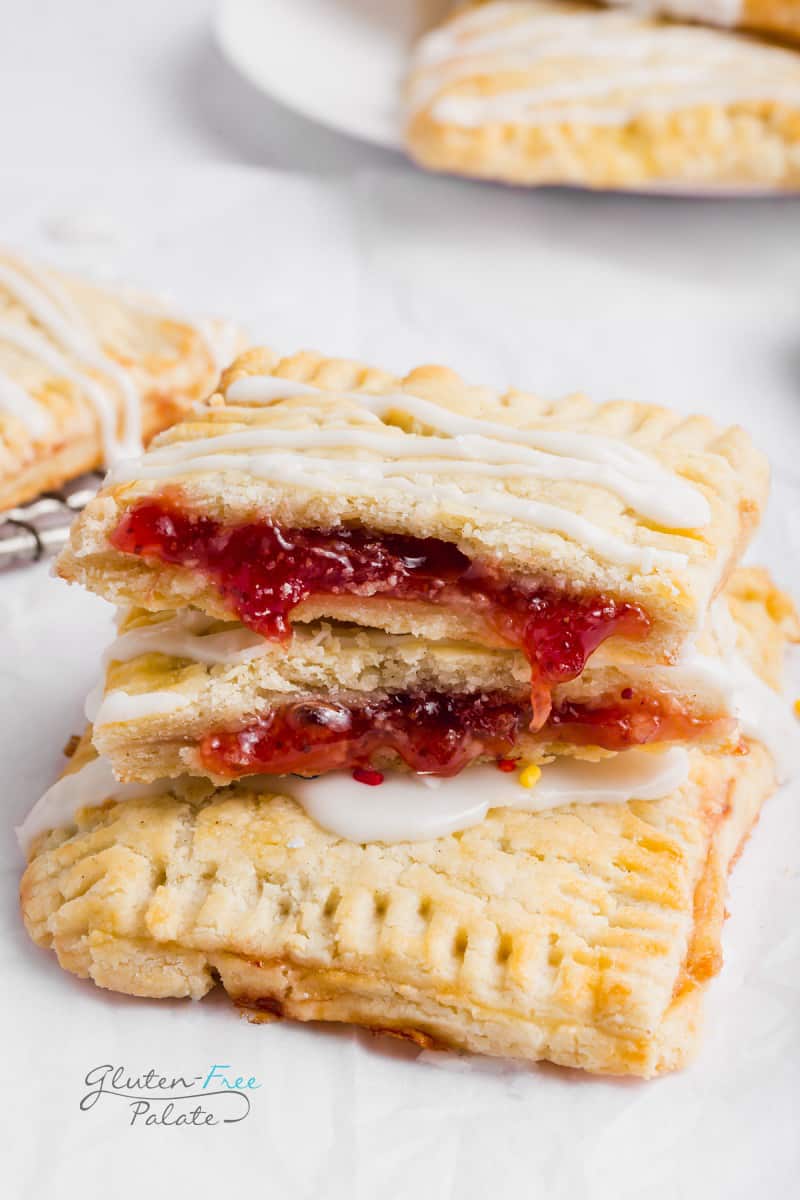
Jam or preserves - we like strawberry, blackberry, or apricot.
Cornstarch (or arrowroot starch) - this helps to thicken the filling.
Egg - For browning those tops. You can use egg wash or heavy cream.
Powdered Sugar - For the glaze. I haven't tried a sugar replacement in the glaze.
Milk - For the glaze, you can also use water.
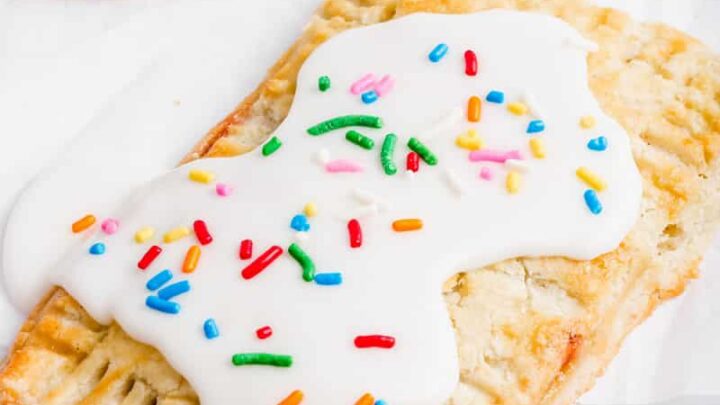
Optional - Sprinkles or colored sugar for decorating.
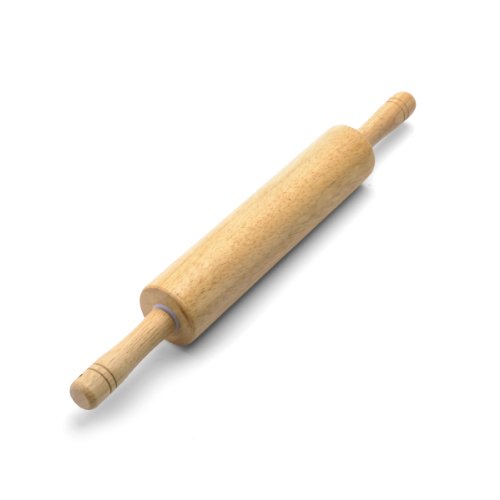
EQUIPMENT NEEDED FOR THIS GLUTEN-FREE POP TARTS
Pastry brush - You can choose from silicone, but I like to use this wooden pastry brush.
If you have any questions about making gluten-free pop tarts, please leave a comment and we will get back to you as soon as possible.

HOW TO MAKE GLUTEN-FREE POP TARTS
- In a small mixing bowl, mix the jam and cornstarch together; set aside.
- Make the pie crust per the directions and roll them out into rectangles. Slice each pie crust rectangle into 3 even strips lengthwise, this will create 6 long strips total between the two pie crusts.
- Place a heaping tablespoon of the jam mixture onto the bottom half of each strip, leaving about ½ of space around the edges. Brush the edges around the jam with the egg wash.
- Fold the pastry in half. Use a fork to seal the seams. If any cracks appear in the pastry, try to pinch the dough together to create a seal and prevent jam leaking during the baking process. Repeat for the remaining pastry strips.
- Poke steam holes with a fork in each pop tart and transfer them to the baking sheet. Brush the top of each pastry with the egg wash using a pastry brush.
- Bake for 20-22 minutes, or until the pastry is golden brown and cooked through.
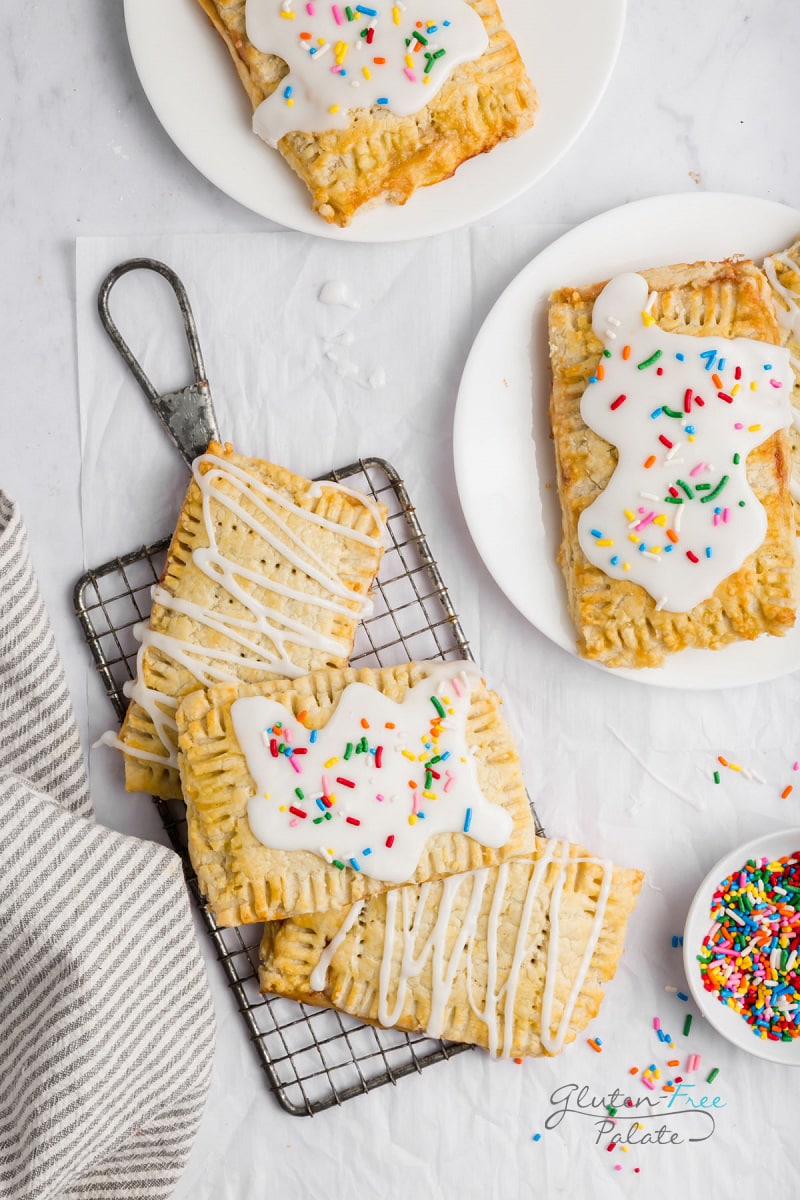
- Allow to cool completely before adding the glaze.
- For the glaze: In a medium bowl, mix together the powdered sugar and milk. Add more or less milk for consistency. Drizzle the icing over the gluten-free pop tarts. If desired, decorate the tops with sprinkles before the icing sets up.
These numbered steps match the numbered photos above and are for illustration purposes only. Please see the recipe card below.
GLUTEN-FREE POP TART FILLING VARIATIONS
Strawberry Filling - This gluten-free pop tarts recipe includes a strawberry filling.
Raspberry Filling - Simply swap out the strawberry jam for raspberry jam.
Cinnamon Sugar Filling - Add ½ cup packed dark or light brown sugar, 2 teaspoons ground cinnamon, and 1 tablespoon all-purpose gluten-free flour to a small mixing bowl and mix until combined.
You can also swap the jam out with other flavors of jam to make these gluten-free pop tarts just the way you like them. We've used apricot and grape in the past because that's what we had on hand.
TIPS FOR MAKING GLUTEN-FREE POP TARTS
Pie crust dough - Keep the pie crust dough as cold as possible. This prevents the butter from melting before they go into the oven. If the butter melts before baking, you lose the flakiness of the pie crust. Consider refrigerating for 10 minutes after you roll it out.
Poke holes in the tops - Poke holes in each pastry to allow the steam to escape. This is important, please don't forget this step.
Refrigerate - For the best results, place the ready-to-bake pop-tarts in the refrigerator for 20 minutes before baking. Again, this helps with the butter and the flakiness of the crust.
Seal the edges - Seal the edges of the pop tarts well, otherwise the filling will leak out.
Serve fresh - These pop tarts are best fresh since the dough becomes soggy over time, but you can store them for future enjoyment.
CAN YOU MAKE THE DOUGH AHEAD OF TIME?
Yes. You can make gluten-free pie crust dough ahead of time and refrigerate it for up to 2 days or freeze it for up to 3 months.
CAN YOU FREEZE GLUTEN-FREE POP TARTS?
Yes, you can freeze these gluten-free pop tarts for up to 3 months. Bear in mind the texture is slightly less crispy than if you made them fresh.
HOW CAN I MAKE THESE GLUTEN-FREE POP TARTS VEGAN OR EGG-FREE?
For the pie crust, refer to my gluten-free pie crust recipe for vegan options. You can substitute the egg wash with coconut oil or aquafaba. For the milk for the glaze use water or a milk alternative.
HOW DO I STORE GLUTEN-FREE POP TARTS?
Store pop-tarts in an airtight container at room temperature for up to 3 days or in the refrigerator for 6 days. You can also freeze them for up to 3 months.
Let the pop tarts cool to room temperature before refrigerating or freezing to prevent excess moisture from getting trapped in the container.
HOW CAN I REHEAT GLUTEN-FREE POP TARTS?
There are a couple of ways to reheat gluten-free pop tarts. You can reheat them in the oven, on the stovetop, or in a microwave.
Oven - To reheat in the oven, bake them glaze side up on a baking sheet at 350°F (177°C) for 10 minutes.
Stovetop - Simply place them in a pan glaze side up on low heat until heated through.
Microwave - You can also microwave them for 30+ seconds. Make sure to let them sit for a couple of minutes to allow the temperature to regulate. This helps with hot spots.
Gluten-Free Pop Tarts Recipe
If you love the flaky, butter crust and sweet filling that makes a pop tart, you're going to devour these gluten-free pop tarts. This gluten-free pop tarts recipe includes a few variations for filling including fruit filling and a cinnamon filling.
Ingredients
- 2 gluten free pie crusts
- ½ cup jam or preserves (we like strawberry, blackberry, or apricot)
- 1 tablespoon cornstarch (or arrowroot starch)
- 1 egg, beaten (or heavy cream)
- 1 cup powdered sugar
- 4 teaspoons milk
- Optional: sprinkles or colored sugar for decorating
Instructions
- Preheat oven to 400 degrees F. Line a baking sheet with parchment paper; set aside.
- In a small mixing bowl, mix together the jam and cornstarch; set aside.
- Make the pie crust per the directions and roll them out into rectangles. Slice each pie crust rectangle into 3 even strips lengthwise, this will create 6 long strips total between the two pie crusts.
- Place a heaping tablespoon of the jam mixture onto the bottom half of each strip, leaving about ½ of space around the edges. Brush the edges around the jam with the egg wash.
- Fold the pastry in half. Use a fork to seal the seams. If any cracks appear in the pastry, try to pinch the dough together to create a seal and prevent jam leaking during the baking process. Repeat for the remaining pastry strips.
- Poke steam holes with a fork in each pop tart and transfer them to the baking sheet. Brush the top of each pastry with the egg wash.
- Bake for 20-22 minutes, or until the pastry is golden brown and cooked through. Allow to cool completely before adding the glaze.
- In a medium bowl, mix together the powdered sugar and milk. Add more or less milk for consistency.
- Drizzle the icing over the gluten free pop tarts. If desired, decorate the tops with sprinkles before the icing sets up.
Notes
- Keep the pie crust dough as cold as possible prevents the butter from melting before they go into the oven. If the butter melts before baking, you lose the flakiness of the pie crust. Consider refrigerating for 10 minutes after you roll it out.
- Poke holes in the tops of each pastry to allow the steam to escape. This is important, please don't forget this step.
- For the best results, place the ready-to-bake pop-tarts in the refrigerator for 20 minutes before baking. Again, this helps with the butter and the flakiness of the crust.
- Seal the edges of the pop tarts well, otherwise the filling will leak out.
- These pop tarts are best fresh since the dough becomes soggy over time, but you can store them for future enjoyment.
Recommended Products
As an Amazon Associate and member of other affiliate programs, I earn from qualifying purchases. They never cost you extra.

Nutrition Information:
Yield:
8Serving Size:
1Amount Per Serving: Calories: 172Total Fat: 3gSaturated Fat: 1gTrans Fat: 0gUnsaturated Fat: 2gCholesterol: 23mgSodium: 49mgCarbohydrates: 36gFiber: 1gSugar: 28gProtein: 1g
This nutrition info is based on the exact ingredients and brands that I used a the time. It may not be 100% accurate. Please check your ingredients nutrition labels.


Lynne Cook
THESE ARE AMAZING!!! WE MADE STRAWBERRY AND LOVED THEM!!!
chrystal
I am so glad you liked them. Thank you for letting me know.
Best,
Chrystal
Rachel
Can I freeze these for future ? And if so would I freeze them before I bake them? Thank you!
chrystal
I would bake them first, let them cool to room temp, and then freeze them.
Best,
Chrystal
Dee
What was your best method for reheating after they are frozen?
chrystal
My kids microwave them. Sometimes I place them under the broiler for a couple of minutes to reheat them. I've heard others wrapping them in foil and putting them in the toaster.
Best,
Chrystal