


These mochi waffles are soft, and once you've taken a bite into them, you may wonder if you prefer them over traditional waffles. With a crunchy exterior and a chewy texture, they're the perfect breakfast or dessert.

The Best Mochi Waffle Recipes
This one, I have to admit, is difficult to describe. The texture is crunchy on the outside, but not as firm, and then a chewy center that has such a nice mouthfeel. And we use glutinous rice flour (it has no gluten), which is relatively inexpensive.
I've included condensed milk, and trust me, you don't want to leave that ingredient out. They don't even need any additional toppings as they are good as is. But yes, we are extra, so we added all the trimmings.
So now that we've found one of our favorites. It's your turn to find your favorite waffles; we have more for you to choose from. Fall is the perfect time to make these Gluten-Free Pumpkin Waffles. (I'm ready for fall already!) Or if you prefer plain, simple, and traditional, these Gluten-Free Belgian Waffles.

Why You’ll Love These Gluten Free Mochi Waffles
Tender taste - The waffles are so tender and tasty without any additions.
Super easy to make - These are really easy to make. You don't need any major skills.
Taste amazing - With the addition of the condensed milk, it not only crisps them up beautifully but also gives them a lovely taste.
Ingredients For This Gluten Free Mochi Waffle Recipe

The key ingredient is the mochiko flour, which is gluten free!
With a few pantry staples and a simple process, you'll be enjoying these shortly.
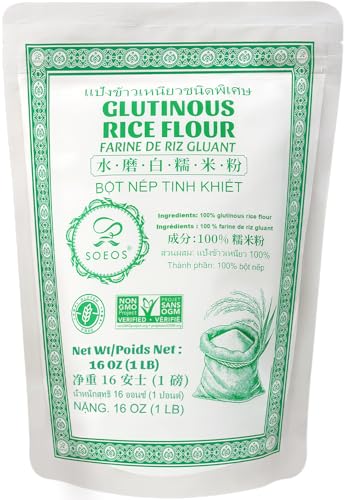
- Sweet rice flour (mochiko flour) – This is the base flour, also known as glutinous rice flour, that gives the waffles their signature chewy, mochi-like texture. And don't let the name fool you, it is gluten-free, despite its name.
- Tapioca starch – Helps create a crisp exterior while keeping the inside chewy.
- Granulated sugar – Sweetens the batter and adds browning.
- Baking powder – Provides lift so the waffles don’t turn out too dense.
- Salt – Balances the sweetness and enhances overall flavor.
- Large egg, separated and an extra egg yolk – The yolk enriches the batter while the whipped white adds lightness and a little lift.
- Whole milk or dairy-free milk – Dairy gives moisture to hydrate the starches and create the chewy interior.
- Unsalted butter (melted) or neutral oil – Keeps the waffles tender and adds crisp edges.
- Vanilla extract – Brings flavor and a subtle sweetness to the batter.
- Condensed milk - Adds richer chew, extra browning, and a creamy sweetness.
Equipment Needed
A mixing bowl, one for the dry ingredients and one for the wet ingredients. A whisk is handy when combining the two. I'd recommend a hand mixer to whisk the egg whites, unless you have the power to do it with a whisk.
A waffle iron is needed for this recipe. I have used a mini waffle iron (it's cute!), but you can use a regular one or one for Belgian waffles.

How to Make This Mochi Waffle Recipe
With just a bit of mixing and then combining the ingredients, you'll have the perfect Mochi waffle batter.
Preheat And Prep Dry Mix


Heat your waffle maker according to the manufacturer’s instructions. Lightly grease with oil or butter if needed. I like to use cooking spray.
In a medium bowl, whisk together the sweet rice flour, tapioca starch, sugar, baking powder, and salt. If you're using this mochi waffle recipe to make a dry mix for later use, this is where you'd stop. You only add the wet ingredients when you're ready to make them.
Whisk Wet Ingredients And Combine With Dry Ingredients


Place the yolk into a small bowl and the white into another clean bowl. Whisk together the egg yolks, milk, melted butter/oil, vanilla, and condensed milk (if using) until smooth.
Pour the yolk mixture into the dry ingredients and whisk until just combined and smooth. Batter should be thick but pourable.
Beat Egg Whites And Fold Into Batter


Using a whisk or hand mixer, beat the egg white (remember it's only from the one egg) until soft peaks form.
Gently fold the whipped white into the batter. This adds air and gives the waffles a lighter lift while keeping the chewy texture.
Spoon Batter, Cook And Serve


Spoon batter into the center of the preheated waffle iron, spread gently to the edges, and cook 3–4 minutes, or until golden brown and crisp on the outside.
Serve with fresh fruit, syrup, or even ice cream, and enjoy. Mochi waffles are best eaten hot with a crispy outside and chewy inside.

Tips For Making The Mochi Waffle Recipe
So if you've never made these before, here are some things to consider:
- Preheat your waffle iron - Make sure you have heated up your waffle iron according to the manufacturer's directions.
- Don't overfill the waffle iron - I still do this if I have not used it in a while. Cleaning the waffle iron is not fun, so fill it less on the first one, and then you will see if you need to add more.
- Let the batter sit - This allows the starch to distribute evenly. This helps it get the correct texture.
- Whip the egg whites - I did it without doing this step, and they came out perfectly fine, but if you want them with a bit more lift, it is worth the step.
- Serve immediately - They are best eaten once cooled slightly. Due to them being different from traditional waffles, they soften as they cool.
- Reheat in a toaster - If you need to reheat them, place them in the toaster or toaster oven, and they will then get their crisp back.
- Grease your waffle iron well - Yes, I forgot to do it for one, and it stuck like glue on my waffle maker, so I use a bit of a spritz of cooking oil for each one. Check your waffle iron directions.

Frequently Asked Questions
Here are some questions you may have
What Are Mochi Waffles Made Of?
They’re made with sweet rice flour, also called mochiko, which gives them a chewy texture different from regular wheat flour waffles. Regular rice flour or all-purpose flour won’t give the same result.
Do Mochi Waffles Taste Different From Regular Waffles?
Yes, mochi waffles are chewier and denser inside, with a crisp edge, while regular waffles are fluffy and airy.
Are Mochi Waffles Gluten-free?
Yes, sweet rice flour is naturally gluten-free, so mochi waffles are safe for gluten-free diets if all ingredients used are gluten-free. This recipe uses gluten-free ingredients.
Why Are My Mochi Waffles Flat?
They are naturally flatter than Belgian waffles, but you can whip the egg whites and slightly increase the baking powder for more lift.

How Do I Store And Reheat Mochi Waffles?
Store leftovers in an airtight container for up to 2 days in the refrigerator, then reheat in a toaster or oven to regain their crispness.
Can I Freeze Mochi Waffles?
Yes, freeze cooled waffles in a single layer, then reheat in a toaster or oven straight from frozen. Freeze them for up to 3 months in a freezer bag. Or just make the dry mix ahead of time, and make them when you're ready to eat.
What Flavors Can I Make Mochi Waffles In?
Our favorite variations are matcha, chocolate, black sesame, taro, or savory cheese and herb versions.
You can also add in chocolate chips, use different syrups. We love maple syrup.
Mochi Waffle Recipe

These mochi waffles are chewy on the inside with a crisp golden edge. Perfect for breakfast or a snack.
Ingredients
- 120g (1 cup) Sweet rice flour (mochiko)
- 30g (¼ cup) Tapioca starch
- 30g (2½ tbsp) Granulated sugar
- 8g (2 tsp) Baking powder
- 1.5 g (¼ tsp) Salt
- 1 Large egg, separated
- 1 yolk (18 g) Extra egg yolk
- 180 g (¾ cup) Whole or dairy-free milk
- 28g (2 tbsp) Unsalted butter or neutral oil, melted
- 4 g (1 tsp) Vanilla extract
- 20 g (1 tbsp) Optional: Sweetened condensed milk
Instructions
- Heat your waffle maker according to the manufacturer’s instructions. Lightly grease with oil or butter if needed.
- In a medium bowl, whisk together the sweet rice flour, tapioca starch, sugar, baking powder, and salt.
- Place the yolks into a small bowl and the white into another clean bowl.
- Whisk together the egg yolks, milk, melted butter/oil, vanilla, and condensed milk (if using) until smooth.
- Pour the yolk mixture into the dry ingredients and whisk until just combined and smooth. Batter will be thick but pourable.
- Using a whisk or hand mixer, beat the egg white (only from 1 egg) until soft peaks form. Gently fold the whipped white into the batter. This adds air and gives the waffles a lighter texture while maintaining their chewy texture.
- Spoon batter into the center of the preheated waffle iron, spread gently to the edges, and cook 3–4 minutes, or until golden brown and crisp on the outside.
- Serve and enjoy. Mochi waffles are best eaten hot.
Notes
- Preheat your waffle iron - Make sure you have heated up your waffle iron according to the manufacturer's directions.
- Don't overfill the waffle iron - I still do this if I have not used it in a while. Cleaning the waffle iron is not fun, so fill it less on the first one, and then you will see if you need to add more.
- Let the batter sit - This allows the starch to distribute evenly. This helps it get the correct texture.
- Whip the egg whites - I did it without doing this step, and they came out perfectly fine, but if you want them with a bit more lift, it is worth the step.
- Serve immediately - They are best eaten once cooled slightly. Due to them being different from traditional waffles, they soften as they cool.
- Reheat in a toaster - If you need to reheat them, place them in the toaster or toaster oven, and they will then get their crisp back.
- Grease your waffle iron well - Yes, I forgot to do it for one, and it stuck like glue on my waffle maker, so I use a bit of a spritz of cooking oil for each one. Check your waffle iron directions.
Recommended Products
As an Amazon Associate and member of other affiliate programs, I earn from qualifying purchases. They never cost you extra.


Nutrition Information:
Yield:
6Serving Size:
1Amount Per Serving: Calories: 587Total Fat: 18gSaturated Fat: 10gTrans Fat: 0gUnsaturated Fat: 8gCholesterol: 113mgSodium: 209mgCarbohydrates: 93gFiber: 1gSugar: 72gProtein: 15g
This nutrition info is based on the exact ingredients and brands used at the time. It may not be 100% accurate. Please check your ingredients nutrition labels.
If you make this mochi waffle recipe, please consider stopping by and letting me know what you think.
DID YOU MAKE THIS RECIPE?
Tag @glutenfreepalate on Instagram and hashtag it #glutenfreepalatebaker so we can see all the deliciousness!



Leave a Question or Comment