


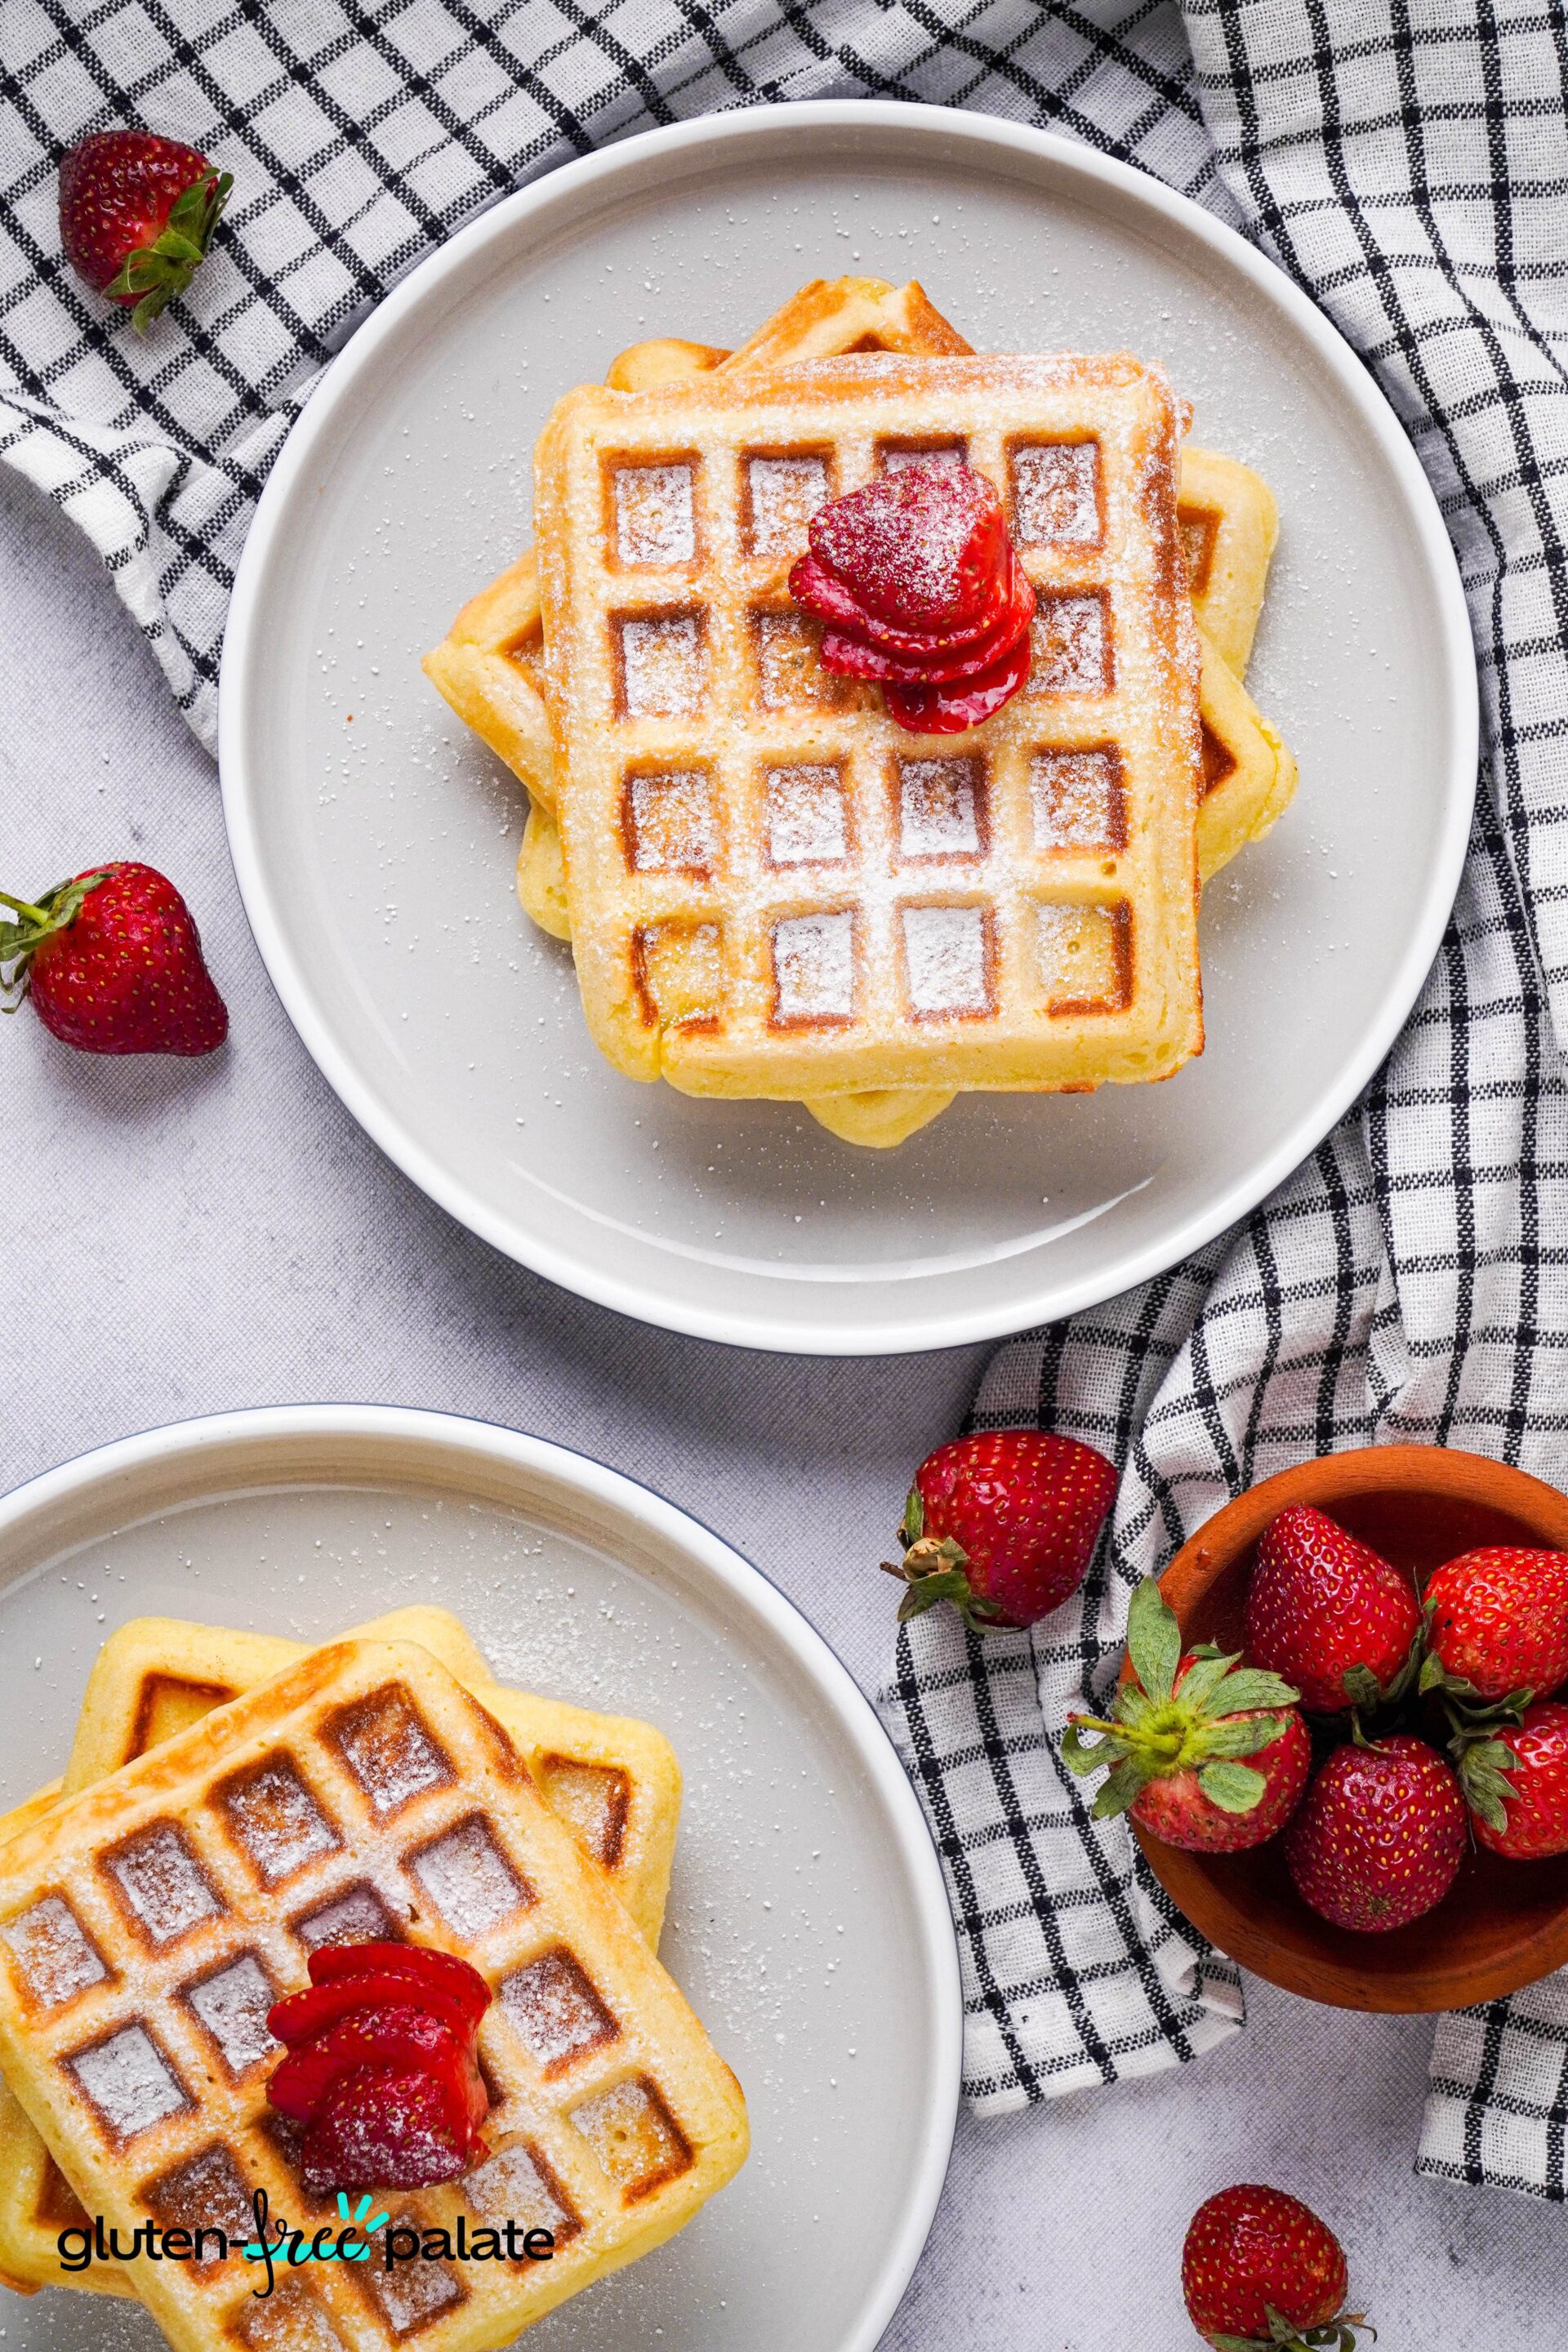
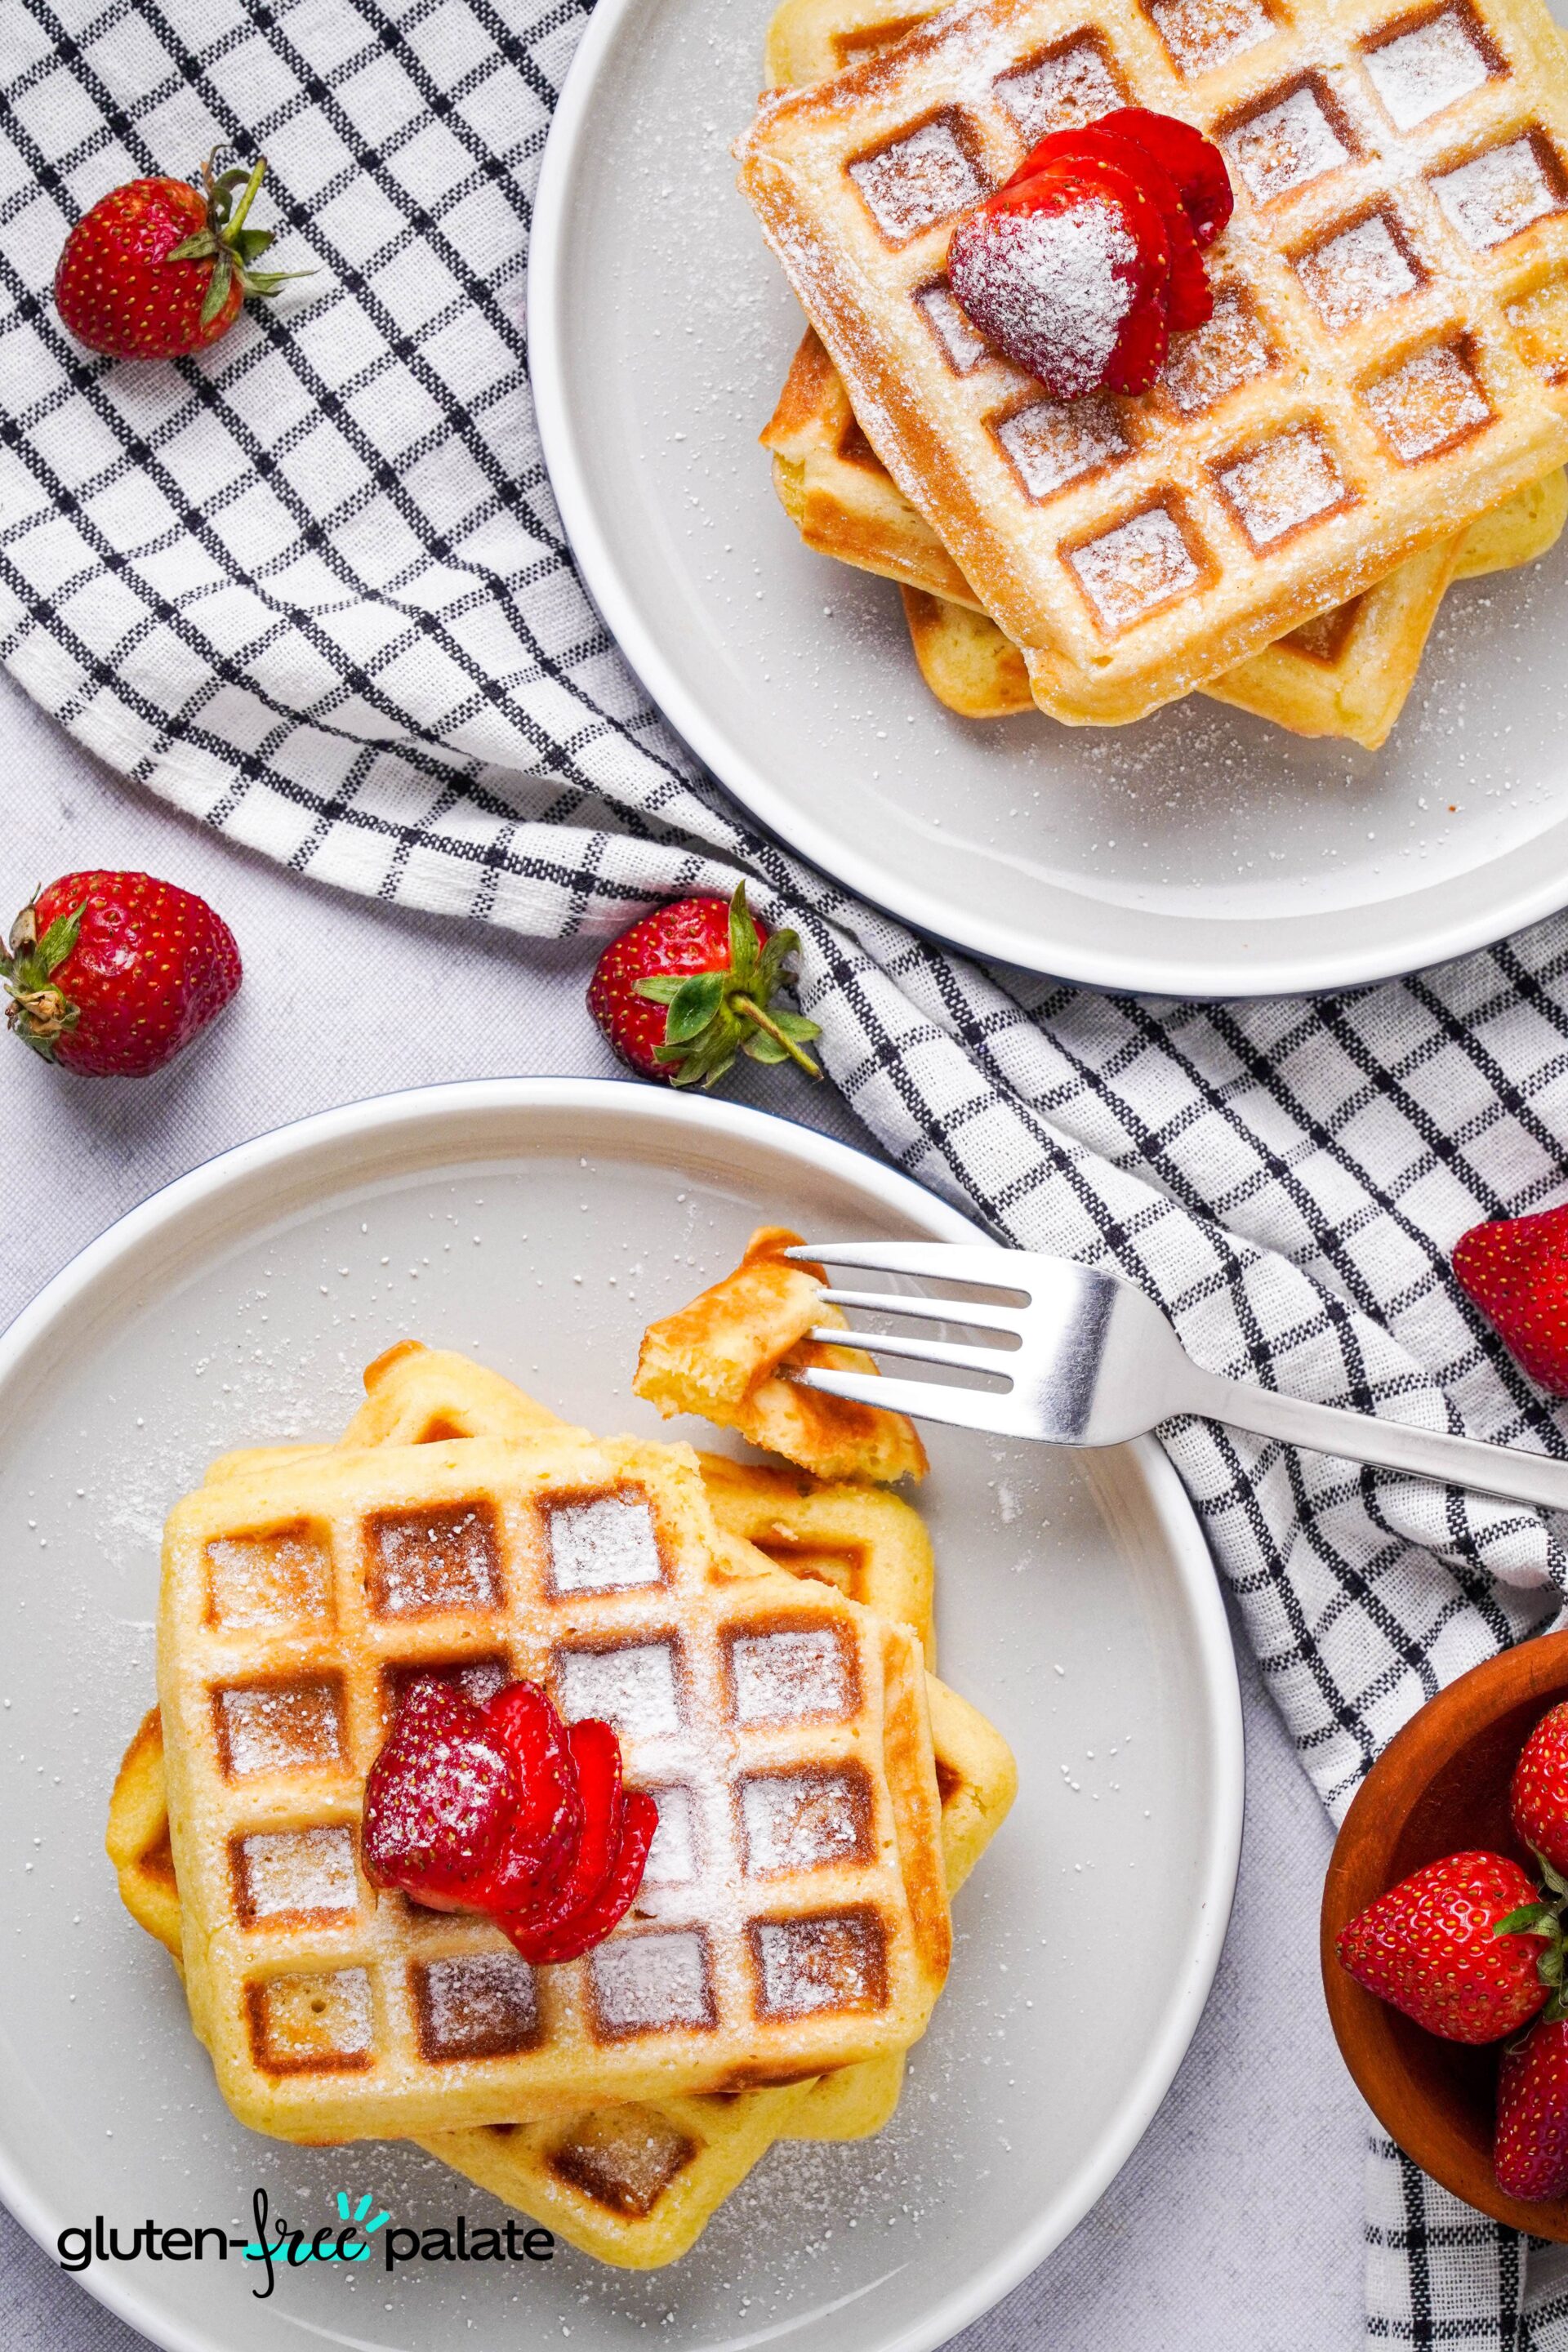
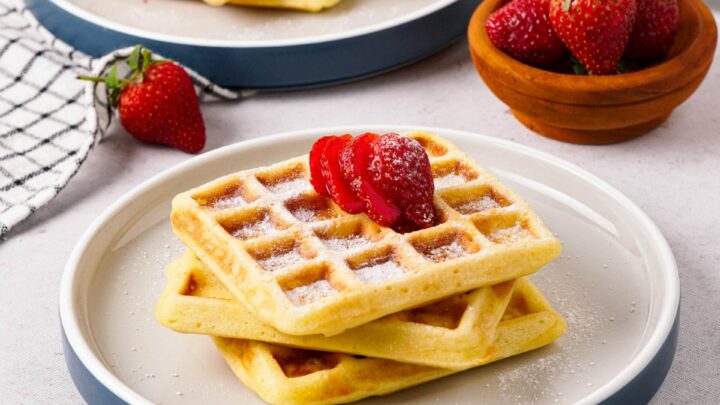
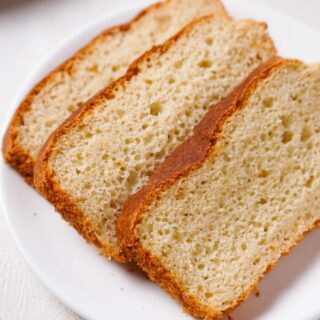
These gluten-free Belgian waffles are crispy on the outside and fluffy on the inside. They are super easy to make and can be customized with your favorite toppings. These waffles are a delicious and sweet breakfast or brunch option that the whole family will enjoy!

Gluten-free waffle lovers, you can enjoy a variety of delicious options such as classic waffles with the gluten-free waffle mix recipe, indulgent gluten-free chocolate waffles, tangy gluten-free sourdough waffles or these seasonal gluten-free pumpkin waffles.
Looking to try out some delicious and healthy plant-based meals? Use the promo code CARROT30 to get $30 off your first box of purple carrot and enjoy easy and delicious meals at home!
Gluten-Free Belgian Waffles Recipe
If you're looking for a delicious breakfast or brunch option, then these gluten-free Belgian waffles are a must-try. Not only do they taste amazing, but they are also easy to make and can be customized with your favorite toppings.
One of the best things about these gluten-free Belgian waffles is their texture. Their crisp exterior gives way to a light and fluffy interior, making for the perfect waffle texture.
These gluten-free Belgian waffles are also incredibly versatile. You can customize them with your favorite toppings. They are perfect for a weekend breakfast or brunch but can also be enjoyed any time of day. These waffles are sure to become a favorite in your household.
Why You’re Going to Love This Gluten-Free Belgian Waffles
Taste so good and have a great texture - They taste so good with a fluffy interior and a crispy exterior.
Easy to make - Follow my easy step-by-step directions to recipe success. Once you have made them, trust me, it won't be the last time.
So many topping choices - You can select really whatever toppings you enjoy. From the traditional syrups to cinnamon and sugar, or go all out and add berries and cream. The choice is yours.
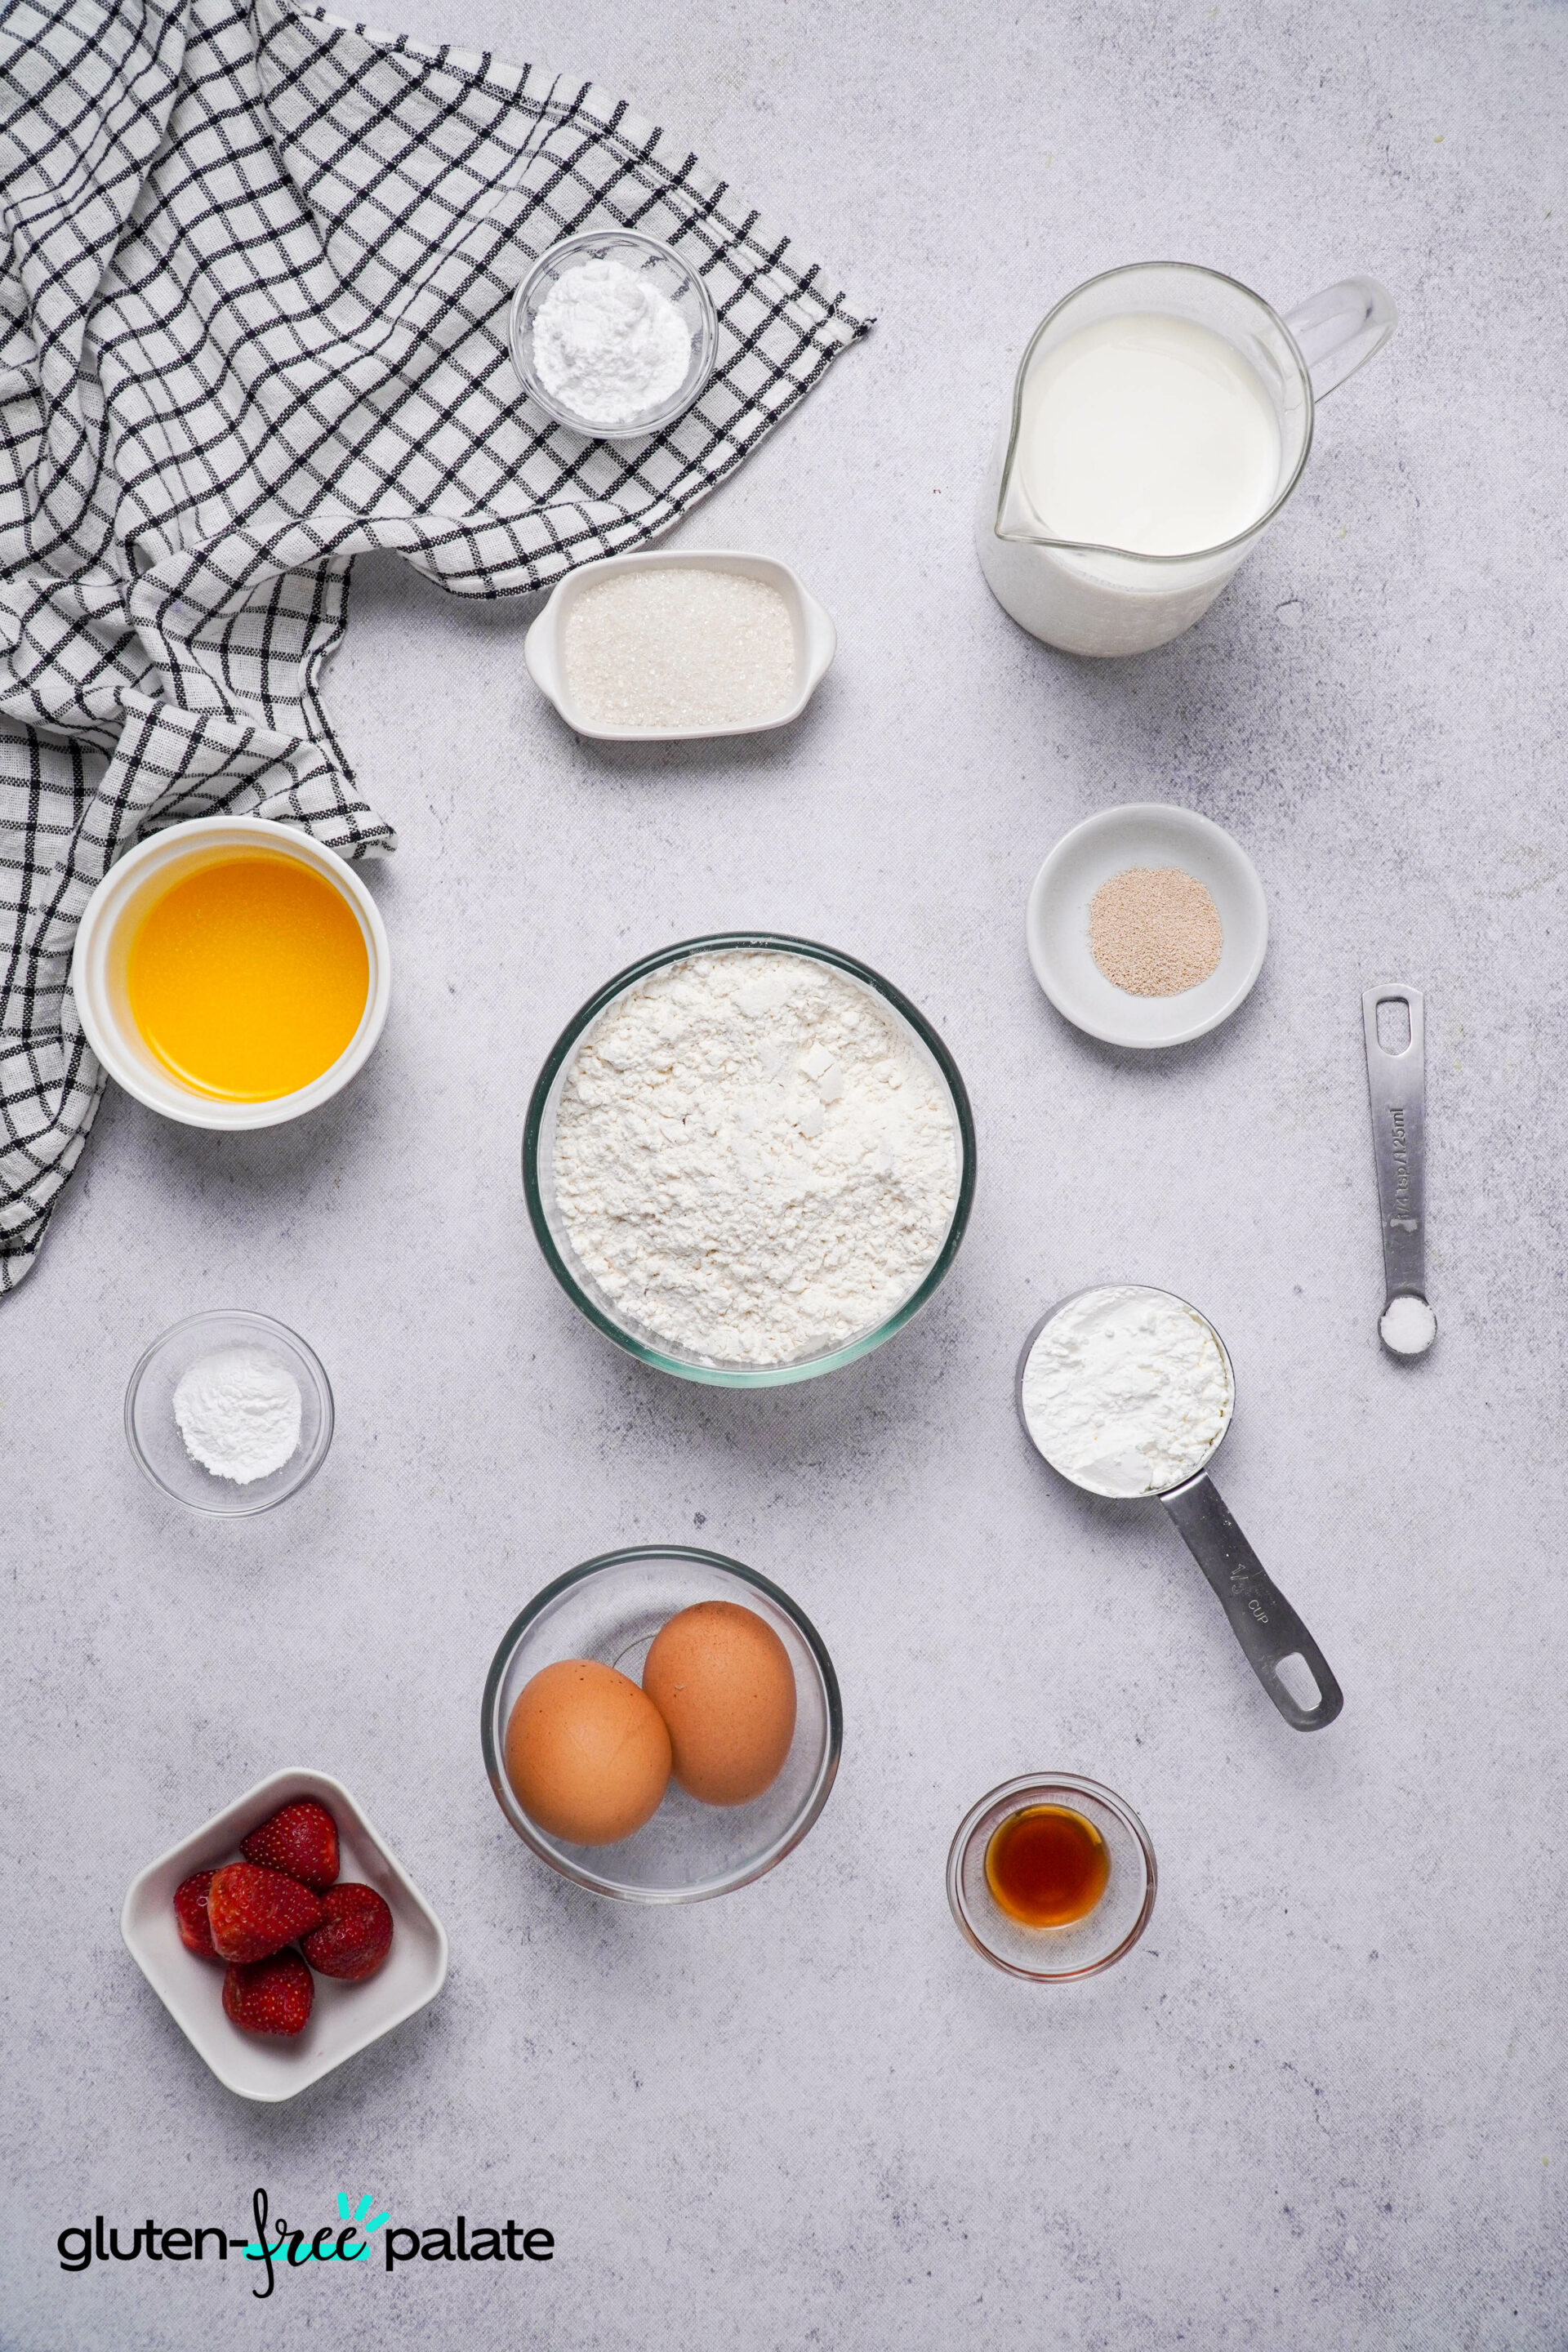
Ingredients in Gluten-Free Belgian Waffles
Eggs - 2 large eggs at room temperature. The eggs bind the mixture together and contribute to the fluffy texture.
Yeast - 1 ½ teaspoons instant yeast.
Butter - ¼ cup melted butter.
Sugar - 3 tablespoons of granulated sugar.
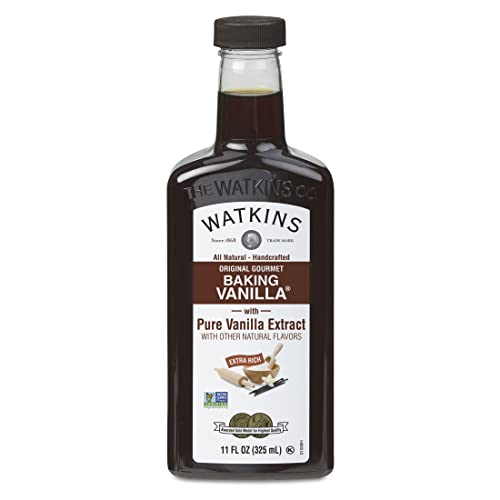
Extract - 2 teaspoons vanilla extract. Using a good-quality extract makes such a difference to any recipe.
Buttermilk - 2 ¼ cups buttermilk. This helps make a tender crumb.
Flour - 2 cups gluten-free all-purpose flour.
Cornstarch - ⅓ cup cornstarch.
Baking powder - ½ tablespoon baking powder.
Salt - ¼ teaspoon salt.
Toppings - Powdered sugar for serving and fresh fruit like bananas or berries or whatever you choose.
Equipment Needed for Gluten-Free Belgian Waffles
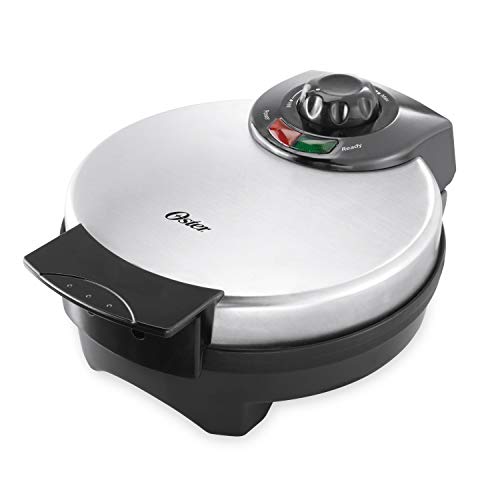
Waffle iron - Use a good quality non-stick waffle iron.
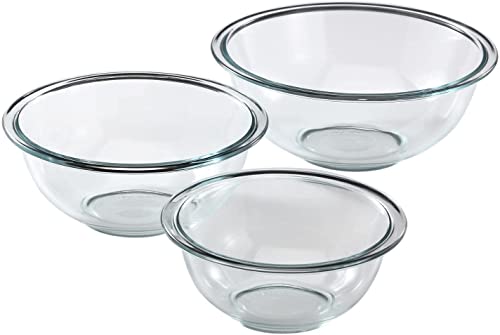
Mixing bowls - The mixing bowls are used to mix and combine the ingredients for the batter and toppings.
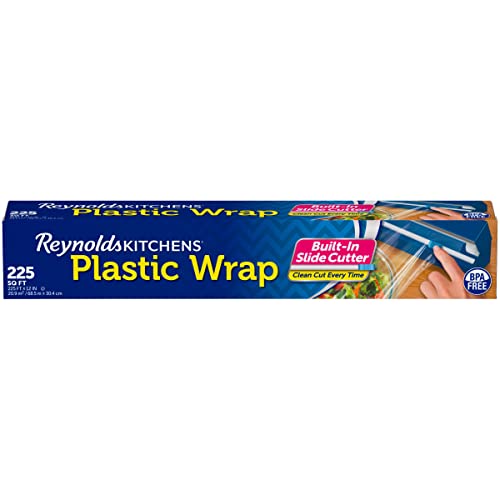
Plastic wrap - The plastic wrap is used to cover the mixing bowl so that the dough rests for 45-60 minutes. This allows the yeast to activate and the flavors to develop.
Pastry brush - You can use a silicon pastry brush to oil the waffle iron. Be sure to read the manufacturer's guide.
If you have any questions about making Gluten-Free Belgian Waffles, please leave a comment, and we will get back to you as soon as possible.
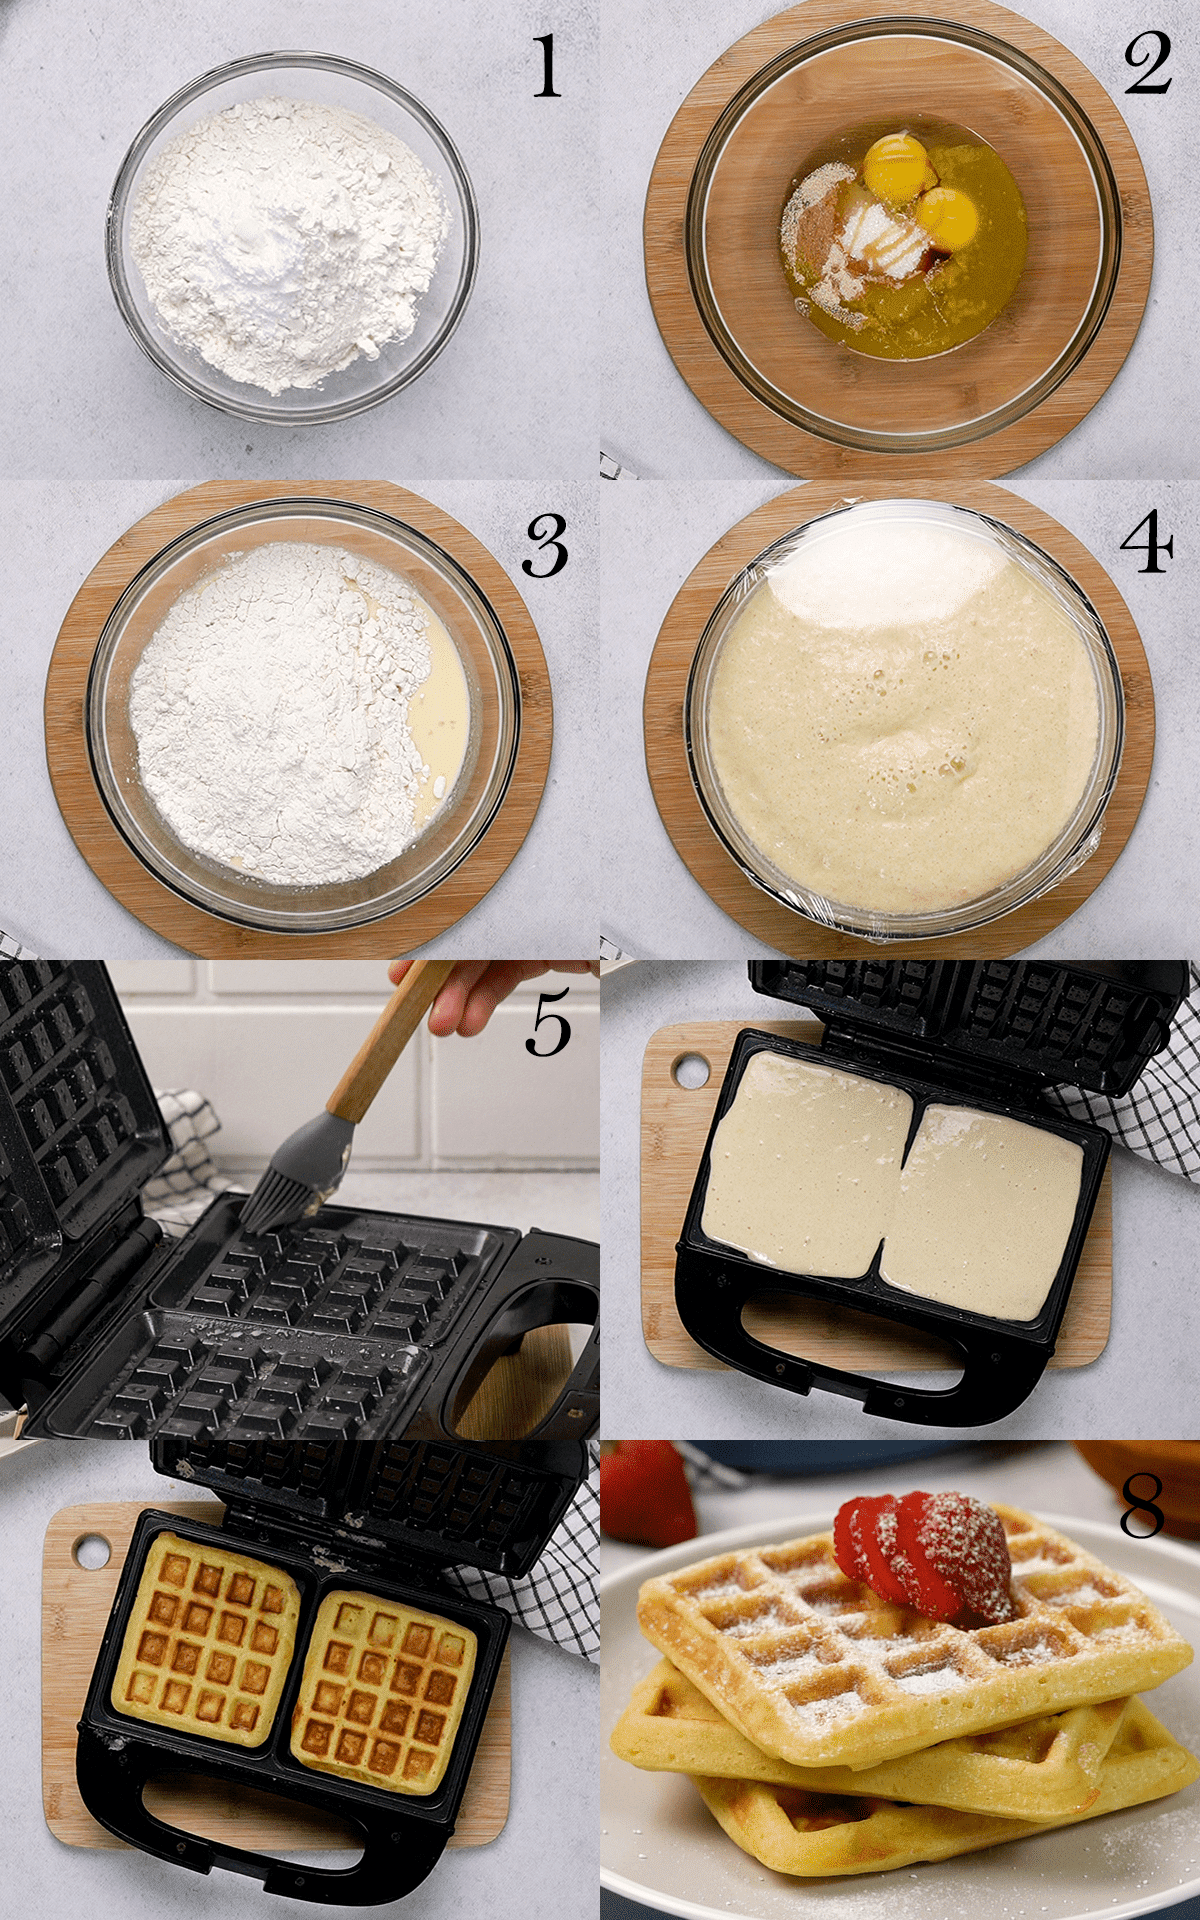
How to Make Gluten-Free Belgian Waffles
- In a bowl, mix together flour, cornstarch, baking powder, and salt. Mix until incorporated. Set aside
- In a large mixing bowl, add eggs, instant yeast, melted butter, granulated sugar, and vanilla extract. Mix well until the sugar is fully dissolved.
- Add the flour mixture to the egg mixture in batches. Mix well and cover with plastic wrap. Let the dough rest for 45-60 minutes.
- Preheat the waffle iron.
- Add the batter to your waffle maker and cook according to the instructions on the machine.
- Serve warm with powdered sugar and fresh fruit. Enjoy!
Tips for Making the Best Gluten-Free Belgian Waffles
Let the batter rest - The batter needs to rest for 45-60 minutes for it to rise.
Use the correct waffle iron - Belgian waffles are known for their deep pockets. Those are the indentations where all the yummy toppings are held. Also, try and get a non-stick waffle iron this helps the batter not stick and makes for easier cleanup.
Don't overmix - Overmixing the batter will lead to tough and dense waffles, which are not great to eat.
Cook them until they are golden brown - You want waffles that are not pale but nice and crispy and brown.
Serve them hot - We like to eat them immediately as nothing beats a waffle straight off a waffle iron.
Frequently Asked Questions
How Do I Store Gluten-Free Belgian Waffles?
Let them cool, and then store them in the refrigerator. They can be stored for 3-4 days.
Can I Freeze Gluten-Free Belgian Waffles?
Yes, and you should. Store them in the freezer for up to 3 months. We like to individually wrap them in plastic wrap or aluminum foil and then take them out as needed. I suggest you reheat them once they have thawed in the toaster so they can crisp up again.
Can You Make This Gluten-Free Belgian Waffles Ahead of Time?
Yes, you can. You can make the batter 24 hours before and keep it in the refrigerator covered with plastic wrap. Alternatively, make them all and then allow them to cool and place them in the fridge for 3-4 days. Or freeze them and thaw them as needed.
What Substitutions / Replacements Can I Make in These Gluten-Free Belgian Waffles?
Buttermilk - If you don't have buttermilk on hand, you can make a DIY version by adding 1 tablespoon of lemon juice or vinegar to 1 cup of milk and letting it sit for 5-10 minutes. Alternatively, you can use dairy-free milk such as almond milk, soy milk, or coconut milk.
Egg-free - You can try an egg replacer. I have not as yet.
Dairy-free - Use butter and buttermilk alternatives. Again, I have not tested these.
Toppings - Adjust the topping according to what you like. Scroll down for some ideas!
What Is The Difference Between A Waffle And A Belgian Waffle?
There are 3 main differences size, shape, and texture. Belgian waffles are bigger in size. The grid pattern is deeper, and they are thicker and fluffier than regular waffles. The reason for the difference in texture is due to the yeast batter.
Why Are My Belgian Waffles Not Crispy?
Here are a few tips to get crispy waffles
- The waffle iron is not hot enough - Make sure your waffle iron is hot enough.
- Too much moisture - If you have not measured the liquid ingredients correctly, the Belgian waffles will not crisp up.
- Cooking time too short - Follow the manufacturer's guide on how long to cook the waffles.
- Using the incorrect flour - I would suggest you use the flour I have used.
How Many Carbs Are In A Gluten-Free Belgian Waffle?
These have 55 grams of carbohydrates in them, but if you change out ingredients, this will change.
What Toppings Can I Place On These GF Waffles?
- Fresh Fruit - Top your waffles with various fruit, such as sliced bananas, strawberries, blueberries, raspberries, or blackberries.
- Nut Butter - Spread some peanut butter, almond butter, or cashew butter on top of your waffles for a delicious and healthy topping.
- Maple Syrup - Drizzle some maple syrup over your waffles for a classic sweet and flavorful topping.
- Whipped Cream - Top your waffles with a dollop of whipped cream, either dairy-based or non-dairy-based depending on your dietary needs.
- Chocolate Chips - Sprinkle some chocolate chips over your waffles for a decadent and indulgent topping.
- Honey - Drizzle some honey over your waffles for a natural and sweet topping.
- Yogurt - Spoon some dairy-based or non-dairy-based yogurt on top of your waffles for a creamy and tangy topping.
- Cinnamon and Sugar - Sprinkle a mixture of cinnamon and sugar over your waffles for a warm and comforting topping.
Gluten-Free Belgian Waffles
These gluten-free Belgian waffles are crispy on the outside and fluffy on the inside. They are easy to make and customize them with your favorite toppings.
Ingredients
- 2 large eggs
- 1 ½ teaspoons instant yeast
- ¼ cup melted butter
- 3 tablespoons granulated sugar
- 2 teaspoons vanilla extract
- 2 ¼ cups buttermilk
- 2 cups gluten-free all-purpose flour
- ⅓ cup cornstarch
- ½ tablespoon baking powder
- ¼ teaspoon salt
Toppings :
- powdered sugar for serving
- fresh fruit
Instructions
- In a bowl, mix together flour, cornstarch, baking powder, and salt. Mix until incorporated. Set aside.
- In a large mixing bowl, add eggs, instant yeast, melted butter, granulated sugar, and vanilla extract. Mix well until the sugar is fully dissolved.
- Add the flour mixture to the egg mixture in batches. Mix well and cover with plastic wrap. Let the dough rest for 45-60 minutes.
- Preheat the waffle iron.
- Add the batter to your waffle maker and cook according to the instructions on the machine.
- Serve warm with powdered sugar and fresh fruit. Enjoy!
Notes
- Let the dough rest for 45-60 minutes
Recommended Products
As an Amazon Associate and member of other affiliate programs, I earn from qualifying purchases. They never cost you extra.
-
 Bob's Red Mill Resealable Gluten Free All Purpose Baking Flour, 22 Ounce (Pack of 2)
 -
Watkins All Natural Original Gourmet Baking Vanilla, with Pure Vanilla Extract, 11 ounces Bottle, 1 Count (Packaging May Vary)
-
Waffle Maker
-
Pyrex Smart Essentials 3-Piece Prepware Mixing Bowl Set, 1-Qt, 1.5-Qt ,and 2.5-Qt Glass Mixing Bowls, Dishwasher, Microwave and Freezer Safe
-
Reynolds Kitchens Quick Cut Plastic Wrap, 225 Square Feet
-
HOTEC 2 pieces Set Basting Brushes Silicone Heat Resistant Pastry Brushes Spread Oil Butter Sauce Marinades for BBQ Grill Barbecue Baking Kitchen Cooking BPA Free Dishwasher Safe (Classic Blue)


Nutrition Information:
Yield:
8Serving Size:
1Amount Per Serving: Calories: 210Total Fat: 8gSaturated Fat: 4gTrans Fat: 0gUnsaturated Fat: 3gCholesterol: 65mgSodium: 353mgCarbohydrates: 32gFiber: 1gSugar: 25gProtein: 4g
This nutrition info is based on the exact ingredients and brands used at the time. It may not be 100% accurate. Please check your ingredients nutrition labels.


Rachel Nix
Hi, I am making these right now, wanted to point out that in the Directions, nowhere does it say when to add the Buttermilk to the recipe! Also, a pointer to make buttermilk when you don't have any at homeand are in a pinch is to add 1 Tablespoon for every 1 cup of milk called for in the recipe, so for this I added 2 T. to my whole milk. I always make my buttermilk this way because I never remember to by it!
I am assuming I just add the buttermilk to the egg yeast sugar mixture? Thanks
God Bless
Momma Nix
Wendy Stoltz
Hi Momma Nix! Thank you for reaching out and for bringing this to my attention. I apologize for any confusion in the recipe directions. You are absolutely right; the buttermilk should be added to the egg-yeast-sugar mixture. Yes we have the directions in the post to make your own which is such a lifesaver! Happy baking!