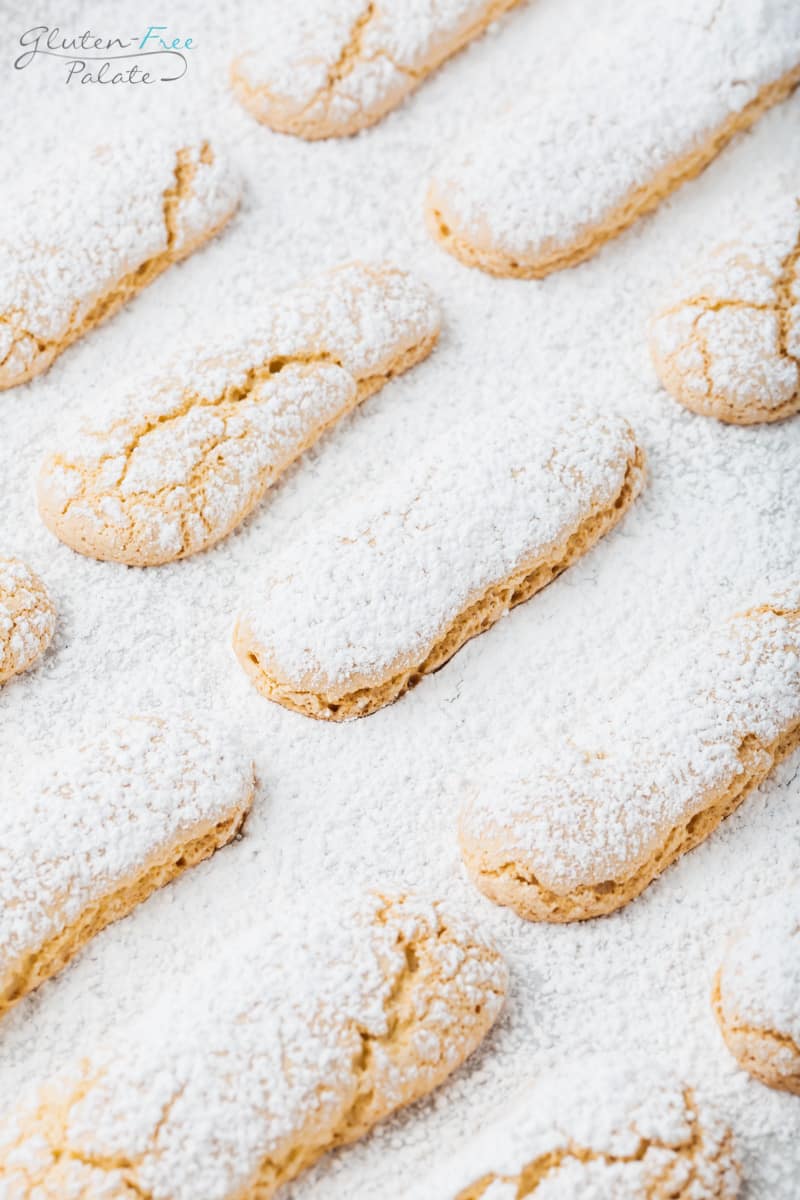
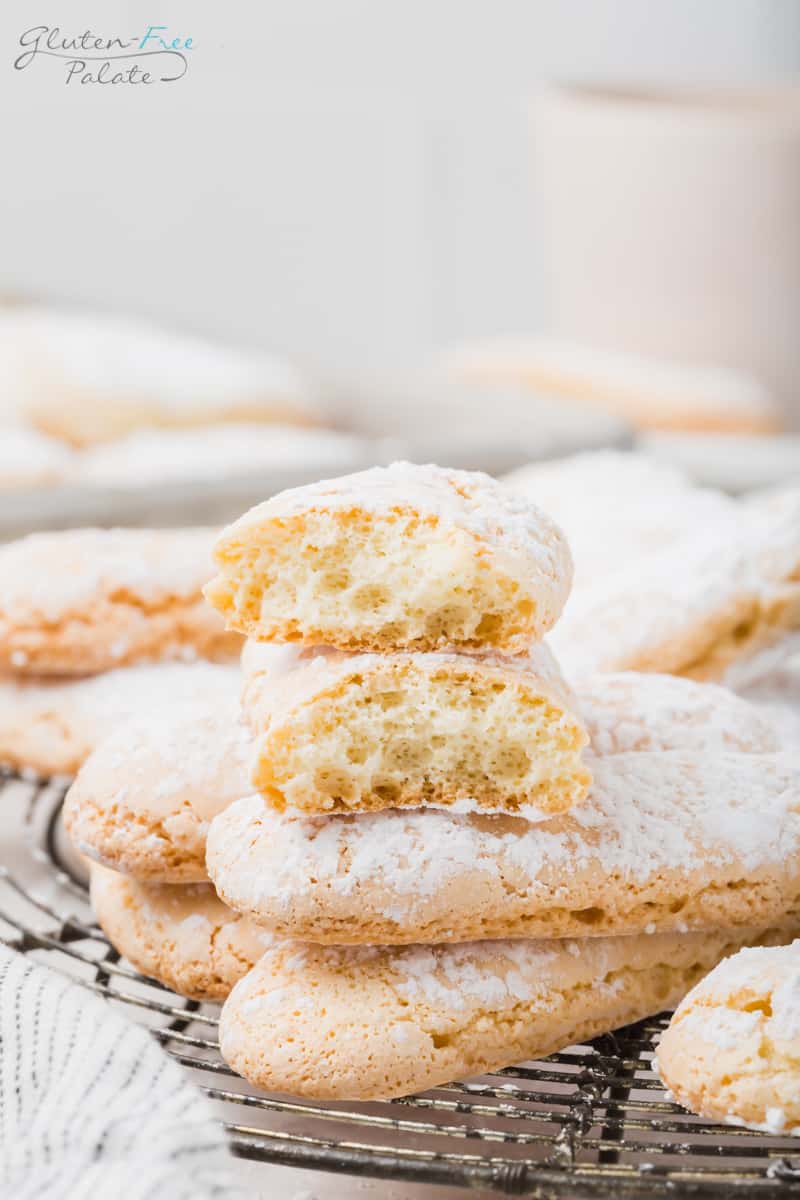
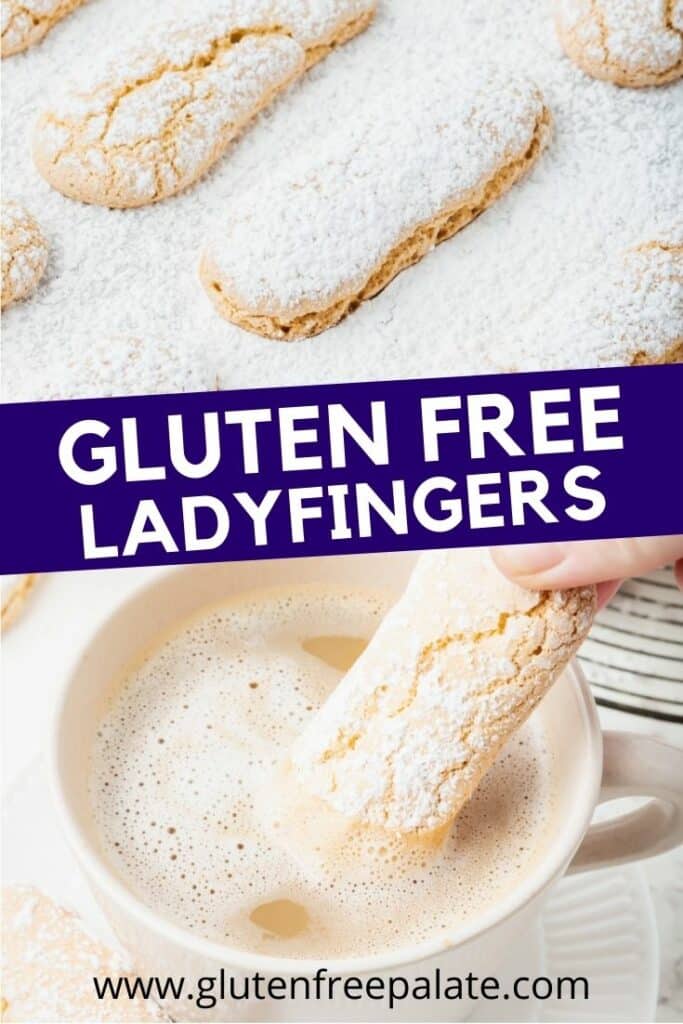
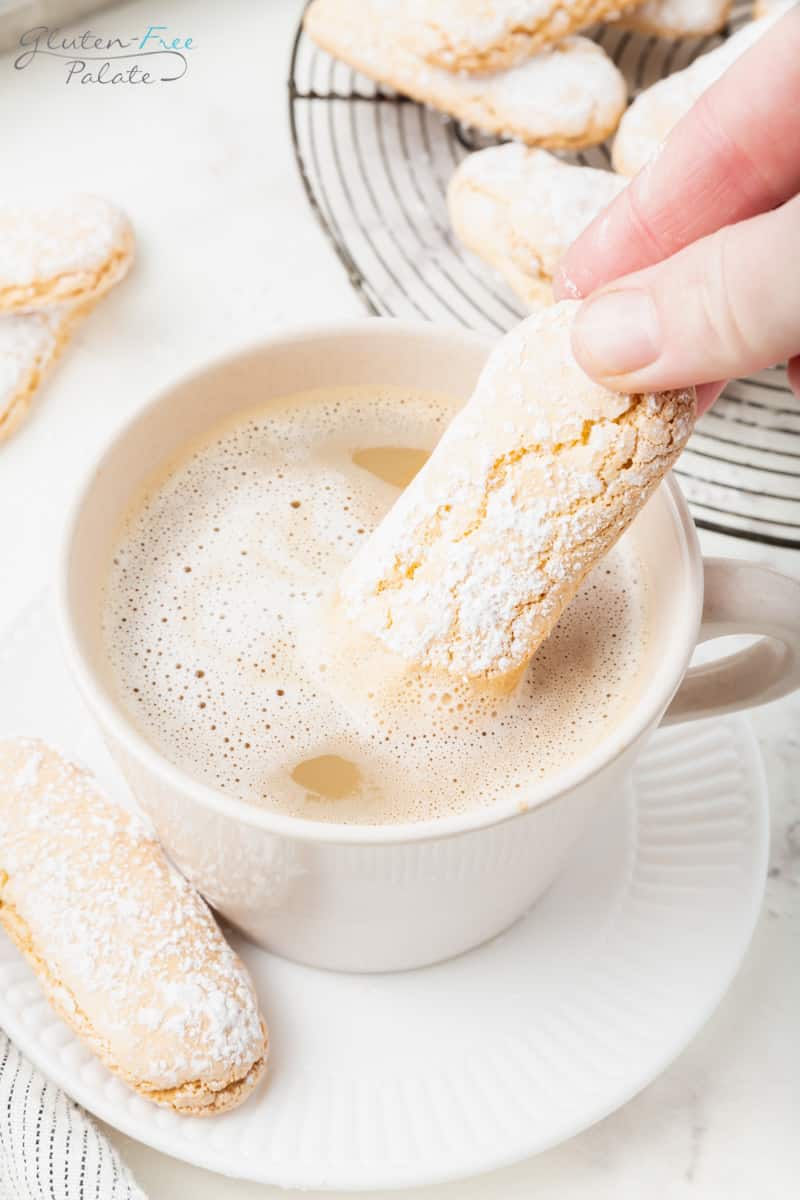
Craving a delicious gluten-free treat? Then you need to make these Gluten-Free Ladyfingers. A simple-to-make cookie perfect for dipping into your favorite hot beverage or using in your favorite desserts. These gluten-free ladyfingers turn out wonderfully crisp outside yet slightly soft in the middle, making the best combination. They're guaranteed to impress.
If you've ever tried to find gluten-free ladyfingers in a store, you might know it can be difficult.
While some companies are making gluten-free ladyfingers, I find that they are a seasonal item, often only available around the holidays and often only in specialty grocery stores. They can be very expensive as well.
It's easy to make gluten-free ladyfingers, which taste much better.
You need a crisp, airy ladyfinger for making tiramisu or trifles, and this recipe will give you exactly what you need without the stress of searching for ingredients. I originally thought ladyfingers would be complicated, but I was pleasantly surprised that they were simple.
You can bake these as soft cookies or bake them longer for a crisp, Italian-style "savoiardi" ladyfinger. Just a handful of pantry ingredients and some eggs are needed to make these amazing gluten-free ladyfingers.
NOTE: If you don't want to make your own, you can find a couple of premade options on Amazon, but they won't be quite as delicious:
Why You’re Going to Love These Gluten-Free Ladyfingers
Simple ingredients - These homemade ladyfingers are made with simple pantry staples you likely already have.
Delicious homemade taste - They taste much better than store-bought options and have a fresh, airy texture perfect for dunking and soaking up flavors.
Versatile and easy to make - Whether you're using them to create a decadent tiramisu or enjoying them on their own, these gluten-free ladyfingers are incredibly versatile and easy to make, requiring just a few steps.
Ingredients in Gluten-Free Ladyfingers
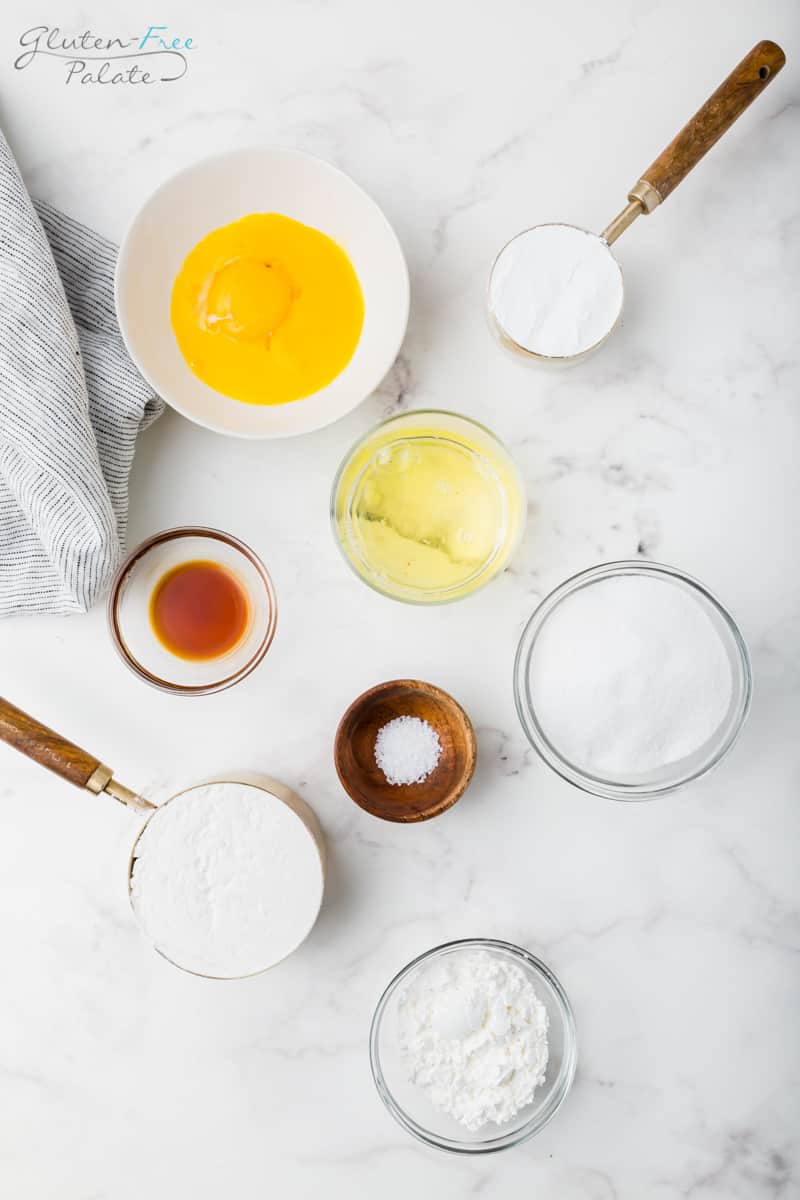
Eggs - Separate three eggs so the yolks and whites are in separate bowls. Each has its purpose in this recipe, but they go in at different times. The leavening agent in this gluten-free ladyfingers recipe is the air incorporated into the batter by whipping the egg whites, so no baking powder is required. The whipped egg whites provide the necessary lift and structure to the ladyfingers, resulting in their light and airy texture.
Granulated Sugar - This is our sweetener and gives crispness and texture to the ladyfingers.
Vanilla Extract - This is our main flavor, so use a high-quality vanilla extract for the best results.
Xanthan Gum - You only need to add this if your flour blend doesn't include any. Bob's flour mentioned above has Xanthan gum, so I didn't need to add more.
Cornstarch - Adds to the airy texture of these cookies and helps the dough stay together.
Salt - Just a pinch brings out the vanilla's sweetness and flavor.
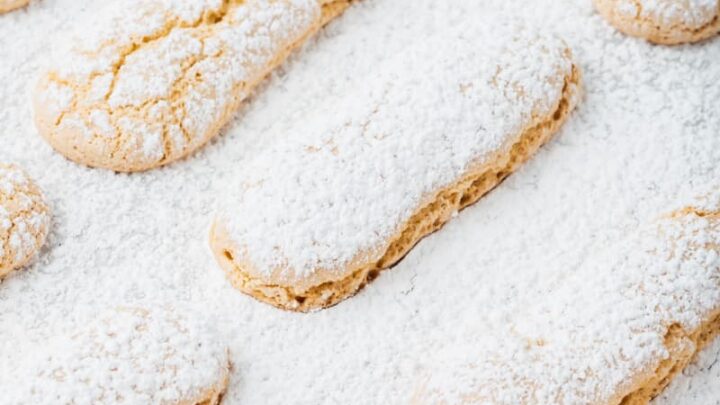
Powdered Sugar - Dusting the tops of the ladyfingers with powdered sugar adds a bit more sweetness and makes them so pretty.
Prepared Baking Sheet - You'll need a baking sheet to place the piped ladyfinger batter for baking.
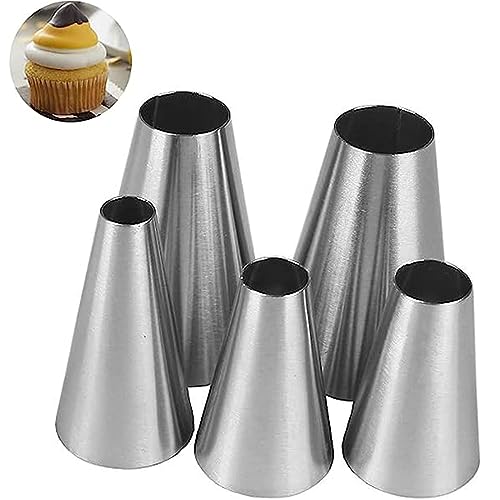
Pastry Bag with Large Round Tip or Ziplock Bag - A pastry bag with a large round tip or a ziplock bag with the corner snipped off can be used to pipe the ladyfinger batter onto the baking sheets.
Wire Rack - A wire rack is essential for cooling the baked ladyfingers and maintaining their crispness.
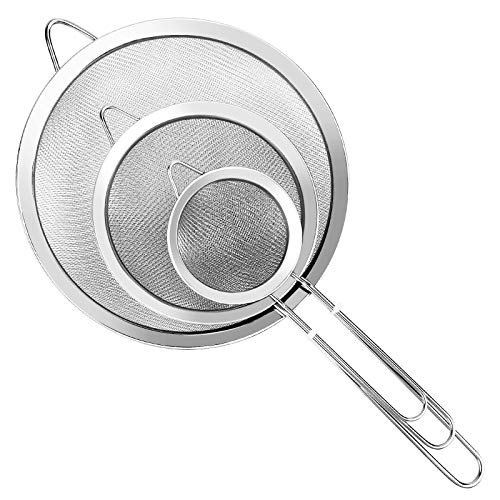
Sifter - A sifter will come in handy for sifting the dry ingredients over the egg mixture, ensuring a smooth and well-incorporated batter.
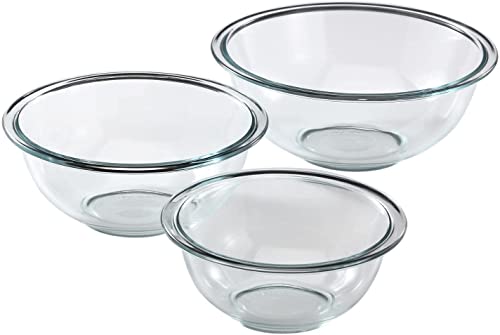
Mixing Bowls - You'll need separate bowls for whisking the egg yolks, whipping the egg whites, and combining the dry ingredients.
Whisk or Electric Mixer - Whisk or use an electric mixer to beat the egg yolks and sugar until light and pale and to whip the egg whites to stiff peaks.
Spatula - A spatula will be useful for folding the egg whites into the egg yolk mixture and gently incorporating the dry ingredients.
If you have any questions about making Gluten-Free Ladyfingers, please leave a comment, and we will get back to you as soon as possible.
How to Make Gluten-Free Ladyfingers
Add half of the sugar and the egg yolks to a large bowl. Whisk together until it reaches a light pale yellow color; this will take a few minutes.
Stir in the vanilla and set aside.
In a separate bowl, beat the egg whites with salt until soft peaks form. Then, add the remaining sugar, whipping until stiff, glossy peaks form.
Gently fold the egg whites into the egg yolk mixture.
Combine the gluten-free flour blend, xanthan gum (if using), and cornstarch. Sift over the egg mixture and carefully fold the flour mixture into the eggs until combined.
Pipe the batter onto prepared baking sheets using a pastry bag with a large round tip or with the tip cut off. Create cookies that are about 3 inches in length and 1 inch wide, making sure to leave space between each ladyfinger.
Dust the tops with powdered sugar, then bake as directed in the recipe card below.
Remove the ladyfingers from the baking sheets immediately and transfer them to a wire rack to cool.
These numbered steps match the numbered photos above and are for illustration purposes. Please see the recipe below for the complete ingredient list and instructions.
TIPS FOR MAKING HOMEMADE GLUTEN-FREE LADYFINGERS
I have a few tips to ensure your ladyfingers always come out perfectly.
Whip the egg whites fully to stiff peaks - The cookies won't rise in the oven if the eggs aren't whipped enough. To check if your egg whites are whipped enough, dunk a spatula or the electric beaters in the egg white mixture and pull out. The peaks should stand up straight. If they fold over a little bit, that means you need to keep whipping the egg whites a little longer.
Fold carefully - It's important to carefully fold the whipped egg whites into the egg yolk mixture to keep as much air as possible. Sometimes it gets hard to work with too much-whipped egg mixture simultaneously, so doing it gradually is better. Fold in about ⅓ of the egg whites at a time. This way, you have better control.
These ladyfingers turn out crispy outside and slightly soft in the middle. I like this texture for dunking in coffee and recipes like my Gluten-Free Tiramisu. You will want them to be crispy enough to hold up to being soaked in espresso.
Frequently Asked Questions
What Can I Use Gluten-Free Ladyfingers For, Besides Tiramisu?
Ladyfingers are best known for being included in Tiramisu recipes, like my Gluten-Free Tiramisu, where they play very nicely with espresso and mascarpone whipped cream to create a decadent dessert.
To line the edge of a no-bake chocolate pudding pie
To make a Charlotte cake, soak the gluten-free ladyfingers in the sweet liquid and line the bottom and sides of a pan with them
GF Ladyfingers Ingredients Substitutions
Eggless Gluten-Free Ladyfingers
Vegan gluten-free ladyfingers are possible, but only with a recipe that was specifically created to make them without eggs. It would probably need to be made with whipped aquafaba instead of egg whites. Keep in mind that egg yolks are harder to replace.
Sugar-Free Gluten-Free Ladyfingers
You can replace the sugar from the recipe with a Swerve brand confectioners' sweetener. Although it's called a "confectioners" sweetener, it's actually an alternative to powdered sugar.
Can I use coconut flour to make ladyfingers?
No. Coconut flour doesn't behave like other flours. It absorbs its weight many times in moisture, and that's why it only works in recipes designed specifically for it.
Can I Freeze Gluten-Free Ladyfingers?
Yes. However, they will lose their original fresh texture once you freeze them. I recommend that you only freeze your gluten-free ladyfingers if you're going to use them as a part of another dessert.
How to Store Gluten-Free Ladyfingers
You can store GF ladyfingers by storing them in a sealed glass container. But if you are making them for tiramisu or in another recipe where they will absorb a sweet liquid, their texture will be refreshed, so don't worry if they get a bit stale.
WHAT ARE LADYFINGERS?
Ladyfingers are an Italian sponge cake-style cookie dating back all the way to the 1300s. Called Savoiardi in Italian, they were named after the House of Savory, which was the last monarch family in Italy.
Are ladyfingers supposed to be soft?
This gluten-free ladyfingers recipe makes ladyfingers crunchy on the outside and slightly soft inside when they are very fresh. They will harden as they sit, or you can bake them just a bit longer to make them crispy all the way through.
Are ladyfingers gluten-free, naturally?
No. Ladyfingers are originally made with an all-purpose flour base. To make gluten-free ladyfingers, you must follow a gluten-free recipe like this!
Can I substitute sugar with granulated erythritol in this recipe?
You can, but remember that erythritol alone doesn't really imitate sugar in the oven.
Why are my ladyfingers flat?
One of the reasons might be that you have overmixed the batter for the GF ladyfingers. Unless you first whip the egg whites until they form stiff peaks and then whip the egg yolks and sugar, your ladyfingers won't lift properly.
How Do You Serve Gluten-Free Ladyfingers?
Gluten-free ladyfingers can be served in several ways:
As a standalone treat - Enjoy these gluten-free ladyfingers on their own as a delightful snack. They pair perfectly with a cup of hot coffee or tea. For an added treat, pair them with sweet dessert wine.
In traditional desserts - Use gluten-free ladyfingers as a key ingredient in classic desserts like GF Tiramisu or trifle. Their light and airy texture makes them ideal for soaking up flavors and adding a delightful layer to your desserts.
As a base for creative desserts - Get creative and use gluten-free ladyfingers as a base for your sponge cake or dessert creations. They can be used to line the edges of cheesecakes as a layer in a Charlotte cake or other delicious sponge cake or dessert recipes that call for a crisp and flavorful base.
Preheat oven to 375F. Line two baking sheets with parchment paper.
In a large bowl, add ⅓ cup of sugar with the egg yolks. Whisk together until it reaches a light pale yellow color, about 2-3 minutes.
Stir in the vanilla. Set aside.
In a separate bowl, beat the egg whites with the salt until soft peaks form.
Then, gradually add in the remaining ⅓ cup of sugar, whipping until stiff, glossy peaks form.
Gently fold the egg whites into the egg yolk mixture.
Combine the gluten-free flour blend, xanthan gum (if using) and cornstarch together. Sift over the egg mixture and carefully fold the flour mixture into the eggs until combined.
Place a pastry bag fitted with a large round tip or the tip cut off in a large glass. Add the batter to the pastry bag.
Pipe the batter onto the prepared baking sheets, about 3-inches in length and 1-inch wide, being sure to leave at least an inch of space between each ladyfinger.
Dust the tops with powdered sugar.
Bake at 375F for 7 minutes. Rotate the pans and bake an additional 6-7 minutes, until the ladyfingers are golden and crispy.
Remove the ladyfingers from the baking sheets immediately and transfer to a wire rack to cool.
Notes
Following these baking instructions will give you crisp ladyfingers that are perfect for dunking in coffee or making tiramisu. If you want softer cookies, adjust the bake time to be a few minutes less.
It is important that you whip the egg whites until they have stiff peaks so that the cookies will rise in the oven. If your peaks fold over when you lift out the beater, keep whipping.
Fold the egg whites into the egg yolks very carefully. I like to fold my egg whites in ⅓ at a time. Gradual is better. This way you have better control and can keep as much air as possible in your mixture.
Store these ladyfingers in an airtight container at room temperature for up to a week.
Recommended Products
As an Amazon Associate and member of other affiliate programs, I earn from qualifying purchases. They never cost you extra.
2 cookies Amount Per Serving:Calories: 37Total Fat: 1gSaturated Fat: 0gTrans Fat: 0gUnsaturated Fat: 0gCholesterol: 19mgSodium: 20mgCarbohydrates: 7gFiber: 0gSugar: 4gProtein: 1g
This nutrition info is based on the exact ingredients and brands that I used a the time. It may not be 100% accurate. Please check your ingredients nutrition labels.
Did you make these Gluten-Free Ladyfingers? Please leave a comment below, letting me know what you think.
Note on Questions and Comments: All comments and questions are answered in the order they are received. I aim to answer all questions within 48 hours. There may be a delay on weekends and holidays.
Reader Interactions
Comments
Tina
The texture of these ladyfingers is totally perfect! I can't wait to make a gluten free tiramisu this thanksgiving and Christmas !!
Can I just say these bake up brilliantly as mini cookies? I piped them like macarons (on a silicone macaron sheet to keep them neat) and they worked like an absolute charm! Sandwiched together with raspberry jam and vegan buttercream they went down a treat with non-GF and non-dairy-free people alike at my camera club. SO simple, yet such an awesomely versatile recipe - thank you! I shall be trying whoopie pies with this mix next 🙂
I don't have experience. But with the research I did, you could possibly use natural sweeteners: Examples include stevia and monk fruit. These plant-based sweeteners do not raise blood sugar levels and are generally considered safe for people with diabetes. It is important to consult with a healthcare provider or a registered dietitian to determine if these sugar substitutes are appropriate for your individual needs and how to incorporate them into your diet. They can provide you with guidance on the appropriate amount to consume and can help you choose the best sugar substitute for your specific dietary requirements.
I'm so glad to hear that you were able to make ladyfingers with the recipe and that it turned out well for you! It's always exciting to see the results of your efforts and I'm happy that the recipe was helpful and easy to follow. Enjoy your delicious ladyfingers!
These turned out great, but because I used a silicone lady finger mold to bake the lady fingers, it ended up taking another 10 minutes , rotated every few minutes. But the results were perfect. Thank you for this awesome recipe !
I'm so glad to hear that the lady fingers turned out perfectly, even with the extra baking time needed for the silicone mold! Rotating them to ensure even baking was a smart move. Using a silicone mold can sometimes affect cooking times due to its material properties, but it sounds like you managed it beautifully!


 Checkered Chef Cooling Rack - Set of 2
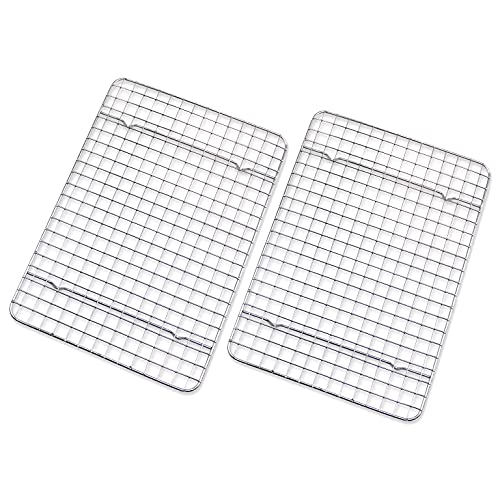


Tina
The texture of these ladyfingers is totally perfect! I can't wait to make a gluten free tiramisu this thanksgiving and Christmas !!
Cara
Can I just say these bake up brilliantly as mini cookies? I piped them like macarons (on a silicone macaron sheet to keep them neat) and they worked like an absolute charm! Sandwiched together with raspberry jam and vegan buttercream they went down a treat with non-GF and non-dairy-free people alike at my camera club. SO simple, yet such an awesomely versatile recipe - thank you! I shall be trying whoopie pies with this mix next 🙂
chrystal
I am so glad you like them. Thank you for letting me know. Let me know how the whoopie pies turn out!
Best,
Chrystal
Leeanne Cutugno
How many days ahead can I bake these before I make my tiramisu.
chrystal
They should be fine 2-3 days ahead.
Best,
Chrystal
Agnieszka Prajzner
What can I replace the corn starch with?
chrystal
You cqn use arrowroot starch.
Best,
Chrystal
Irene
Will this work with regular gluten flour?
chrystal
It should work.
Best,
Chrystal
Nicole
What happens if can't find xanthan gum?
chrystal
It's an important ingredient that helps hold the cookies together.
Best,
Chrystal
Betsy
First time making these and they turned out perfect! We used them in the Tiramisu recipe but looking forward to trying them out other ways.
Sarah
Should the eggs be at room temperature?
Wendy Stoltz
Hi Sarah, yes.
Vickie Loemker
Any experience or suggestions for us diabetics related to sugar substitutes?
Wendy Stoltz
Hi Vickie,
I don't have experience. But with the research I did, you could possibly use natural sweeteners: Examples include stevia and monk fruit. These plant-based sweeteners do not raise blood sugar levels and are generally considered safe for people with diabetes. It is important to consult with a healthcare provider or a registered dietitian to determine if these sugar substitutes are appropriate for your individual needs and how to incorporate them into your diet. They can provide you with guidance on the appropriate amount to consume and can help you choose the best sugar substitute for your specific dietary requirements.
Laura
HOLY COW I HAVE LADYFINGERS!!!!!!!!!!
Thank you SO much for this simple recipe!!!
Wendy Stoltz
Hi Laura,
I'm so glad to hear that you were able to make ladyfingers with the recipe and that it turned out well for you! It's always exciting to see the results of your efforts and I'm happy that the recipe was helpful and easy to follow. Enjoy your delicious ladyfingers!
Ellen Horovitz
These turned out great, but because I used a silicone lady finger mold to bake the lady fingers, it ended up taking another 10 minutes , rotated every few minutes. But the results were perfect. Thank you for this awesome recipe !
Wendy Stoltz
Hi Ellen,
I'm so glad to hear that the lady fingers turned out perfectly, even with the extra baking time needed for the silicone mold! Rotating them to ensure even baking was a smart move. Using a silicone mold can sometimes affect cooking times due to its material properties, but it sounds like you managed it beautifully!