


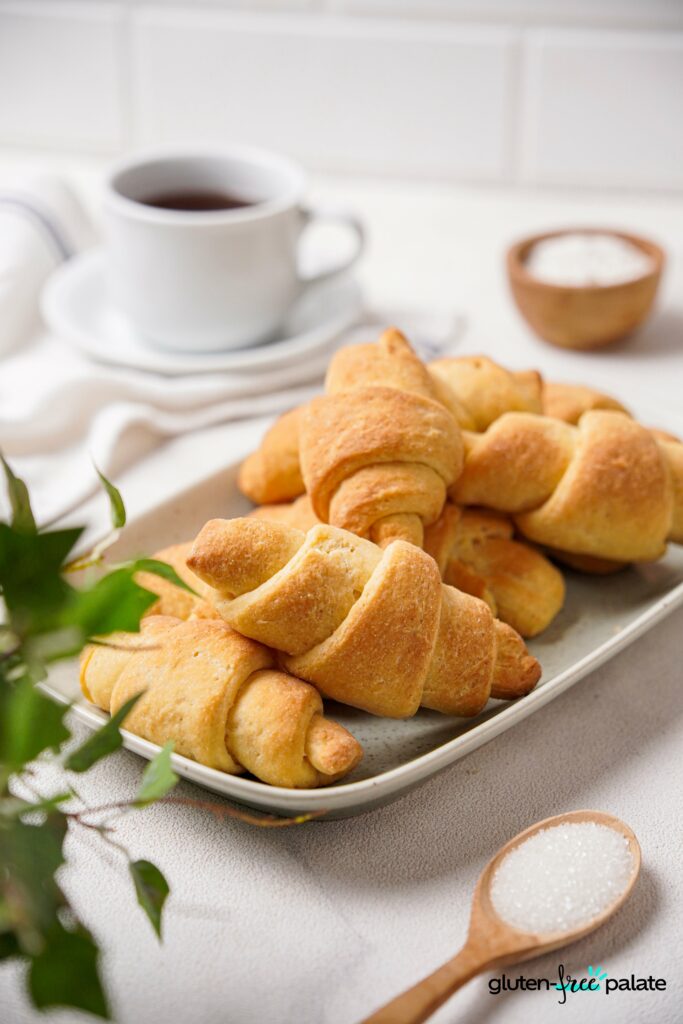
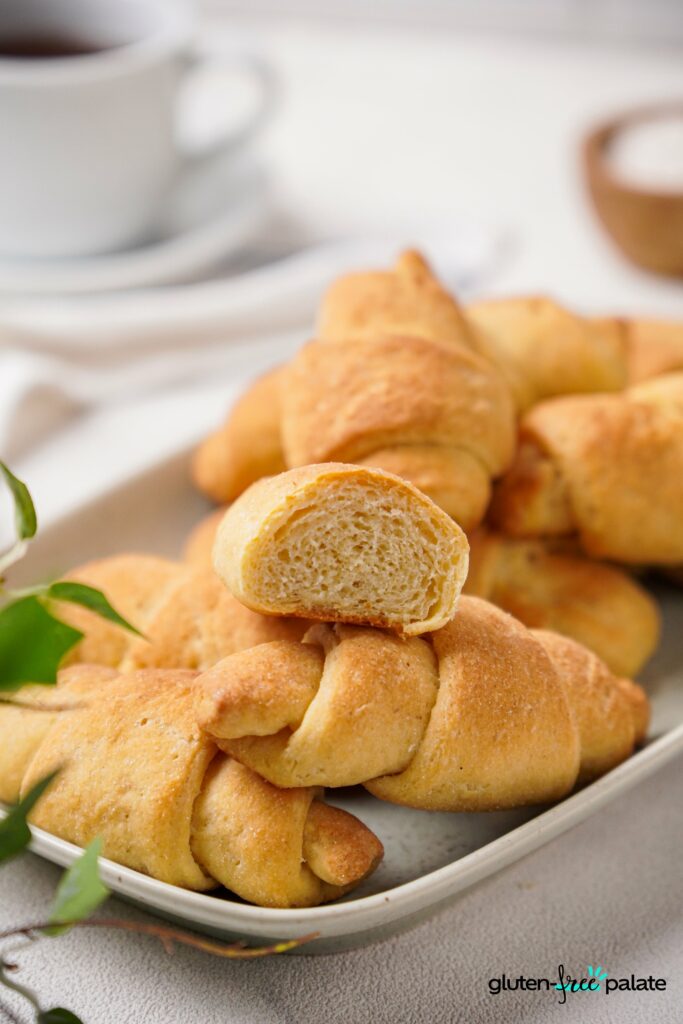
If you're a fan of warm, flaky, buttery pastries but have been missing out, then today is your lucky day; let's make gluten-free crescent rolls. Imagine sinking your teeth into a golden crescent roll with its delicate layers revealing a pillowy soft interior. Our secret lies in the combination of quality gluten-free ingredients blended to create a dough that rivals its traditional counterpart.
From heavenly Gluten-Free Croissants and delectable Gluten-Free Puff Pastry to irresistible Gluten-Free Rolls and mouthwatering Gluten-Free French Toast, these recipes are a testament to the fact that gluten-free baking can be just as indulgent and satisfying. With carefully selected ingredients and tried and tested techniques, each recipe delivers exceptional taste and texture.
Unlock the secrets of creating irresistible gluten-free artisan breads with this exciting course, guaranteed to elevate your gluten-free baking skills and tantalize your taste buds.
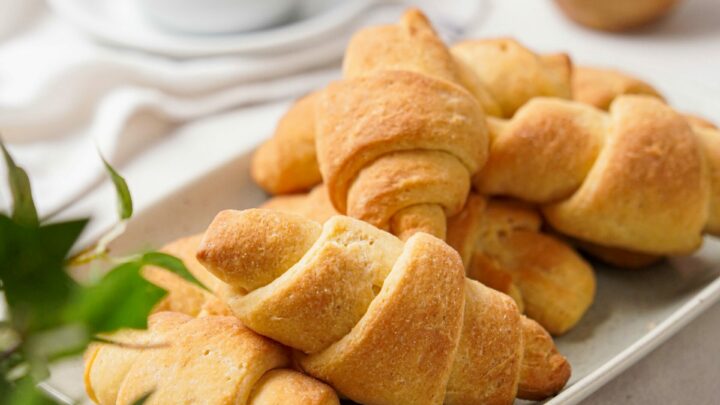
Gluten-Free Crescent Rolls Recipe
Indulge in warm, flaky pastries with our tried and tested recipe for Gluten-Free Crescent Rolls. If you've been yearning for the perfect crescent roll that's both gluten-free and irresistibly delicious, your search ends here.
With simple yet carefully selected ingredients, we've created a recipe that guarantees flaky layers, delightful texture, and an incredible taste experience that rivals traditional crescent rolls.
With just a few hours of your time, you can effortlessly create a batch of these heavenly treats. As the buttery aroma fills your kitchen, anticipation builds for that moment when you can finally bite into a warm Gluten-Free Crescent Roll. Be prepared to savor the delicate balance of flavors and revel in the joy of guilt-free indulgence. So why wait? Unlock the magic of gluten-free baking now.
Why You’re Going to Love These Gluten-Free Crescent Rolls
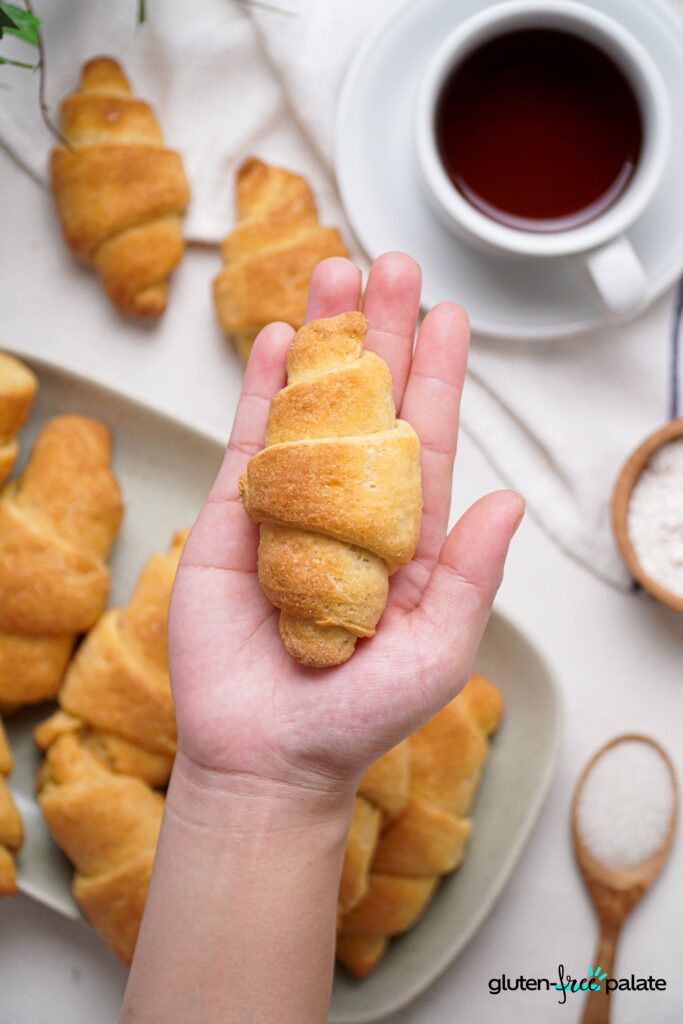
Deliciously Flaky and Buttery - These gluten-free crescent rolls are everything you want regarding texture and taste, offering the perfect balance of flakiness and buttery goodness that will leave you eating more and more (don't ask how I know this!)
Easy-to-Find Ingredients - You don't need to scour specialty stores for obscure ingredients. This recipe uses simple, readily available pantry staples, making it convenient and accessible for everyone.
Indulgence without Compromise - Finally, you can enjoy the indulgence of crescent rolls without worrying about gluten. These gluten-free versions are carefully crafted to ensure every bite is a delight, providing a guilt-free treat.
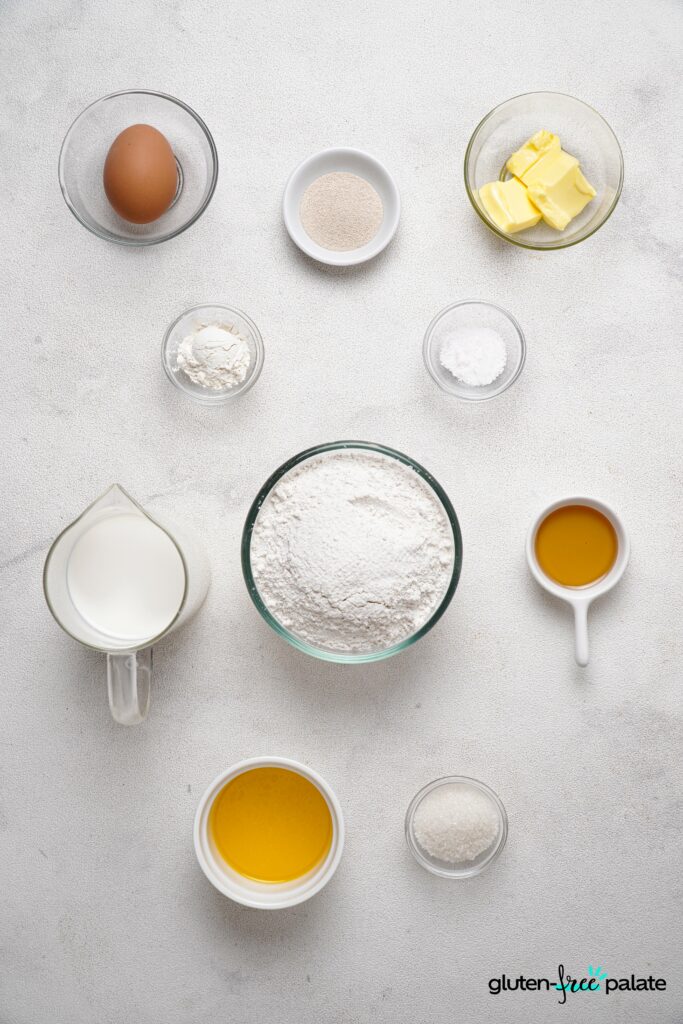
Ingredients in Gluten-Free Crescent Rolls
Gluten-Free Flour - The main ingredient in gluten-free crescent rolls, gluten-free flour replaces traditional wheat flour. It is a blend of various gluten-free flours like rice flour, tapioca flour, and potato starch, providing a suitable texture and structure to the dough.
Xanthan Gum - Xanthan gum is a common ingredient in gluten-free baking as it helps mimic gluten's elasticity and binding properties. It improves the texture and structure of the dough, making it easier to handle and resulting in a more cohesive final product. Omit this ingredient if your blend has it in already.
Sugar - Sugar adds sweetness to the gluten-free crescent rolls, balancing the flavors and providing a slight touch of caramelization during baking.
Instant Yeast - Instant yeast is a leavening agent that helps the dough rise and gives the crescent rolls a light and airy texture. It reacts with the other ingredients to release carbon dioxide, causing the dough to expand and become fluffy.
Egg - The egg in the recipe adds moisture and richness and helps bind the ingredients together, contributing to the overall texture and structure of the crescent rolls.
Milk - Milk serves as a liquid component in the dough, providing moisture and contributing to the tenderness of the crescent rolls. It also adds a subtle richness to the flavor.
Salt - Salt enhances the overall taste of the gluten-free crescent rolls, balancing the sweetness and adding depth to the flavors.
Unsalted Butter - Butter adds richness, flavor, and tenderness to the dough, resulting in a more luxurious and indulgent texture. It also helps with the browning and crispness during baking.
For Brushing: Butter And Honey - Additional butter and honey to brush on top of the GF crescent rolls before baking to make them come out nice and golden.
Equipment Needed for This Gluten-Free Crescent Rolls
Standing Mixer with Paddle Hook - A standing mixer with a paddle hook attachment makes mixing easier and more efficient, ensuring that all ingredients are thoroughly combined.
Whisk - A whisk is essential for whisking together the dry ingredients and ensuring they are evenly distributed.
Pizza Cutter - A pizza cutter comes in handy when slicing the dough into triangles, allowing for precise and effortless shaping of the crescent rolls.
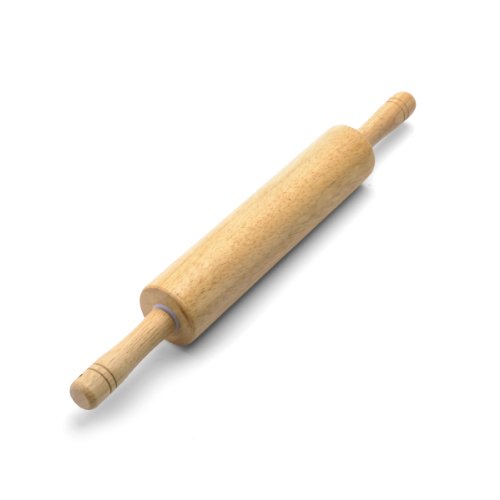
Rolling Pin - A rolling pin is needed to roll out the dough into a thin disk, creating the perfect base for shaping the crescent rolls.
Baking Sheet - A baking sheet or baking tray is necessary for placing the shaped crescent rolls before baking, providing a flat surface for them to rise and bake evenly.
Parchment Paper - Parchment paper on the baking sheet prevents the crescent rolls from sticking to the pan, making removing them easier.
Pastry Brush - A pastry brush is used for brushing the melted butter and honey mixture onto the crescent rolls before baking, adding flavor and creating a golden, shiny finish
If you have any questions about making Gluten-Free Crescent Rolls, please leave a comment, and we will get back to you as soon as possible.
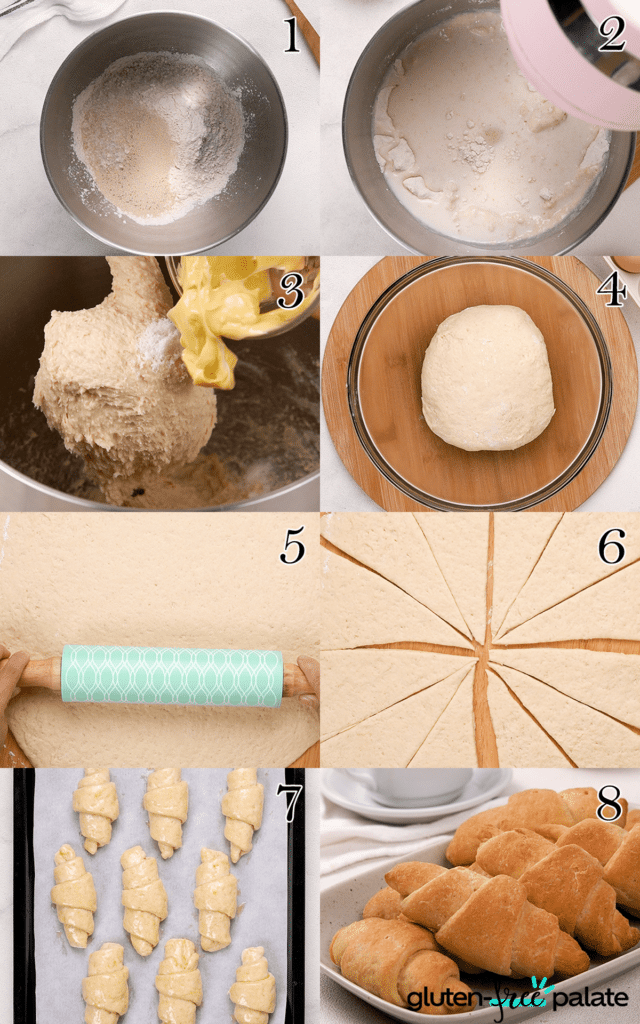
How to Make Gluten-Free Crescent Rolls
- Mix the flour, xanthan gum, sugar, and yeast in a standing bowl. With a whisk, mix them until incorporated.
- Add the egg and milk, then put the bowl into the standing mixer with a paddle hook. Mix it on low speed until the dough forms into a ball.
- Add the salt and butter. Process them again until the dough becomes smooth and easy to handle.
- Transfer the dough to a floured, flat surface and knead for 5 minutes. Form it into a ball and transfer it into a clean-oiled bowl. Cover it with a towel and let it rest for 45 minutes or until it has doubled in size.
- After 45 minutes, transfer the dough to a floured flat surface, punch it, and reform it into a ball. Roll the dough into a large thin disk (around 10 inches). Using a pizza cutter, slice it into 12 triangles.
- Add 1 triangle and roll the broad side to the pointy end. Do the same for the rest of the triangles.
- Put all the triangles into a baking sheet with parchment paper and cover them with a towel. Rest it for 45 minutes.
- Preheat the oven to 370F for 10 minutes.
- In a mixing bowl, mix butter and honey. Then brush the butter mixture on the dough.
- Bake the crescent rolls for 10-12 minutes or until golden brown.
- Enjoy your crescent roll with milk, coffee, or tea.
Tips for Making the Best Gluten-Free Crescent Rolls
Measure Ingredients Accurately - Use measuring cups and spoons specifically designed for gluten-free baking to ensure precise measurements, as accuracy is crucial in achieving the perfect texture.
Handle the Dough with Care - Gluten-free dough is delicate, so handle it gently to prevent overworking. This will help maintain the desired flakiness and prevent the dough from becoming tough.
Allow Sufficient Resting Time - Allowing the dough to rest and rise for the specified time is essential for developing flavors and textures. Be patient and resist the temptation to rush this step.
Brush with Butter, and Honey Mixture - The butter and honey mixture brushed on the dough before baking adds a delightful flavor and enhances the golden-brown color. Don't skip this step for an extra touch of deliciousness.
Frequently Asked Questions
How Do I Store Gluten-Free Crescent Rolls?
After the crescent rolls have cooled completely, store them in an airtight container or a resealable plastic bag at room temperature for up to 2-3 days.
Can I Freeze Gluten-Free Crescent Rolls?
Yes, you can freeze gluten-free crescent rolls. Let them cool completely, then wrap them tightly in plastic or aluminum foil. Place them in a freezer-safe bag and store them for up to 3 months. Thaw at room temperature before reheating or enjoying.
Can You Make This Gluten-Free Crescent Rolls Ahead of Time?
Absolutely! You can prepare the dough in advance, shape it into crescent rolls, and refrigerate them overnight. When ready to bake, allow the rolls to come to room temperature before following the baking instructions.
What Substitutions / Replacements Can I Make in These Gluten-Free Crescent Rolls?
Dairy-Free Options - If you need to avoid dairy, you can substitute the milk and butter with non-dairy alternatives like almond milk and vegan butter. Ensure that the replacements have a similar fat content for optimal results. I have not tried this yet. Let us know if you do it in the comments.
Egg Replacements - You can use a commercial egg replacer or a combination of applesauce, mashed banana, or flaxseed meal mixed with water for an egg-free version. Experimentation may be needed to achieve the desired texture.
Are Crescent Rolls The Same As Croissants?
Crescent rolls are similar in shape to croissants, as they both have a crescent or horn-like shape when rolled. However, crescent rolls and croissants differ in their ingredients, preparation methods, and flavor profiles. While both are delicious pastry treats, each has its own distinct characteristics that make them unique.
How Do You Serve GF Crescent Rolls?
- Enjoy these delectable Gluten-Free Crescent Rolls as a delightful accompaniment to your favorite soups, stews, or salads for a complete and satisfying meal.
- Serve them as a delectable breakfast or brunch option, pairing the gluten-free crescent rolls with a spread of butter, jam, or cream cheese.
- Create an irresistible appetizer by filling these gluten-free crescent rolls with savory ingredients such as ham and cheese or spinach and feta, offering your guests a delightful bite-sized treat.
- Indulge in the ultimate comfort food by using these gluten-free crescent rolls as a base for creating delectable mini sandwiches or sliders filled with your favorite ingredients.
How Do You Shape GF Crescent Rolls?
- Once the dough has risen and is ready to be shaped, transfer it to a floured, flat surface.
- Using a rolling pin, gently roll out the dough into a large thin disk, approximately 10 inches in diameter.
- Using a pizza cutter or a sharp knife, slice the rolled-out dough into 12 triangles. Start by cutting the disk in half, divide each into three equal triangles, and cut each in half again to get 12 triangles.
- Take one triangle and position it with the broad side facing you. Gently roll the dough from the broad side towards the pointy end, applying slight pressure as you go. Repeat this process with the rest of the triangles.
- Place the shaped crescent rolls on a baking sheet lined with parchment paper, leaving some space between each roll.
- Once all the rolls are shaped and placed on the baking sheet, cover them with a clean kitchen towel and let them rest for an additional 45 minutes. This resting time allows the dough to relax and rise slightly.
How Much Yeast Do You Need For A Batch Of Crescent Rolls?
For the batch of Gluten-Free Crescent Rolls in this recipe, you will need 2 teaspoons of instant yeast. This amount of yeast will contribute to the leavening and rising of the dough, resulting in light and fluffy crescent rolls.
Does Pillsbury Make Gluten-free Crescent Rolls?
No, Pillsbury does not currently offer gluten-free crescent rolls. However, Pillsbury has a line of gluten-free product mixes like a pizza crust, cake, cookie, and brownie mix.
What Is The Difference Between Rough Puff Pastry And Crescent Roll Dough?
The main difference between rough puff pastry and crescent roll dough is their preparation methods, ingredients, and resulting texture.
Rough puff pastry:
- Preparation - Rough puff pastry involves creating thin layers of butter within the dough through a process called lamination. The dough is rolled out, and butter is spread over two-thirds of the surface. It is then folded into thirds, rotated, and rolled out again. This process is repeated multiple times to create distinct layers of butter and dough.
- Ingredients - Rough puff pastry typically consists of flour, salt, water, and butter. The butter is incorporated into the dough during the lamination process.
- Texture - Rough puff pastry, as the name suggests, has a rougher and more rustic appearance than crescent rolls' precise and uniform shape. It has a flaky, buttery texture with defined layers.
Crescent roll dough:
- Preparation - Crescent roll dough is typically prepared by combining flour, leavening agents (such as yeast or baking powder), fat (such as butter or vegetable shortening), and other ingredients. The dough is mixed, rolled out into a flat sheet, and cut into triangles. Each triangle is then rolled into a crescent shape.
- Ingredients - Crescent roll dough commonly includes flour, yeast, baking powder, fat (butter), liquid (milk or water), sugar, and salt.
- Texture - Crescent rolls have a softer, bread-like texture with a slightly sweet flavor. The crescent roll layers are less pronounced than rough puff pastry, resulting in a lighter and more pillowy consistency.
Overall, while rough puff pastry and crescent roll dough are used to create delicious baked goods, rough puff pastry requires a more intricate lamination process to achieve its distinctive flaky layers. In contrast, crescent roll dough is simpler in preparation and yields a softer, bread-like texture.
Gluten-Free Crescent Rolls
If you're a fan of warm, flaky, buttery pastries but have been missing out, then today is your lucky day; let's make gluten-free crescent rolls. Imagine sinking your teeth into a golden crescent roll with its delicate layers revealing a pillowy soft interior.
Ingredients
- 2 cups gluten-free flour
- 2 tsp xanthan gum
- 2 tbsp sugar
- 2 tsp instant yeast
- 1 egg
- 1 ½ cups milk
- 1 tsp salt
- 3 tbsp unsalted butter
Brush:
- 3 tbsp butter, melted
- 1 tbsp honey
Instructions
- Mix the flour, xanthan gum, sugar, and yeast in a standing bowl. With a whisk, mix them until incorporated.
- Add the egg and milk, then put the bowl into the standing mixer with a paddle hook. Mix it on low speed until the dough forms into a ball.
- Add the salt and butter. Process them again until the dough becomes smooth and easy to handle.
- Transfer the dough to a floured, flat surface and knead for 5 minutes. Form it into a ball and transfer it into a clean-oiled bowl. Cover it with a towel and let it rest for 45 minutes or until it has doubled in size.
- After 45 minutes, transfer the dough to a floured flat surface, punch it, and reform it into a ball. Roll the dough into a large thin disk (around 10 inches). Using a pizza cutter, slice it into 12 triangles.
- Add 1 triangle and roll the broad side to the pointy end. Do the same for the rest of the triangles.
- Put all the triangles into a baking sheet with parchment paper and cover them with a towel. Rest it for 45 minutes.
- Preheat the oven to 370F for 10 minutes.
- In a mixing bowl, mix butter and honey. Then brush the butter mixture on the dough.
- Bake the crescent rolls for 10-12 minutes or until golden brown.
- Enjoy your crescent roll with milk, coffee, or tea.
Notes
- Ensure you rest the dough for the required times.
Recommended Products
As an Amazon Associate and member of other affiliate programs, I earn from qualifying purchases. They never cost you extra.
-
 KitchenAid KSM150PSAQ Artisan Series 5-Qt. Stand Mixer with Pouring Shield - Aqua Sky
 -
OXO Good Grips 11-Inch Balloon Whisk
-
Kitchy Pizza Cutter Wheel - No Effort Pizza Slicer with Protective Blade Guard and Ergonomic Handle - Super Sharp and Dishwasher Safe (Green)
-
Farberware Classic Wood Rolling Pin, 17.75-Inch, Natural
-
NutriChef Non-Stick Kitchen Oven Baking Pans-Deluxe & Stylish Nonstick Gray Coating Inside & Outside, Commercial Grade Restaurant Quality Metal Bakeware with Red Silicone Handles NCSBS3S, 3 Piece Set
-
Reynolds Kitchens Parchment Paper Roll, 60 Square Feet
-
Pastry Brush Natural Bristle Wooden, MSART Basting/Food Brush, with Beech Wood Handle and Rope Hook, Great for Butter, Cookies, Oil, Bread, Frosting. Easy to Clean (1 inch)


Nutrition Information:
Yield:
12Serving Size:
1Amount Per Serving: Calories: 88Total Fat: 7gSaturated Fat: 4gTrans Fat: 0gUnsaturated Fat: 2gCholesterol: 33mgSodium: 238mgCarbohydrates: 5gFiber: 0gSugar: 5gProtein: 2g
This nutrition info is based on the exact ingredients and brands used at the time. It may not be 100% accurate. Please check your ingredients nutrition labels.

Victoria Dy
What else can I use if I don't have a standing mixer with paddle hook?
Wendy Stoltz
Hi Victoria,
You can knead it by hand until it becomes smooth and elastic.
Megan
It never became smooth and elastic. What flour blend do you use?
Wendy Stoltz
Hi Meagan,
I used Bob's Red Mill Resealable Gluten Free All Purpose Baking Flour
Cyd Benson
Could tgus be made and then used like the Pilsbury refrigerated cresent rolls for those old favorite recipes?
If so any suggestions and could I freeze raw dough?
Wendy Stoltz
Hi Cyd,
I have not tried it yet, but it should work. Let them cool completely, then wrap them tightly in plastic or aluminum foil. Place them in a freezer-safe bag and store them for up to 3 months. Thaw at room temperature before reheating or enjoying.
Carolyn
Have you tried using this dough for pigs in a blanket like you can do with the Pilsbury dough? Trying to figure out how that could work with the second 45 minute rest since I can’t rest the dough on the hot dogs. Appreciate any suggestions.
Wendy Stoltz
Hi Carolyn,
I have not but here is some ideas to perhaps help, you will need to experiment
- Instead of letting the wrapped hot dogs rest for the full 45 minutes, you can try chilling them in the refrigerator for a shorter period, around 15-20 minutes. This can help the dough firm up and maintain its shape.
- If you find that the dough is challenging to handle after wrapping the hot dogs, you can skip the second rest altogether. Instead, proceed to bake them directly after wrapping.
Remember that gluten-free dough may behave differently, and adjustments may be needed based on your preferences and the characteristics of the dough. It's always a good idea to experiment and find the method that works best for you. Enjoy your gluten-free pigs in a blanket!
Lesley
Hi, I have a few questions. 1. If I don't heat the milk or proof the yeast, what activates the yeast? 2. What is the reason for kneading the dough, since it does not have any gluten? Wouldn't this overirk the dough. 3. My dough was not all workable. It was much too wet. So I ended up adding at least 3/4 of a cup more flour before it became workable. Any idea why? Thanks! (Also, they never browned)
Wendy Stoltz
Hi Lesley,
In gluten-free baking, like with crescent rolls, warm milk is necessary to activate the yeast, while kneading distributes the yeast and binds ingredients, even without gluten. If the dough is too wet, adjustments like adding more flour are common due to the variable absorption rates of gluten-free flours. Browning issues can often be resolved with an egg wash or checking oven temperature accuracy.
Thanks,