

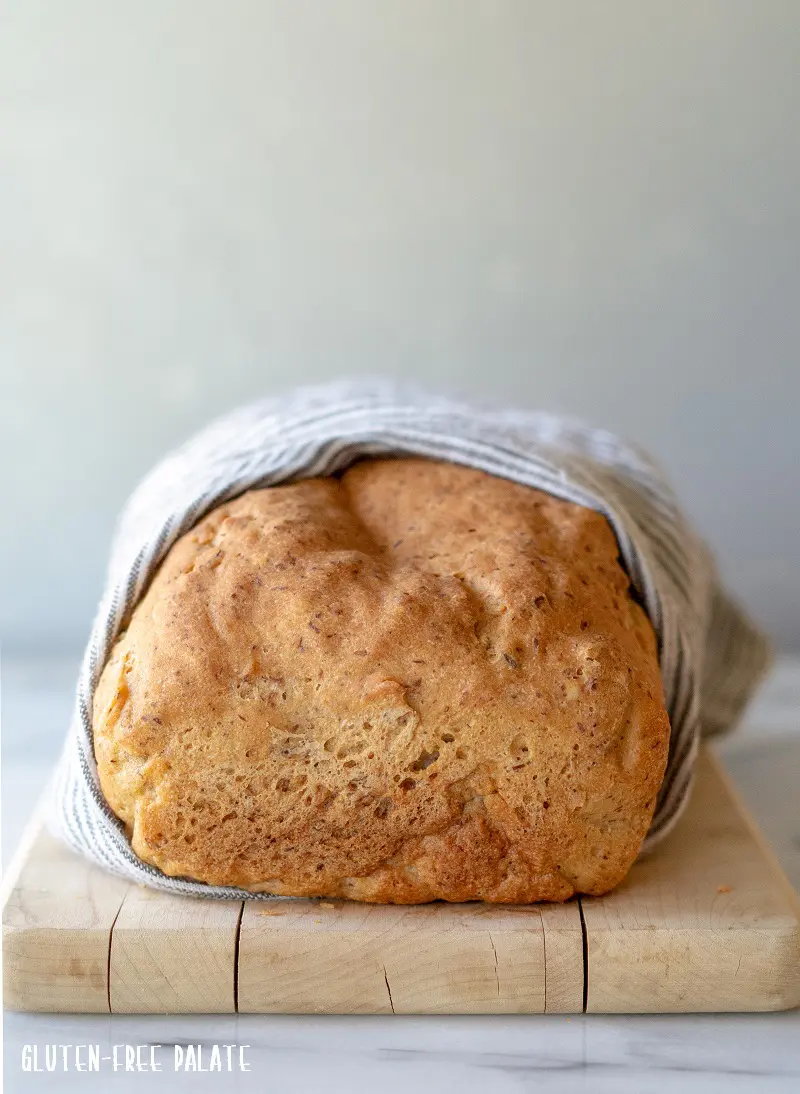
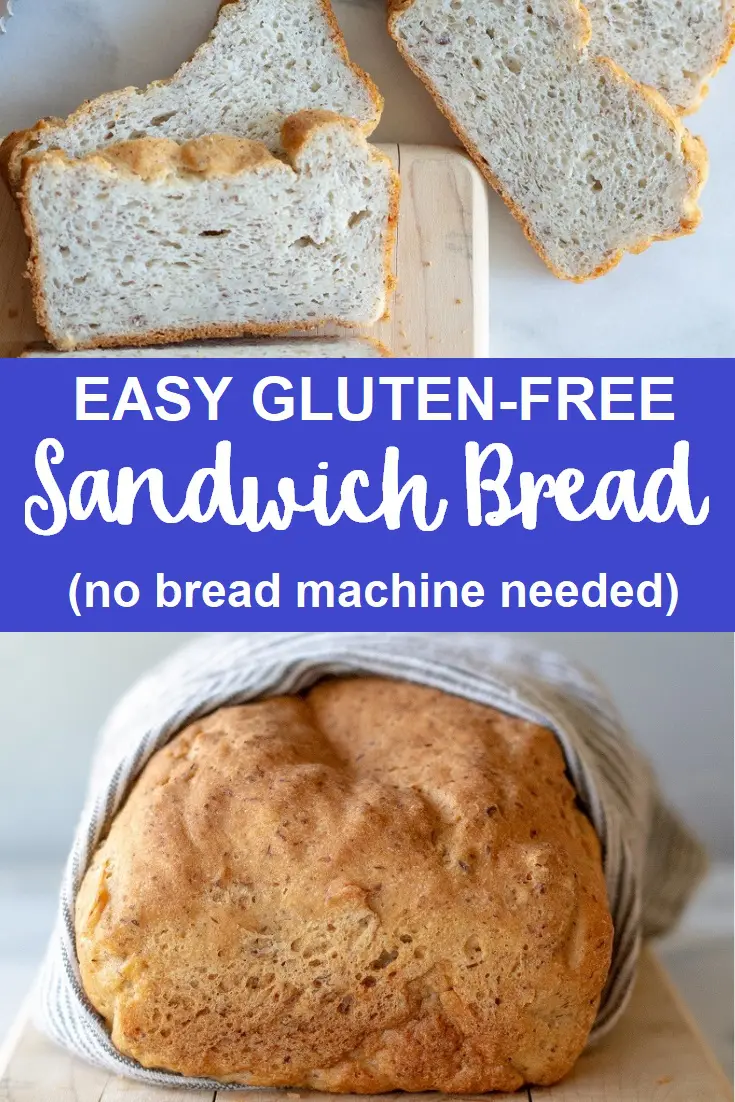
Whip up this simple and easy-to-make homemade gluten-free bread. It is a straightforward, no-fuss recipe with tips and information for success. This easy-to-make bread is the ideal base for any sandwich, perfect for your next lunch.


I've also included instructions for making this gluten-free bread in a bread machine for those who prefer to use a bread machine when making gluten-free bread. If you are vegan, I've included instructions, too!
Start your gluten-free baking with this Gluten-Free Yeast-Free Bread, this tangy, easy Gluten-Free Sourdough, and the sweet Gluten-Free Cinnamon Raisin Bread; each recipe has a different taste.
The Gluten-Free Hawaiian Rolls are one you need to add to your list, while the Gluten-Free Rye Bread is so good, too. Which one will you choose next?
Gluten-Free Sandwich Bread Recipe
I posted a gluten-free bread recipe back in early 2015. It was okay, but it wasn't the best gluten-free bread. It had a little bit of a quick bread texture. I also have a gluten-free bread recipe for the bread machine (see further down if you use a gluten-free bread machine).
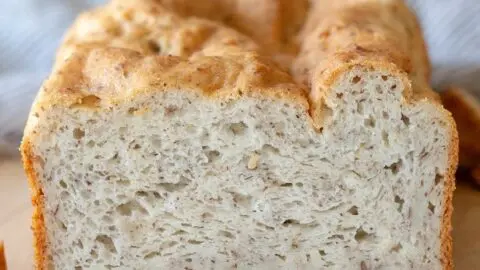
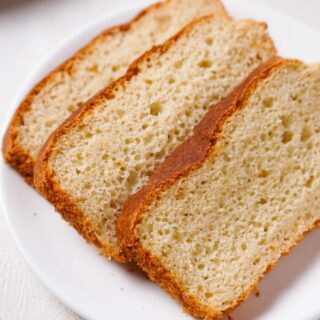
Just look at the texture of this easy gluten-free bread. It's amazing. The gluten-free loaf featured in this picture could've used a few more minutes in the oven, but I'll discuss that below.
You are going to love this gluten-free, dairy-free bread. I promise.
Please, please read through this post. I share my experience and what worked and didn't when I was reworking this gluten-free bread recipe.
Why You’re Going to Love This Gluten-Free Bread
Tastes so good - Leave the store-bought bread and enjoy real, fresh, homemade bread that tastes delicious.
Great for various diets - You can make this bread dairy-free, and I've also included a vegan option.
Simple And wholesome ingredients - This recipe blends gluten-free flours and natural ingredients. So, no nasties.
Ingredients in Gluten-Free Bread
For The Yeast Proof
Water (95°F-110°F) - The warm water activates the yeast, which is important for the bread to rise.
Sugar or Honey - This acts as food for the yeast, which helps activate it and produces carbon dioxide, which causes the dough to rise.
Active Dry Yeast - The key leavening agent, it ferments the sugars and creates air bubbles that make the GF bread light and fluffy.
For The Bread
White Rice Flour - This ingredient contributes to its structure.
Tapioca Starch - Adds chewiness and helps bind the ingredients, improving the bread's texture.
Potato Starch or Arrowroot Starch - This helps with the bread's moisture and is for that tender crumb.
Millet Flour or Almond Flour - Adds a nutty flavor.
Ground Flaxseed (Flaxseed Meal) - This increases the fiber content and can help bind the dough, similar to gluten.
Xanthan Gum - Replaces gluten's role by providing elasticity and stickiness. This is for the bread's structure.
Baking Powder - An additional leavening agent that helps the bread rise and achieve a light texture.
Salt - This is added for the overall flavor of the bread and regulates yeast activity.
Oil - Adds moisture and richness, contributing to a soft texture and extending the bread's shelf life.
Egg Whites - Provide structure and stability to the bread, helping it to rise and maintain its shape.
Apple Cider Vinegar - Improves the bread's texture and interacts with leavening agents for a better rise.
Equipment Needed for This Gluten-Free Bread
Loaf Pan - A standard-sized loaf pan of 9x5 inches works well.
Stand Mixer with Paddle Attachment - This is for mixing the dough so that the bread has the right texture. You don't need a dough hook for this recipe.
Mixing Bowls - Used for preparing the yeast-proofing mixture and combining the dry ingredients before mixing with wet ingredients.
Thermometer - To measure water temperature for yeast activation, ensuring it's within the optimal range (95°F-110°F).
Rubber Spatula - Useful for scraping down the sides of the bowl during mixing and transferring the dough to the loaf pan.
Plastic Wrap or Damp Cloth - To cover the dough during the rising process to create a warm environment to aid the yeast.
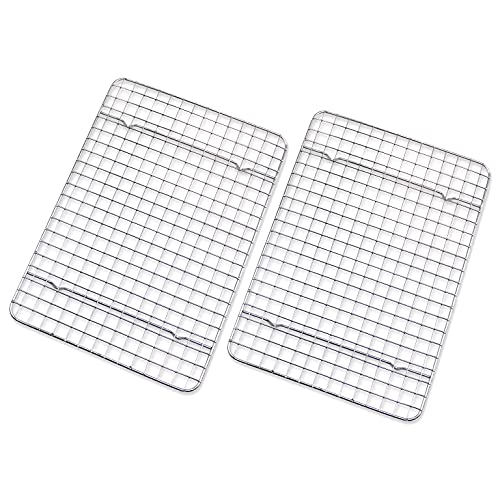
Wire Rack - For cooling the bread after baking, which helps to prevent sogginess and keep the bread's structure.
Serrated Knife - A serrated knife is for slicing the finished bread. It has a saw-like blade that helps to cut through the crust easily without squashing the center of the bread.
If you have any questions about making Gluten-Free Bread, please leave a comment, and we will get back to you as soon as possible.
Additional Gluten-Free Flours to use when making this gluten-free bread
I used my gluten-free flour blend when I first made this gluten-free bread recipe. It works great, but I realized it needed something more.
I tested several different flour blend options before settling on the winner, the one that I think makes the best gluten-free bread. See the recipe card for the gluten-free bread recipe that readers love.
Here are some additional options for making this gluten-free bread recipe. Note that these substitutions will yield slightly different results. If you decide to go with one of these substitutions, you will need to replace all the flours and starches in the recipe with the following (everything else stays the same):
- 2 ½ cups of my gluten-free flour blend + ½ cup of almond flour + ¼ cup flaxseed meal (ground flaxseed).
- 2 ½ cups of my flour blend + ½ cup of millet flour + ¼ cup of flaxseed meal. It's an amazing nut-free gluten-free bread.
- 2 ½ cups of Bob's Red Mill 1-to-1 gluten-free flour blend + ½ cup of almond flour + ¼ cup flaxseed meal.
- 2 ½ cups of Bob's Red Mill 1-to-1 gluten-free flour blend + ½ cup millet flour + ¼ cup flaxseed meal.
This gluten-free dairy-free bread recipe was originally developed for the oven, but I have a gluten-free bread machine recipe version below for those who like to use a bread machine.
How To Make Gluten-Free Bread
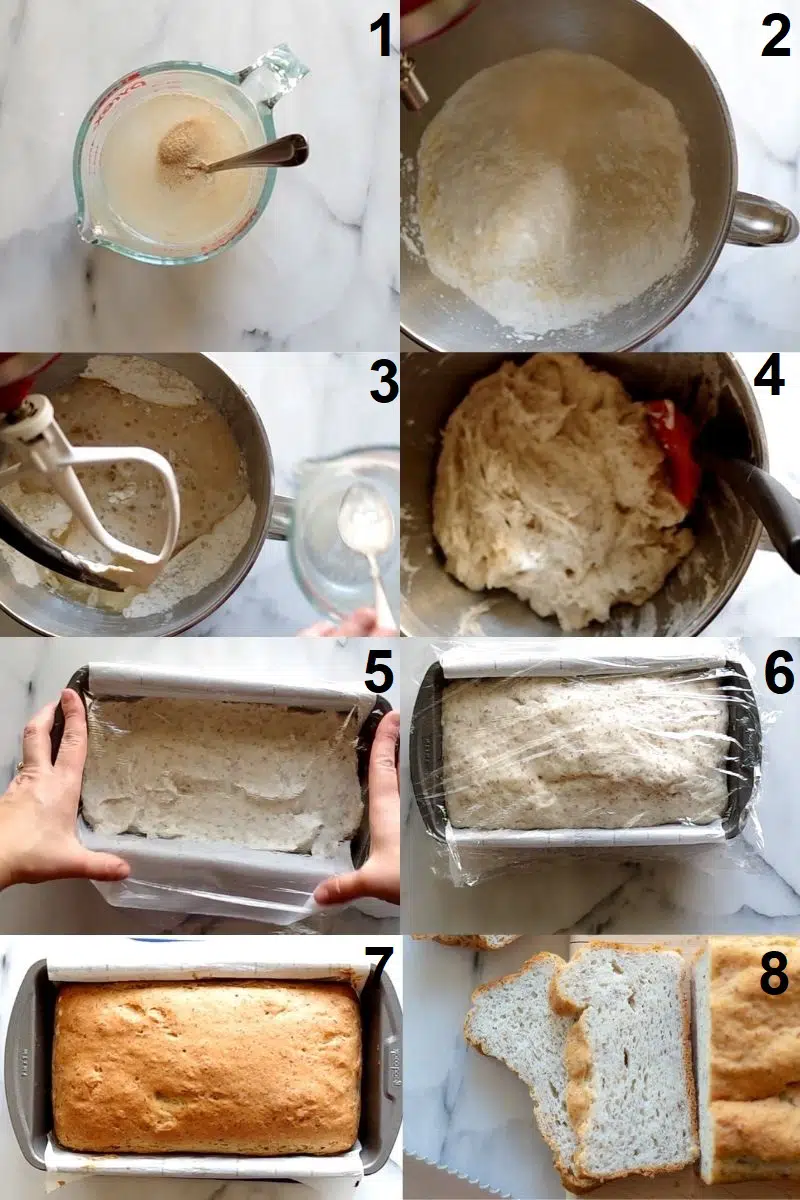
- Add the sugar and yeast to your warm water (95-110 degrees F) and stir; set it aside for 5-10 minutes but no longer.
- While your yeast is proofing, in the bowl of a stand mixer fitted with the paddle attachment, add the flours, flax seed meal, xanthan gum, baking powder, and salt. Turn your mixer to low and mix just until combined.
- Add oil, egg whites, vinegar, and proofed yeast mixture.
- Turn the mixer to a medium speed and mix for 2 minutes. The dough will be thick and sticky. Turn off the mixer and scrape down the sides.
- Using a rubber spatula, add the dough to your prepared loaf pan, filling in the corners of the pan and leveling the top. Wet your fingers and smooth the top.
- Cover the dough with a lightly oiled piece of plastic wrap and allow it to rise in a warm place for 45 to 60 minutes or until it has risen slightly above the loaf pan.
- When the dough is near the top of the pan, preheat your oven to 350°F. Remove the plastic wrap and bake for 60 – 65 minutes. Halfway through baking, cover the bread loaf with a piece of foil to keep it from over-browning.
- Remove the loaf from the oven and let cool completely before slicing. Slice the entire loaf and store in a container at room temperature for up to 4 days or in the freezer for up to a month.
Please see the recipe below for the complete ingredient list and instructions.
Gluten-Free Bread in a Bread Machine
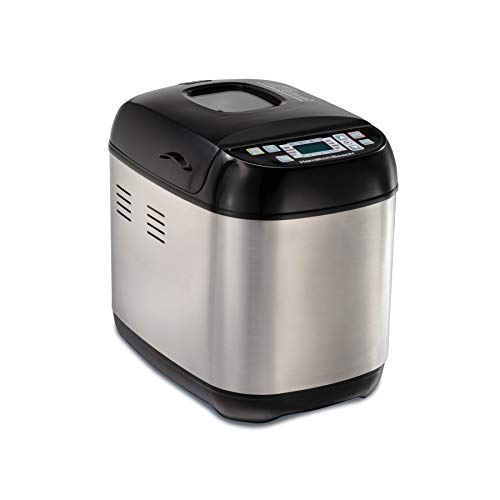
If you prefer to make this gluten-free bread recipe in a bread machine, make sure you have one with a gluten-free setting. I have a Zojirushi bread machine and it makes a beautiful loaf and is my preferred gluten-free bread machine. There are other bread machines, just follow their instructions if they are different.
Check out our list of the Best Gluten-Free Bread Makers on the market today if you're looking to purchase one yourself. (I highly recommend it!)
- Add the warm water, oil, egg whites, and vinegar to the pan in your gluten-free bread machine. Do not add the yeast here. We are not proofing the yeast, we will add it in later.
- In a large mixing bowl, whisk together all dry ingredients except for the yeast (sugar, flours, flaxseed, xanthan gum, baking powder, and salt) and add to the bread machine pan on top of the wet ingredients, in a mound.
- Make a hole in the center of the top of the dry ingredients that are in the bread machine and add the yeast. Don't let the yeast touch the wet ingredients.
- If your machine has a "rest" setting, cancel it. You don't need it. With the Zojirushi you have to do this before you select any other settings.
- Select the gluten-free bread setting on your machine.
- Close the lid and press "start".
Please let me know if you have any questions about making this gluten-free bread recipe.
Egg-Free Substitution in Gluten-Free Bread
For a gluten-free vegan bread version of this gluten-free bread recipe, you can use chia eggs or Bob's Red Mill Egg Replacer (2 eggs worth).
I've only tested this gluten-free egg-free bread recipe in the oven. I haven't tested the egg-free version in a bread machine.
Swap out the 3 egg whites with 2 tablespoons of chia seed + 7 tablespoons of water (let sit for 5 minutes and stir before you add it to the mixture). Or use Bob's Red Mill Egg Replacer and mix up 2 eggs worth.
Bake for 70 minutes (putting a piece of foil over the loaf to help prevent over-browning, halfway through).
Dairy-free gluten-free bread recipe
I still can't get over how amazing this gluten-free sandwich bread is. It's better than any gluten-free bread I've had, and my family, including my gluten-eating husband, agrees.
This gluten-free bread is also dairy-free. I've tested it with dairy (milk for activating the yeast and butter instead of oil) and I found it to add to the quick bread texture.
If you want this gluten-free bread to have the same texture as deli-style sandwich bread, then you need to use water when activating the yeast, and oil instead of butter.
Trust me. Plus, it's less expensive to use water and oil in gluten-free bread recipes than it is to use milk and butter.
To make this a gluten-free vegan bread, see the instructions above for subbing out the eggs for chia eggs.
Related: Easy Gluten-Free Artisan Bread Recipe
Gum-free gluten-free bread
I use xanthan gum in this gluten-free dairy-free bread recipe. I feel it yields the best results.
Not everyone can have gums. You can use psyllium husk powder (not full husks) in this recipe. I only tested it once, but I used 3 tablespoons of psyllium husk powder in place of the xanthan gum - yes, that reads 3 TABLESPOONS.
Psyllium husk powder is not a 1-to-1 for xanthan gum. Again, I only tested this one time, so I cannot claim that this is the best sub for xanthan gum.
Sure, it worked for me, but I haven't checked to see if it's repeatable with that amount of psyllium husk powder.

Tips for making gluten-free bread

Here are my tips that work with this gluten-free bread recipe. See below for my gluten-free bread machine recipe.
Don't substitute anything in this gluten-free bread recipe unless I specified above that I've tested it. This is important. If you substitute something, I can't guarantee anything, and I can't help you troubleshoot if something doesn't work in your gluten-free bread.
Ingredients at room temperature work best. You can always run your eggs under warm water for a few minutes to keep the temperature up.
Read the recipe instructions and get all the ingredients out before you start.
Use dry active yeast or quick yeast. I use Fleischmann's yeast: it's labeled gluten-free. I've also used Red Star yeast.
If your bread sinks in the middle before it is done baking, you most likely let the yeast proof sit too long before using it, or you let your bread rise too long. You want to put your gluten-free bread in the oven when it rises just above the top of the loaf pan, no longer.
Ensure your water is between 95-110 degrees before adding the yeast. If you don't have a thermometer, I suggest you get one.
Line the loaf pan with parchment paper and then spray it with oil. This will help you remove the loaf from the pan.
Pan size matters. If you use a wider pan, your loaf will be broader and shorter. If you use a narrower pan, your loaf baking time might change.
Again, if you have any questions on how to make gluten-free bread, please leave me a comment below. I've included a video that shows step-by-step how to make gluten-free bread.
Frequently Asked Questions
How long to bake gluten-free bread?
This gluten-free bread recipe works best when baked for 60-65 minutes in the oven or on the gluten-free setting in a bread machine.
See my notes on the gluten-free bread recipe for the bread machine below.
Remember to cover your gluten-free bread with foil halfway through baking so it doesn't over-brown.
You might read that a loaf is done baking once it hits around 200 degrees F. Please bake this loaf 60-65 minutes, even if your thermometer says otherwise.
What size of a pan do I use to make Gluten-Free Bread?
This gluten-free bread recipe was developed using a 9 x 4 inch metal loaf pan. You can use a different size loaf pan, but you'll want to watch the cook time. Also, it won't have the same rise, depending on the size.
You can also make this bread recipe in a glass loaf pan lined with parchment paper. Metal and glass pans transfer heat differently, and gluten-free bread loaves typically have a thicker crust when baked in a glass pan.
How to store freshly baked bread
This fresh-baked bread stays soft for 2-3 days after it's been baked. You'll want to let it cool to room temperature before you slice it. We like to store it whole, in a sealed container, or wrap it tightly with cling wrap, and slice it as we need it.
After a day or two, we will freeze any bread that's left.

Can I freeze gluten-free bread?
Yes, you can freeze this gluten-free bread loaf. After it has completely cooled, slice the loaf into equal slices. We like to place a piece of parchment paper in between each slice, so it's easy to pull out of the freezer.
You can either defrost the bread in the microwave or you can let it sit at room temperature until it has thawed.
Why is my gluten-free bread dense?
If you are using a bread machine, does it have a gluten-free setting? This setting is essential because it only does one mix cycle, not two mix cycles, as you get with other settings.
If you don't have the gluten-free setting option, use a quick program with one mixing cycle rather than two when making gluten-free bread. Mixing it twice will always cause the bread to be denser.
Are you scooping your measuring cup into the flour? Or spooning the flour into the cups and then leveling? It would be best if you always spoon and then level. Otherwise, you'll end up with more flour than you want, which will cause the bread to be dense.
Are you storing your flours in the freezer or refrigerator? If flours are stored that way, they lose moisture, and when they are mixed with other ingredients, they tend to absorb more of the moisture, and the bread is denser.
Can I Double This Bread Recipe?
Yes, you can double this gluten-free bread recipe. When doing so, use two loaf pans to ensure even baking and consider slightly adjusting the yeast quantity to avoid over-proofing.
Be mindful of the mixer capacity for the increased volume of ingredients, and check for any necessary adjustments in baking time.
However, I recommend you try the recipe first. I usually make two doughs for two loaves as it is easier to handle and yields consistent results.
View our step-by-step instructional video for this recipe on YouTube.
Simple and Easy Gluten-Free Bread Recipe
Whip up this simple and easy-to-make homemade gluten-free bread. It is a straightforward, no-fuss recipe with tips and information for success.
Ingredients
For the yeast proof:
- 1 ¼ cup (10 oz.) water between 95°F-110°F
- 2 tablespoons (25g.) sugar (or honey)
- 2 ¼ teaspoons dry active yeast (a 7g. packets worth)
For the bread:
- 1 cup (145g.) white rice flour
- ¾ cup (85g.) tapioca starch
- ¾ cup (92g.) potato starch (or arrowroot starch)
- ½ cup (60g.) millet flour (or almond flour)
- ¼ cup (25g.) ground flaxseed (flaxseed meal)
- 2 ½ teaspoons (9g.) xanthan gum
- 1 teaspoon (5g.) baking powder
- 1 teaspoon (6g.) salt
- ¼ cup (2 oz.) oil of choice (I used avocado oil)
- 3 egg whites (75g.)
- 1 teaspoon (6g.) apple cider vinegar
Instructions
- Line a 8-inch x 5-inch metal loaf pan with parchment paper and spray it with cooking spray; set it aside.
- Add the sugar and yeast to your warm water (95-110 degrees F) and stir; set it aside for 5-10 minutes but no longer.
- While your yeast is proofing, in the bowl of a stand mixer fitted with the paddle attachment, add the flours, flax seed meal, xanthan gum, baking powder, and salt. Turn your mixer to low and mix just until combined.
- With the mixer still going, add the oil, egg whites, vinegar, and proofed yeast mixture.
- Turn the mixer to a medium speed and mix for an additional 2 minutes. The dough will be thick and sticky.
- Using a rubber spatula, add the dough to your prepared loaf pan making sure to fill in the corners of the pan and level the top. Wet your fingers and smooth the top.
- Cover the dough with a lightly oiled piece of plastic wrap and allow it to rise in a warm place for 45 to 60 minutes, or until it has risen slightly above the loaf pan.
- When the dough is near the top of the pan, preheat your oven to 350°F.
- Remove the plastic wrap and bake for 60 – 65 minutes. Half way through baking, cover the bread loaf with a piece of foil to keep it from over-browning.
- Remove the loaf from the oven and let cool completely before slicing.
- Slice the entire loaf and store in a container at room temperature for up to 4 days or in the freezer for up to a month.
Notes
- Please read all the tips and tricks in the post before you get started. If you prefer to use a bread machine, check further up in the post for instructions.
- Use dry active yeast or quick yeast. Instant yeast is okay and you don't need to proof it, just make sure you get it in the oven as soon as it rises to the top of the loaf pan.
- For the gluten-free bread machine recipe, add wet ingredients to the pan, and then dry ingredients except the yeast, make a hole in the center of the dry ingredients and then sprinkle the yeast into the hole. See complete instructions just above the recipe.
- Make sure your water is between 95-110 degrees before adding the yeast. This is warm to the touch, but not hot.
- Line the loaf pan with parchment paper and then spray it with oil, this will help you remove the loaf from the pan. Pan size matters. If you use a wider pan your loaf will be wider, and shorter. If you use a narrower pan your loaf baking time might change.
- Flour blend option: 2 ½ cups of Bob's Red Mill 1-to-1 gluten-free flour blend + ½ cup millet flour + ¼ cup flaxseed meal. The 2 ½ cups of Bob's Red Mill 1-to-1 is in place of the rice flour, tapioca, and potatoe. You are swapping the three with Bob's.
- Egg free option: Swap out the 3 egg whites with 2 tablespoons of chia seed + 7 tablespoons of water (let sit for 5 minutes and stir before you add it to the mixture). Bake for 70 minutes (putting a piece of foil over the loaf to help prevent over-browning, half way through).
- Not everyone can have gums. You can use psyllium husk powder (not full husks) in this recipe. I only tested is once, but I used 3 tablespoons of psyllium husk powder in place of the xanthan gum.
Recommended Products
As an Amazon Associate and member of other affiliate programs, I earn from qualifying purchases. They never cost you extra.


Nutrition Information:
Yield:
12Serving Size:
1 sliceAmount Per Serving: Calories: 26Total Fat: 0gSaturated Fat: 0gTrans Fat: 0gUnsaturated Fat: 0gCholesterol: 0mgSodium: 14mgCarbohydrates: 5gFiber: 0gSugar: 0gProtein: 2g
This nutrition info is based on the exact ingredients and brands used at the time. It may not be 100% accurate. Please check your ingredients nutrition labels.

)
Angie
Question, do you have the gram measurement for the alternate to use 2 ½ cups of Bob's Red Mill 1-to-1 gluten-free flour blend? I am excited to make this as my sister has Lupus and has gone gluten free which minimizes her symptoms. Thanks in advance!
Wendy Stoltz
Hi Angie,
Unfortunately not, but here is a handy tool you can use - https://convertrecipe.com/convert_US_to_metric.php
We hope it helps.
Karla
Do you have to use the Xanthum gum or is there a substitute. I am intolerant to that as well as gluten and dairy. Thank you
Wendy Stoltz
Hi Karla,
If you're intolerant to xanthan gum, you can substitute it with psyllium husk powder, ground flaxseeds, or ground chia seeds in your gluten-free bread recipe. These alternatives can help provide the structure that xanthan gum typically offers. A general substitution ratio is 1:1, but since these alternatives absorb more liquid, you might need to adjust the amount of liquid in your recipe slightly. Psyllium husk is particularly effective for bread recipes due to its high fiber content, which helps mimic gluten's elasticity.
Feel free to experiment and see which substitute works best for you.
Brenda
I went to the Bob's site and they have a chart that shows 1 cup of the 1 for 1 GF flour weighs 148g. So 2.5 cups = 370g.
Shannon
I love this recipe and make it frequently. Can it be doubled to make two loaves? Would I need to double the yeast? Thanks so much!
Wendy Stoltz
Hi Shanon!
I'm glad to hear that you love the gluten-free bread recipe and make it frequently! Doubling the recipe to make two loaves is definitely possible, and it's a great idea if you want to have more bread on hand or share it with others.
When you double the recipe, you'll need to adjust the quantities of all the ingredients accordingly. This includes the yeast as well. In general, when doubling a bread recipe, it's recommended to increase the yeast by about 50%. So if the original recipe calls for 1 teaspoon of yeast, you would use approximately 1.5 teaspoons when doubling it. I have not however tried this myself so you will need to experiment. I usually just make the recipe twice.
Happy baking, and I hope your doubled batch turns out delicious!
Ibrahim
Hello Wendy
I have just baked this loaf of bread for my daughters for the fourth time. They both follow gluten-free diet and they love the bread I make with this recipe.
I generally follow the instructions, but I use four whole eggs instead of three egg whites. The loaf rises better.
Thank you
Ibrahim
Wendy Stoltz
Hi Ibrahim!
I'm glad to hear that your daughters love the bread you make using this recipe! It's wonderful that you've found a way to accommodate their gluten-free diet. Experimenting with recipes and making adjustments to suit your preferences is part of the fun of baking.
Using four whole eggs instead of three egg whites sounds like a great modification. Eggs play a crucial role in baking, providing structure and moisture to the bread. The additional yolk in the whole eggs might contribute to a richer texture and enhanced rise in the loaf. It's fantastic that you've found this change to work well for you.
Keep up the great work, and happy baking to you and your daughters!
Best regards,
Joshua
I followed the bread machine recipe and after the kneading cycle it looked like clumpy, barely moist, powder. I followed the bread machine instructions. I feel like I'm missing something.. how do 3 egg whites and 0.25 cup oil make a dough consistency when mixed with 3.25 cups flower (plus the other stuff)? Thank you!
Wendy Stoltz
Hi Joshua,
Did you add in the water and oil?
Brenda
Made this bread for the first time. It was great! Loved the crust and flavor. I used the dough setting on my bread machine because I thought it only kneaded the dough once (gf setting also does that). I was wrong. It started a second knead so I pressed the stop button on my machine so that the dough could just rise. Got a perfect beautiful rise out of the bread and went to start the baking mode but the machine started to knead the bread again. Buh-bye beautiful rise. Had to unplug the machine to get it to restart and only bake it.
When it was done, it looked like another sad gf brick of bread. But it wasn't. Oh my god it was so good, even my picky husband loved it. I will say that the loaf was still moist in the middle but not wet or goey. My husband didn't wait for it to cool down so I'm sure that didn't help. As soon as I can get more Bob's flour I'll be making another loaf. This time the mixing and the rising will happen outside of the bread machine.
I used Bob's 1 for 1 GF flour 370 g = 2.5 cups) and almond flour. Didn't use xanathan gum, but added 1 TBS psyllium husk.
Wendy Stoltz
Congratulations on successfully making your bread for the first time Brenda! It sounds like you had quite the adventure with your bread machine, but I'm glad to hear that the end result was delicious.
Roberta Adams
Did you use husk or powder? And did you just throw it in the bread machine dry? Or premixed with liquid?
Wendy Stoltz
Hi Roberta,
You can use psyllium husk powder (not full husks) in this recipe, there is a link to my suggested powder in the article. I only tested it once, but I used 3 tablespoons of psyllium husk powder in place of the xanthan gum - yes, that reads 3 TABLESPOONS. I put it in as is.
Roberta Adams
Thank you
Nancy Jacobson
I would like to make bread for a fiend who wants gluten free but. With cancer also is using no sugar. How do I sub for sugar?
Wendy Stoltz
Hi Nancy,
So kind of you to support your friend.
In baking, particularly in bread recipes, sugar is often used to feed the yeast, which helps the dough rise. Consider trying honey, agave syrup, maple syrup or unsweetened apple sauce.
Remember, each alternative can affect the flavor and texture of the bread differently but it is worth experimenting with for your dear friend.
Thanks
Roberta Adams
Update: great recipe! I added 2.5 tbsp of powdered husk and only used 1 whole small Banty sized egg (that’s all the egg I had). I used brown rice flour as I was out of white rice flour. I will change from millet flour to almond flour next time as I didn’t care for the strong millet taste. Turned out great. It’s a keeper
Wendy Stoltz
Thanks for coming back and letting us know Roberta. Enjoy experimenting!
Lauren
Hello!
If I do not have a stand mixer, what mixer would you recommend? Would the Danish Dough Mixer work for this recipe as well?
Thank you!!
Wendy Stoltz
Hi Lauren,
If you don't have a stand mixer, a hand mixer with dough hooks can be a good alternative for making GF bread. The Danish Dough Mixer could work too, I however have not tried it myself. Remember, gluten-free bread dough can be stickier and more delicate than regular wheat-based dough, so whatever mixer you choose, make sure it can handle the consistency and won't strain during the mixing process.
Experiment and see which method works best for you and your GF bread recipe. Happy baking!
Corinna
I am making this bread for the second time, and I’m just wondering why it needs to be pre-sliced. Is that for convenience or does the consistency make it difficult to slice later?
Wendy Stoltz
Hi Corinna,
It is purely for convenience so if we decide not to eat it all within 2-3 days we can place it in the freezer and take out the amounts as we need them.
Thanks,
Jessica O.
Do you have recommendations for baking this in a 1lb Pullman loaf pan?
Wendy Stoltz
Hi Jessica,
You can adapt this gluten-free bread recipe for a 1lb Pullman loaf pan by slightly reducing the ingredient quantities to fit the pan's size. When baking, start with the lid on for about 45-50 minutes, then remove it and bake for an additional 10-15 minutes until the bread is golden brown and reaches an internal temperature of around 200°F (93°C). Ensure the dough rises slightly above the pan's top before baking and extend the parchment paper for easy removal. Remember that these are approximate adjustments, so some experimentation may be needed for the best results in your Pullman loaf pan. Enjoy your gluten-free bread!
Jean
Hello, I made the bread this morning and wondering when using a digital thermometer after 60 minutes of baking what temp should it be to be done? Thank you.
Wendy Stoltz
Hi Jean,
You might read that a loaf is done baking once it hits around 200 degrees F. Please bake this loaf 60-65 minutes even if your thermometer says otherwise.
Rebecca Panosso
Thank you for the recipe! Do you make the flour mixture up in bulk, any downsides to that? I’m all about convenience! If you do make in bulk, do you have the measurements for each ingredient and total for loaf?
Wendy Stoltz
Hi Rebecca,
Unfortunately I do not make it in bulk. You could however. Just be mindful of ingredient seperation and make sure the ingredients are fresh.
Thanks
Kathleen
I figured I should leave a review on this bread recipe as I make it regularly. First of all, thank you for the ONLY good gluten free bread I've ever eaten. Honestly it's worth it to go to the hard work of making your own bread because the taste is miles above store bought gf bread. I usually follow the recipe exactly (including using the measurements). I find this the best way to have the bread turn out consistently.
I've had to make it without baking powder once (replaced with baking soda) and I've also tried just cracking 3 full eggs into it instead of the white. It was a bit "gummier" that way just fyi. One time I also had to make it without the flaxseed and had to replace it with hemp seeds. This is not advisable, the bread got moldy from the seeds within a few days!
Follow the recipe and weigh the flour - you'll have great bread! Oh, and I usually double it, it works well doubled!
Wendy Stoltz
Thank you so much for your wonderful review and feedback on this gluten-free bread recipe, Kathleen! We're thrilled to hear that you've had success with it and that it's become a regular part of your baking routine. Your insights and tips about following the recipe closely, using the recommended measurements, and weighing the flour are incredibly helpful for others looking to achieve the same consistency and flavor.
Cary
Hello! Is it detrimental to the recipe if the "rest" stage can't be cancelled on the bread machine? I have the GF setting which only kneads once, but it seems that the "rest" stage has to be included in the process.
Thanks!
Wendy Stoltz
Hi Cary,
I am not sure, you may need to test it.
Donna
Hi - If I substitute the flour for one of the other options you described, do I include the xantham gum or no? Thank you!
Wendy Stoltz
Hi Donna,
If the alternative flour is a blend without xanthan gum, you need to add it separately.
Karen H
Oh my! I didn’t expect this to turn out NEARLY as good as it is! Thank you so much! It’s eons above store-bought gf bread! Soft and fluffy and doesn’t crumble!
Wendy Stoltz
Hi Karen,
I'm absolutely thrilled to hear that the gluten-free bread turned out so well for you! It's wonderful that it exceeded your expectations and that you found it soft, fluffy, and not crumbly. Homemade bread can be a game-changer, especially when it comes to gluten-free options.
Vivian Boatto
Wondering if this bread can be baked in a cast iron Dutch oven. That is how I have made all my breads (non gluten free). I am hoping someone tried to use a Dutch oven? This will be my first attempt to make a gluten free bread.
Wendy Stoltz
Hi Vivian,
It should work, I do not see why it shouldn't.
Vivian Boatto
So just made this bread. It was my first gluten free bread and I must say it is very good. I made it in my dutch oven, but since the recipe is so wet, I kept the lid off. It turned out great.
I would like to make gluten free olive bread and I am wondering if any has anyone used recipe this as a base?
Wendy Stoltz
Hi Vivian,
Congrats on your first GF bread. I have not tried it yet, but hopefully others will chime in. I don't see why it shouldn't work.
Cathy Goelzer
Trying this for the first time in a bread machine that requires me to choose between the following sizes. 1 lb, 1.5 lb, or 2 lb. I read through recipe and many comments but don't see this noted anyplace. Based on amounts of flour, I'm thinking this is closer to a 2lb. loaf??
Thank you!
Wendy Stoltz
Hi Cathy,
If I recall correctly it is a 2lb loaf.
Jennifer Winningham
My first time baking, the loaf sank quite significantly after baking. Ideas? I used a bread machine with the 1.5 lb setting and medium browning.
Regardless, it is delicious!!! Thank you!
Wendy Stoltz
Hi Jennifer,
Let's troubleshoot did you do the following - For the gluten-free bread machine recipe, add wet ingredients to the pan, and then dry ingredients except the yeast, make a hole in the center of the dry ingredients and then sprinkle the yeast into the hole.
I am glad it was delicious.
Ashley M.
So I am new to making bread and I am still waiting on my bread maker to come in the mail. Just a question, would I line the bread maker with parchment paper? Also, do I set the bread maker to 350 degrees Farenheit and put it in for 60-65 minutes? Or does the "gluten free" setting automatically put it to whatever temperature it needs to be and bake it for the correct amount of time?
Wendy Stoltz
Hi Ashley,
No parchment paper, follow the recipe directions for a bread machine. It is difficult to give you advice not knowing which bread machine you purchased. But you need to select the gluten-free bread setting, it then sets the correct temperature etc.
Thanks
Becky
Hi! Just wondering what you recommend - the homemade flour blend or the Red Mills 1 to 1 - obviously it's much more inexpensive to buy the pre-made blend as opposed to purchasing all the separate components to make your own. However, I am very open to purchasing all of these if it makes the bread itself better!
Wendy
Hi Becky,
When it comes to choosing between options, it really boils down to your personal taste. I'd recommend giving both options a try and seeing which one resonates with your palate the most. After all, taste is incredibly subjective!
Penny
I made this bread and it was not done on the inside. Do you have a temperature that should be reached for doneness? I did like the taste of the end piece, so I would like to try again. I hope throwing it back in the oven after cooling it will repair it somewhat???
Wendy Stoltz
Hi Penny,
Sorry I do not have a temperature for doneness for the bread, however the internal temperature for done bread is typically around 190°F to 210°F.
Let us know if it comes out better by monitoring the internal temp. Your oven may need a service or alternatively you need to check if your oven has hot spots.
Virginia Allen
This bread looked possible until the nutrition list showed ZERO fiber. How do you add fiber to this bread recipe successfully? Thank you.
Wendy Stoltz
Hi Virginia,
This nutrition info is based on the exact ingredients and brands used at the time. It may not be 100% accurate due to what you use. Please check your ingredients nutrition labels.
You can however add seeds and nuts, or add vegetable purees like pumpkin or sweet potato.
When modifying a gluten-free bread recipe to increase fiber, it's important to make small changes and adjust the recipe as needed. Gluten-free baking can be quite precise, and alterations can significantly impact the texture and rise of the bread.
Happy baking!
Jess B
Made this loaf today, as I had a smaller pan, I made 3 small dinner rolls with the smaller loaf.
Waiting for both to cool fully - especially before slicing the bread.
Texture is great, nice chew to crust.
Question on the rise though please - I felt like this bread dropped a bit in the oven, rather than rising further (making rolls, I had space for extra rise if needed) is thus correct or normal to not have additional rise or drop slightly in height while baking?
Wendy Stoltz
Hi Jess,
It's quite normal for gluten-free breads to experience a slight drop or minimal rise in the oven, largely due to the lack of gluten which affects elasticity and air-trapping capabilities. Factors like over-proofing, oven temperature, moisture content, the effectiveness of leavening agents, and the mixing technique can all influence this behavior. Nonetheless, achieving a great texture and chew in the crust is a sign of successful gluten-free baking, so well done!
Wendy Stoltz
Hi Barbara,
I have not tried alternative but here are some suggestions of flour you could try: Sorghum Flour, Oat Flour or Buckwheat Flour. You will need to experiment, however as I have not tried these myself.
All the best,
VALERIE MEINERS
this bread is very nice. I did the chai seed substitution for the eggs.
I discovered that it is best to mix the dry ingredients together before adding to the bread maker.
Wendy Stoltz
Thanks for sharing Valerie,
Carlie
I can't igurw out what went wrong. I went by the instructions with ALL the ingredients and it was not sticky dough but crumbly flour. I had to add some milk to get it to form a dough. So disappointed.
Wendy Stoltz
Hi Carlie,
Let's try figure it out, how did you measure your ingredients? Specifically your flour.
Laurie
I have a very old stand mixer that does not have a paddle option. All there is for this mixer are regular beaters and dough hooks. Will either of these options work, if so any alterations I need to make during the mixing process? I'm so looking forward to some homemade bread
Wendy Stoltz
Hi Laurie,
Absolutely, you can still make delicious homemade gluten-free bread with your stand mixer, even if it doesn't have a paddle attachment. Given the options you have, using the dough hooks is your best bet for mixing gluten-free bread dough. Gluten-free dough is generally more like a thick batter than traditional wheat dough, and it doesn't require the same level of kneading to develop gluten.
Thanks
Bob Roos
1st) I was drooling on the keyboard (not a good thing) while reading your descriptions.
I really want to make this.
2nd) Once or twice you mention 8x5 loaf pan and also 8x4. You say size matters 😉 which is the size your recipes are based on? I would guess 8x4. If so how about changing 8x5 comment to be consistent.
3) Am new to GF and looking at your other recipes. I think I will be a frequent visitor.
Wendy Stoltz
Hi Bob,
Welcome, we are glad you found us. The standard loaf pan size is usually 8.5 inches by 4.5 inches (about 22 cm by 11 cm) or 9 inches by 5 inches (about 23 cm by 13 cm). These sizes are most commonly used for baking breads, meatloaf, and other loaf-shaped dishes.
So it is the 8.5 inches x 4.5 inches. Depends if you want to round up or down I guess :-).
Thanks
Bob Roos
I made it. Pan measures 8.5x4.25. I think I under baked it. I stopped at 60 minutes. The sides collapsed in. It tastes delicious! I saw where you suggest internal temp of 190-210. I will check that next time. I sliced and put the slices back into the over for 10 minutes. That made them a bit better.
I am baking in a toaster oven and the loaf rose to the upper element so I had to interrupt the baking to lower the shelf. I will know better next time.
Wendy Stoltz
Hi Bob,
It sounds like you're already learning and adapting, which is great! Underbaking can indeed lead to the sides collapsing, but checking the internal temperature next time will be a game-changer. Aiming for that 190-210°F range will help ensure your bread is perfectly done. Using a toaster oven can be tricky due to its size and heat distribution, but adjusting the shelf height as you've planned should help avoid any issues with the loaf rising too close to the element. Your initiative to slice and further bake the bread for a crisper texture is a clever fix, too. Keep experimenting, and each loaf will get even better!
Pam Graber
Holy WOW this was amazing and by far the best GF bread I have been able to make. Thank you so much for the recipe.
Wendy Stoltz
Hi Pam,
I'm over the moon to hear that you loved the GF bread recipe and found it to be the best you've made! Bread is such a cornerstone of many meals, and finding a gluten-free version that hits the mark is truly something to celebrate.
Shelley
I make this bread all the time. It’s the only GF bread I eat now! I make it in my bread machine, but just before the baking cycle starts (my bread machine book breaks down the exact times for each part of the cycle), I carefully transfer it to a 9” x 5” loaf pan, and then bake in the oven. I bake it for 75 minutes at 350°F, and it turns out perfectly every time. Internal temp is about 210°F. I found the bread machine didn’t bake it long enough, and I hate having the mixing paddle hole in the bottom! Thank you for this fabulous recipe!
Wendy Stoltz
Lovely Shelley, thanks for sharing with others. So glad you love it!
Teresa Adamic
I follow the gluten-free bread recipe exactly I cooked it for 60 minutes. The inside was sticky. I made it again and I cooked it for 65 minutes. The inside is sticky. I made it again and I cooked it for 70 minutes and the inside is sticky when I sliced it. I freeze it and when it thaws it’s sticky.Please help me! What am I doing wrong?
Wendy Stoltz
Hi Teresa
It sounds like you're experiencing a common issue with gluten-free breads, where the inside can stay more moist and sticky compared to traditional wheat breads. Here are a few tips:
Check your oven temperature with an oven thermometer to make sure it's accurate.
Let the bread cool completely before slicing it; gluten-free breads often continue cooking slightly as they cool.
Consider reducing the liquid in your recipe slightly, as gluten-free flours absorb liquids differently.
Try baking the bread at a slightly lower temperature for a longer time.
Also, different gluten-free flour blends can behave differently. If you're using a store-bought blend, ensure it's a brand recommended for bread. If you're mixing your own, make sure you have a good balance of flours and binders (like xanthan gum). Keep experimenting, and don't get discouraged – gluten-free baking is an art as much as it is a science!
Anna
Can you make it by hand
Wendy Stoltz
Hi Anna,
Yes, you can make the gluten-free bread by hand. Mix the ingredients thoroughly until you achieve a consistent texture. The dough will be more like a thick batter. Use a strong spoon or spatula to mix.
All the best.
Audrey Lyncook
I made this bread by hand for the first time today. After an hour and 5 minutes, the outside had a nice golden brown colour but the top fell in , the inside was very moist almost undone, the taste was great as I expected. I put it back into the oven (covered) for another 15 minutes and waiting for it to cool. I will definitely attempt this recipe again. Thank you.
Wendy Stoltz
Hi Audrey,
Great job on tackling gluten-free bread making! To address the issue with the top falling in and the moist interior, consider adjusting the proofing time, oven temperature, and and ensure you added xanthan gum. With a few tweaks and ensuring it cools completely before slicing, your next attempt should bring you the perfect loaf. Keep it up!