

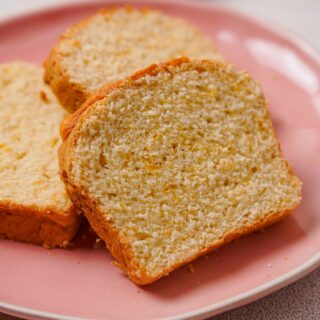
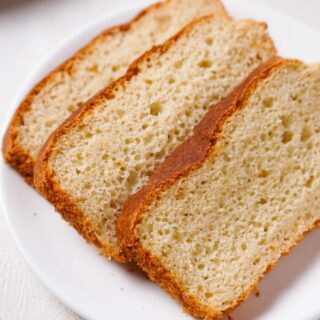
These gluten-free rolls are a beloved classic recipe in our kitchen. We've put it through its paces, tweaking and perfecting it to guarantee that these rolls come out wonderfully light, irresistibly fluffy, and a breeze to prepare.
These gluten-free dinner rolls are naturally dairy-free, and I've included a vegan option. I also share different flour options, so you have many alternatives! You'll make these repeatedly; there's no need to wait for those special holidays.
These gluten-free pull-apart rolls are based on my best gluten-free bread recipe. If you are looking for more traditional recipes, you’ll want to make my gluten-free pizza, gluten-free pizza rolls, the best gluten-free burger buns, gluten-free sourdough bread, or, last but not least, my gluten-free cinnamon rolls.
Join this Udemy course today to discover the secrets of crafting delicious gluten-free artisan breads that will elevate your baking skills to a whole new level!
GLUTEN-FREE DINNER ROLLS RECIPE
Please read through this post to learn how to make gluten-free rolls. I've done side-by-side testing with a few different gluten-free flour options. I had so much fun trying to get these gluten-free rolls as close to traditional dinner rolls as possible.
I know a lot of people are intimidated by having multiple gluten-free flours on hand. This gluten-free roll recipe is the BEST with the flours listed in the recipe card.
WHY YOU’RE GOING TO LOVE THESE GLUTEN-FREE ROLLS
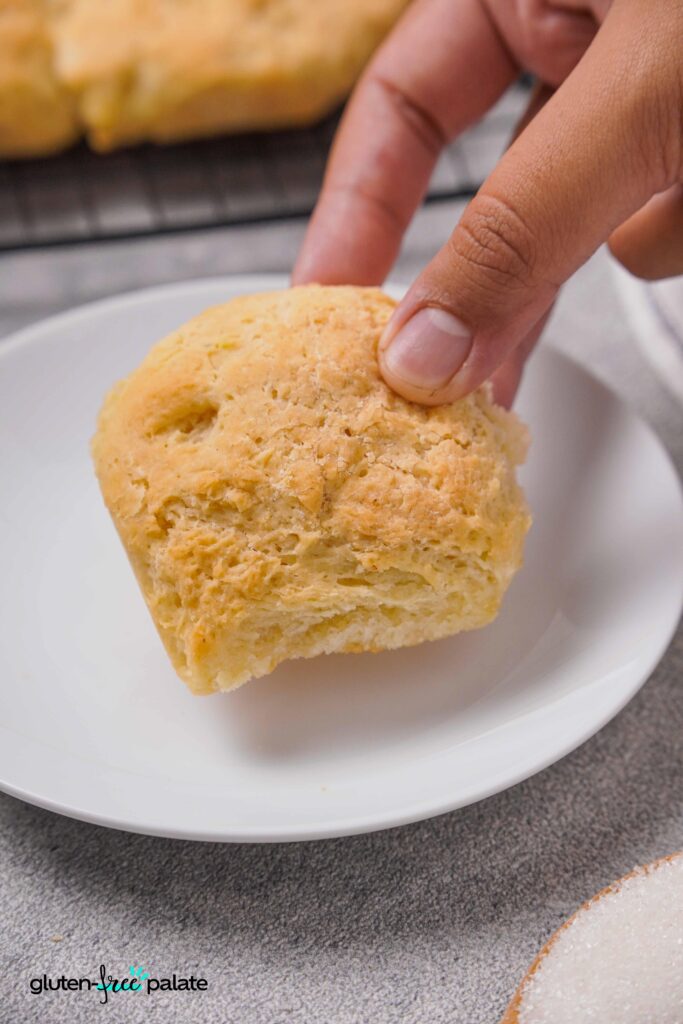
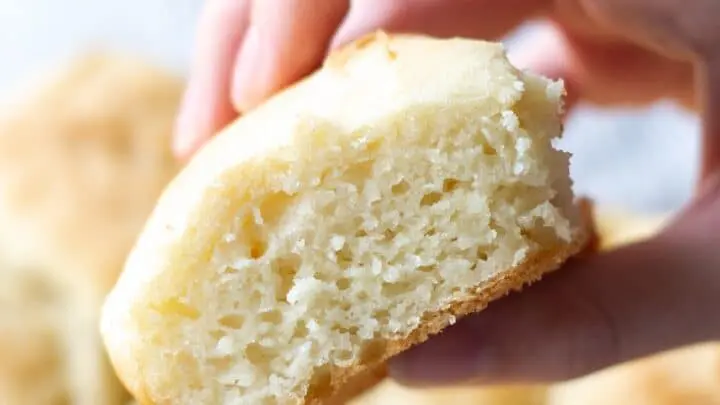
Texture - They're so light and fluffy you can't help yourself eating more and more!
Easy to make - With a handful of ingredients and a bit of patience, they're ready.
Tried and tested - This recipe has gone through extensive testing, and read on further for the flour options I've tested for you. Each flour option yields a slightly different texture but is all delicious. I know not everyone has the same flour, so I include as many flour options as possible.
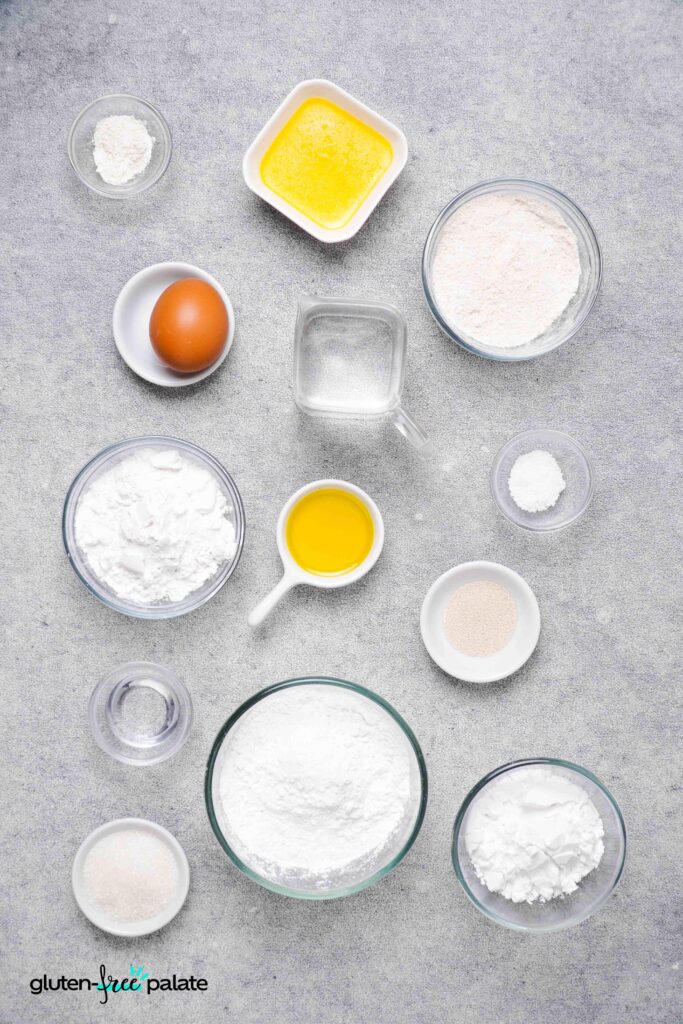
INGREDIENTS IN GLUTEN-FREE ROLLS
One of the most essential ingredients is the flour. And you know as well as I do that gluten-free rolls need (good) gluten-free flour. So which should you use? I list a few notes below on flour options. Here's the complete list of ingredients:
White Rice Flour - This light flour is very mildly flavored, making it perfect for replicating the flavor of traditional white flour breads.
Potato Starch - Be sure to use potato starch, not potato flour. They are different.
Tapioca Starch - This flour is a thickener, holding the dough together.
Millet Flour - I love baking with millet flour! It has a sweet and nutty flavor and a light texture.
Salt - For flavor.
Xanthan Gum - This is a popular additive to gluten-free baked goods because it helps to replicate some of the properties of gluten.
Instant Yeast - One standard yeast packet or 2 ¼ tablespoons. There is no need for baking powder in this gluten-free rolls recipe because the rolls rely on yeast for leavening, not baking powder. Yeast is a natural leavening agent that produces carbon dioxide gas as it ferments, causing the dough to rise and become light and fluffy. Commercial yeast is 50 percent protein and is a rich source of vitamins B1, B2, niacin, and folic acid.
Sugar - Sugar feeds the yeast and adds a slight bit of sweetness.
Warm Water - Used for proofing the yeast for these gluten-free rolls. The water should be tepid, between 95°-110°F.
Egg - In baking, eggs act as a binder, holding everything together. (You can also brush the egg across the top for an egg rinse!)
Olive Oil - I like the flavor of olive oil, but any oil can be used in this recipe.
Vinegar - Either white vinegar or apple cider vinegar. This creates a reaction that makes super tender rolls.
If you have any questions about making Gluten-Free Rolls, please comment, and we will get back to you as soon as possible.
GLUTEN-FREE FLOURS TO USE WHEN MAKING GLUTEN-FREE ROLLS
I used my gluten-free flour blend when I first made these gluten-free rolls. It worked fine, but I didn't get the texture I sought. So, I modified it slightly, adding some millet flour for a bit more substance.
Here's what I found out when I experimented. I tested several different flour blend options before settling on the winner, similar to my gluten-free bread recipe. Surprise-surprise!
- Option 1: 1 cup white rice flour + ½ cup tapioca starch + ½ cup potato starch (not flour) + ½ cup millet flour - this option is in the recipe card below. It delivered the BEST gluten-free dinner rolls. The texture and flavors were incredible, and the tops were nice and smooth.
- Option 2: For those that like to use Bob's Red Mill 1-to-1 you can directly substitute all the flours called for with 2 ½ cups (12 oz.) of Bob's Red Mill 1-to-1 Gluten-Free Baking Flour and add ¼ cup of warm water. The rolls are a bit heavier, but they are still delicious.
- Option 3: For those that like to use Bob's Red Mill 1-to-1 but still like a lighter roll, you can substitute all the flours called for with 10 oz. of Bob's Red Mill 1-to-1 Gluten-Free Baking Flour + 2 oz. fine ground almond flour and add ¼ cup of warm water.
I haven't tested this gluten-free rolls recipe with blends other than what I've listed. If you try something else, please share it in the comments. I love to hear when readers find something new and you might inspire someone else with your kitchen creativity.
If you try another blend, you are doing so at your own risk, but please leave a comment below, letting me know what you think. I've heard good things about brown rice flour in these rolls, but I haven't tried it yet!
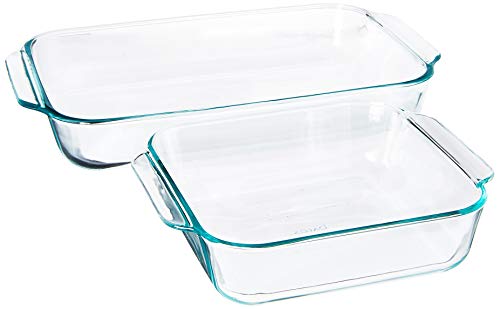
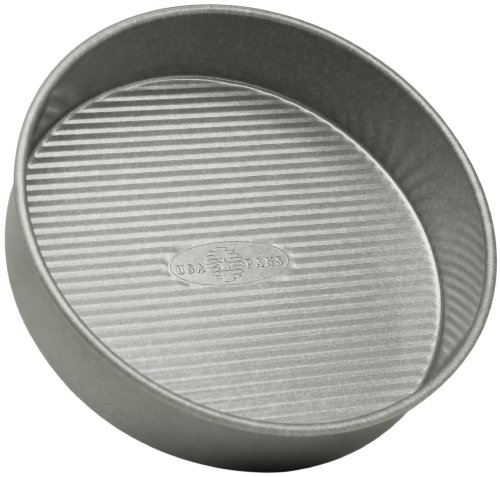
EQUIPMENT NEEDED FOR THESE GLUTEN-FREE ROLLS
Baking pan - Use a 9x9 square or 9-inch round baking pan
Stand mixer - I like to use my KitchenAid stand mixer. You can also use a high-powered hand mixer or do it by hand.
Dough Hook (Optional) - If you're using a stand mixer, use the dough hook instead of the whisk.

HOW TO MAKE GLUTEN-FREE ROLLS
- Add the dry ingredients to a mixing bowl for a mixer with a paddle attachment. Mix until combined.
- Add the wet ingredients.
- Mix for 2 minutes or until well combined. Scrape the side of the bowl in between mixing.
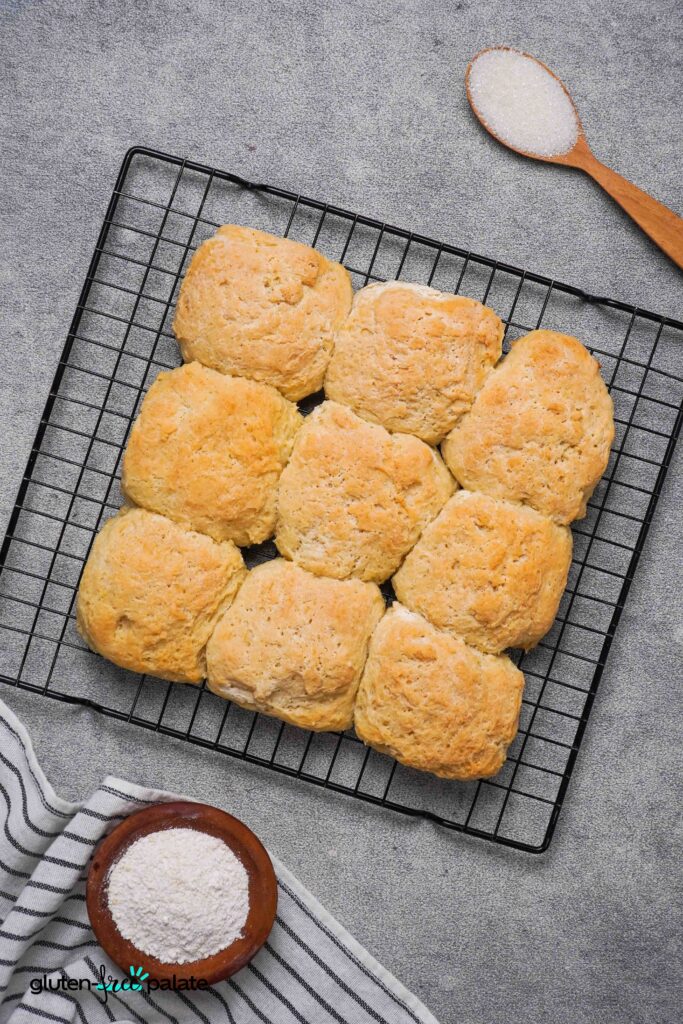
- Scoop dough into nine equal portions into a greased 9x9 square or 9-inch round baking pan. Cover and let rise in a warm spot for 30 minutes.
- Once the rolls have doubled in size, preheat your oven.
- Bake for 26 minutes or until golden brown and cooked through.
The total time, for me, was about half an hour. That includes mixing the ingredients, scooping the dough, and baking everything. Please see the recipe below for the complete ingredient list and instructions.

TIPS AND TRICKS FOR MAKING THE BEST GLUTEN-FREE ROLLS
Here are my tips and tricks that work with this gluten-free dinner roll recipe:
Don’t substitute - Unless I specified above that I’ve tested it. This is important. If you substitute something, I can’t guarantee anything, and I can’t help you troubleshoot if something doesn’t work in your rolls. Even the sugar. That said, I love experimentation. If you're up for a challenge, try using vegan butter or whole psyllium husk and report back with your results.
Measure correctly and mix - When measuring gluten-free flours into measuring cups, spoon the flours into the measuring cups, then level. Never scoop the measuring cup into the flour. Make sure you mix the mixture fully, too.
Ingredients at room temperature work best - You can always run your eggs under warm water for a few minutes to keep the temperature up.
Prepare - Read the recipe instructions and get all ingredients out before you start. Make sure your yeast hasn't expired before starting, and you check the temperature of the water so you don't kill the yeast. This also minimizes prep time.
Rising - Ensure you give the dough enough time to rise. I usually cover mine with a kitchen towel and check back in about 30 minutes.
Use the correct temperature - Ensure your water is 95-110 degrees before adding the yeast. If you don’t have a thermometer, I suggest you get one.
Thermometer - I highly suggest you use a thermometer to check if the rolls are cooked. They should measure 200 degrees in the center. If not cooked, increase the time in 2-minute increments. I also suggest you use an oven thermometer, as ovens are inconsistent with the correct temperature.
TIPS TO SHAPE THE ROLLS
I like to use a large cookie scoop to get 9 equal portions. If you want them to be uniform, you can measure them so all 9 are the same grammage. You can roll them into a ball after you have them all the same size. Press the dough down, bring the left and right corners together in the middle, and pinch the ends together. Turn the dough upside down (pinched pieces will be on the bottom), move it in a circular motion, and do this for all 9 portions for perfectly round rolls. Try not to handle the dough too much.
Common Mistakes to Avoid for Perfect Gluten-Free Rolls
Incorrect Flour Blend - The wrong combination or proportion of gluten-free flour can produce undesirable results. Follow my recipe's recommended flour blend and proportions for the best texture and taste.
Mismeasuring Flours - Gluten-free flours should be measured accurately. Use a kitchen scale if possible, or spoon the flours into measuring cups and level them off to ensure you're not using too much or too little flour.
Omitting Xanthan Gum - Xanthan gum is crucial in gluten-free baking, as it helps mimic the elasticity and structure of gluten. Omitting it can result in crumbly and dense rolls. Make sure to include the specified amount of xanthan gum in the recipe.
Not Proofing the Yeast Properly - Ensure that the water used to proof the yeast is at the correct temperature (between 95°F-110°F) and that the yeast is active. If the water is too hot, it can kill the yeast; if it's too cold, the yeast won't activate.
Inadequate Rising Time - Gluten-free dough may require more time to rise than traditional wheat dough. Allow the dough to double in size during the specified rising time, crucial for achieving a light and fluffy texture.
Overmixing or Undermixing - Gluten-free dough should be mixed just until all the ingredients are well combined. Overmixing can lead to a tough texture, while undermixing may result in an uneven rise.
Using Cold Ingredients - Eggs and liquids should be at room temperature to promote proper yeast activation and dough consistency.
Skipping the Proofing Step for Flax Eggs - If you're using flax eggs as a vegan substitute, ensure that they are properly prepared (mixed with water and allowed to thicken) before adding them to the dough.
Improper Shaping - When shaping the rolls, handle the dough gently. Avoid overworking it, as this can lead to denser rolls. Follow the recommended shaping instructions.
Inaccurate Oven Temperature - Use an oven thermometer to check that your oven is at the correct temperature. Baking at the wrong temperature can affect the rise and browning of the rolls.
Not Monitoring Baking Time - Keep a close eye on the rolls during baking. Overbaking can result in dry rolls, while underbaking can lead to doughy centers. Use a thermometer to check for the correct internal temperature.
Skipping Cooling Time - Allow the rolls to cool a few minutes after baking before serving. This helps the texture to set properly.
Frequently Asked Questions
CAN I USE ACTIVE DRY YEAST TO MAKE GLUTEN-FREE ROLLS?
Yes, you can use active dry yeast (not instant yeast). You'll want to proof your yeast before you add it to the mixing bowl. Mix the warm water, sugar, and active dry yeast in a measuring cup and let it sit for 8-10 minutes. Add it to the batter when you add the other wet ingredients.
HOW DO YOU MAKE GLUTEN-FREE ROLLS LESS DENSE?
It can be one of two things. Either your flour didn't have xanthan gum, or it was omitted. The other cause could be too much flour. Always try to measure your flour correctly. A kitchen scale is always best.
HOW DO YOU MAKE GLUTEN-FREE ROLLS RISE?
The yeast in the recipe makes the rolls rise. Make sure to have the correct environment for this to occur. According to various articles, the desired dough temperature is 78°F.
HOW LONG DO HOMEMADE GLUTEN-FREE DINNER ROLLS LAST, AND HOW DO I STORE THEM?
You can store them in an airtight container for about 2-3 days and reheat them in the microwave for 10-20 seconds. They're the best, however, when they've just come out of the oven. Don't place them in the refrigerator, as they'll dry out.
CAN I PREPARE THESE GLUTEN-FREE DINNER ROLLS AHEAD OF TIME?
Yes, you can. You have two options: either make the dough in advance and freeze it (see below for a recommendation), or you can bake it and then freeze it. All you need to do is defrost and bake them.
CAN I FREEZE GLUTEN-FREE ROLLS?
Yes, you can freeze gluten-free rolls. After baking, allow the rolls to cool completely. Once cool, place them in an airtight container and freeze for up to three months or two months for a frost-free freezer.
When you are ready to enjoy these gluten-free dinner rolls, thaw them on the counter, drop them onto parchment paper, and reheat them in the oven before serving. I do this at 200 degrees Fahrenheit to get them warmed up.
CAN I FREEZE THE DOUGH?
Yes, you can freeze the gluten-free roll dough. After you mix the dough, scoop the dough into nine mounds in your baking dish, cover and freeze.
When you are ready to use, let your roll dough come to room temperature, then let it rise for an hour. It won't rise as high after being frozen, but it will rise some. Bake these gluten-free dinner rolls as directed.
I DON'T HAVE A STAND MIXER; WHAT CAN I USE?
You can mix the dough for these gluten-free dinner rolls with a high-powered hand mixer or by hand with a spoon. Just note that the dough is thick, and you'll have to keep mixing and scraping down the sides until all the ingredients are well incorporated. Honestly, if you're making a bunch for Thanksgiving dinner, I find the stand mixer worth it.
HOW DO YOU MAKE VEGAN OR EGG-FREE GLUTEN-FREE ROLLS?
If you enjoy a vegan diet or can't consume eggs, you can substitute the egg for 1 flax egg + 1 teaspoon of baking powder.
Mix one tablespoon of ground flaxseed meal with three tablespoons of water to make a flax egg. Let the mixture sit for 15 minutes to thicken. Add the 1 teaspoon of baking powder with the dry ingredients and the flax egg with the other wet ingredients.
Please note that the rolls won't have the same texture as they would if you were to use eggs.
HOW DO YOU MAKE DAIRY-FREE GLUTEN-FREE ROLLS?
Substitute the egg for 1 flax egg. See directions above.
WHAT CAN I SERVE THESE HOMEMADE GLUTEN-FREE ROLLS WITH?
They're great with butter and a cup of tea, but you can have them with any main dish. They're such a versatile side dish, especially for holiday feasts. I especially like the with:
Are King's Hawaiian rolls gluten-free?
No, King's Hawaiian rolls aren't gluten-free. Thankfully, I've got an alternative! Here's my recipe for gluten-free Hawaiian rolls. They're just sweet enough!
How To Par Bake These Rolls?
Parbaking gluten-free rolls involves partially baking the shaped rolls at a lower temperature for about half the recipe's recommended baking time. After cooling, you can store these partially baked rolls in the refrigerator or freezer. To serve, finish baking them at the original recipe's recommended temperature until they become golden brown.
View our step-by-step gluten-free rolls instructional video on YouTube.
Gluten-Free Rolls
This is the best recipe for gluten-free rolls! Tested and perfected to be light, fluffy, and easy to make. These gluten-free dinner rolls are naturally dairy-free and I've included a vegan option.
Ingredients
- 1 cup (5.5 oz.) white rice flour
- ½ cup (2.5 oz.) potato starch (not flour)
- ½ cup (2.0 oz.) tapioca starch
- ½ cup (2.0 oz.) millet flour
- 1 ½ teaspoons salt
- 1 teaspoon xanthan gum
- 1 packet (2 ¼ teaspoons) instant yeast
- 2 tablespoons sugar
- 1 cup warm water between 95°-110°F
- 1 egg, room temperature
- 2 tablespoons olive oil (or oil of choice)
- 1 teaspoon white vinegar or apple cider vinegar
Optional:
- 2 tablespoons of melted butter or additional olive oil for brushing the tops
Instructions
- Add white rice flour, potato starch, tapioca starch, millet flour, salt, xanthan gum, yeast, and sugar to a large standing mixer mixing bowl. Mix for one minute, or until combined.
- Add the warm water, egg, oil, and vinegar and mix for 2-3 minutes, scrapping down the side of the bowl half way through.
- Remove the bowl from the stand mixer, and scrape the dough from the sides. Using a dough scoop, or a ⅓ cup measuring cup, scoop nine dough balls into a 9X9 square baking pan, lined with parchment paper (or well greased).
- Cover and let rise for 30 minutes. If you're in a colder environment, you can use the "proof" setting on your oven and rise the rolls in your oven. Note: If you're in a pinch for time you don't have to let them rise. They will still rise in the oven, just not as much.
- Preheat your oven to 400°F.
- If desired, brush the tops of the rolls with olive oil or melted butter (if you can do dairy) before baking. Bake rolls for 24-26 minutes or until brown on top and the centers are cooked through.
- Remove from the oven and cool before serving. Store in an airtight container for up to three days. Reheat before serving.
Notes
- When measuring gluten-free flours into measuring cups, spoon the flours into the measuring cups, then level. Never scoop the measuring cup into the flour.
- Flour Option: For those that like to use Bob's Red Mill 1-to-1 you can directly substitute all the flours called for with 2 ½ cups (12 oz.) of Bob's Red Mill 1-to-1 Gluten Free Baking Flour and add an additional ¼ cup of warm water. Still add the xanthan gum. The rolls are a bit heavier, but they are still delicious.
- Flour Option: For those that like to use Bob's Red Mill 1-to-1 but still like a lighter roll, you can substitute all the flours called for with 10 oz. of Bob's Red Mill 1-to-1 Gluten Free Baking Flour + 2 oz. fine ground almond flour, and add an additional ¼ cup of warm water. Still add the xanthan gum.
- Vegan Option: If you enjoy a vegan diet or you can't consume eggs you can substitute the egg for 1 flaxegg + 1 teaspoon of baking powder. To make a flax egg, mix one tablespoon of ground flaxseed meal with three tablespoons of water. Let the mixture sit for 15 minutes to thicken. Add the baking powder in with the dry ingredients and the flaxegg in with the other wet ingredients. Please note that the rolls won't have the same texture as they would if you were to use eggs.
Recommended Products
As an Amazon Associate and member of other affiliate programs, I earn from qualifying purchases. They never cost you extra.

Nutrition Information:
Yield:
9Serving Size:
1Amount Per Serving: Calories: 106Total Fat: 8gSaturated Fat: 2gTrans Fat: 0gUnsaturated Fat: 5gCholesterol: 27mgSodium: 382mgCarbohydrates: 8gFiber: 0gSugar: 3gProtein: 1g
This nutrition info is based on the exact ingredients and brands that I used a the time. It may not be 100% accurate. Please check your ingredients nutrition labels.
Looking for another side dish? Try my Gluten-Free Crescent Rolls.
DID YOU MAKE THIS RECIPE?
Tag @glutenfreepalate on Instagram and hashtag it #glutenfreepalatebaker so we can see all the deliciousness!
Judy Bates
Chrystal,
I have made your cinnamon rolls and they are my go to for my GF customer. I have now had a request for dinner rolls and of course went to your site. The problem I have is several of my customers have found a sensitivity to the Millet flour so for the cinnamon rolls have always just adeded more rice flour. Concern is that for the Dinner rolls this might not work as the dough is always very spongy. Do you have a suggestion for a subsitute for the millet flour. Long way to get to my question but trust your judgement as the cinnamon rolls have never let me down.
Lindsay
Hi Judy! Other readers have had success using finely ground flax seed as well as almond flour. I think you might be ok using rice flour in place of the millet here as well. Experiment a bit until you get it the way you want it!
Vivian
I'm stirring these up right now and looking forward to them. However, for all of your detailed instructions and pretty pictures, you simply say "remove from oven and cool before serving". Would that be cool in the pan for a given period of time or cool completely in pan or remove to cooling rack immediately? Seems to me that it matters....
Wendy Stoltz
Hi Vivian,
I usually serve mine once it's cooled so I keep it in the baking dish. But yes, remove them from the oven and then take them out to cool on a cooling rack if you intent to freeze them. You don't want them to go soggy.
Deme
Hi, can I use active dry yeast instead of instant? If so, can you let me know how?
Wendy Stoltz
Hi Deme,
Here's the info. from the post - Yes, you can use active dry yeast (not instant yeast). You'll want to proof your yeast before you add it to the mixing bowl. Mix the warm water, sugar, and active dry yeast in a measuring cup and let it sit for 8-10 minutes. Add it to the batter when you add the other wet ingredients.
Tuesday
I'm going to try to use namaste bread flour blend for this recipe.
Wendy Stoltz
Thanks for sharing Tuesday, let us know how it goes.